How to Propagate Redberry juniper?
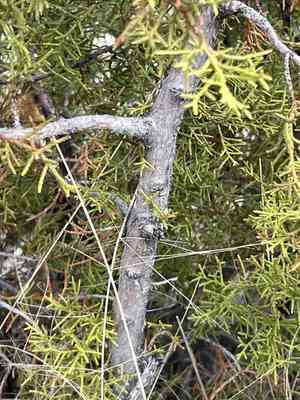
Juniperus coahuilensis is a robust evergreen frequently employed for preventing soil erosion and for ornamental purposes in dry environments. Effective propagation necessitates choosing vigorous semi-lignified cuttings. To enhance the likelihood of success, confirm that cuttings are immersed in a rooting stimulant prior to insertion into porous soil. Sustaining uniform moisture and warmth is vital throughout the rooting phase. After establishment, it demands infrequent irrigation, rendering it perfect for regions susceptible to drought.
Optimal Time for Redberry Juniper Propagation
Propagation Method
Cutting
Propagation Period
Autumn,Winter
Tools for Redberry Juniper Propagation
Pruning Shears
Pruning shears are vital for taking cuttings from redberry juniper. They ensure clean cuts, minimizing the risk of harm or illness to the parent plant.
Rooting Hormone
Rooting hormone powder or gel enhances the chances of successful rooting when propagating redberry juniper from cuttings. It promotes faster root development and stronger roots.
Propagation Tray
A propagation tray with cells offers a controlled environment for redberry juniper cuttings to root. It helps organize multiple cuttings and maintain consistent moisture levels.
Sterilized Medium
Utilizing a sterilized propagation medium, such as a blend of peat and perlite, prevents fungal infections and encourages healthy root formation for redberry juniper cuttings.
Misting Bottle
A misting bottle is essential for keeping redberry juniper cuttings hydrated without overwatering. Regular misting keeps the cuttings moist, aiding the rooting process.
Heating Mat
A heating mat placed beneath the propagation tray provides consistent bottom warmth, which is particularly beneficial for encouraging root growth in redberry juniper.
Humidity Dome
A humidity dome placed over the propagation tray maintains a humid environment, reducing water loss and promoting successful rooting of redberry juniper cuttings.
Sharp Knife
A sharp knife can be used for precise cuts when preparing redberry juniper cuttings. Clean cuts help prevent plant tissue damage and reduce the risk of disease.
How to Propagate Redberry Juniper?
Propagation Type
Moderately Difficult
Caring for Your Newly Propagated Redberry Juniper
Caring for Your Newly Propagated Redberry Juniper?
Once rooted, gradually introduce redberry juniper to outdoor conditions by exposing it to more direct sunlight and lowering humidity. Transplant rooted cuttings to larger pots or directly into the garden, ensuring well-draining soil and proper spacing. Water sparingly, allowing the soil to dry between waterings. Apply mulch around the base to retain moisture and control weeds. Prune to shape and remove any dead or diseased branches to encourage healthy growth.
Common Mistakes to Avoid When Propagating Redberry Juniper
Improper technique
Cuttings are often made incorrectly, either too long or too short, reducing the likelihood of successful rooting.
Overwatering
Excessive moisture can lead to root rot, preventing cuttings from developing healthy roots.
Incorrect soil mix
Using soil that is too dense or poorly draining can suffocate the roots, hindering propagation.
Insufficient light
Cuttings require the right balance of light; too little light can stunt growth, while too much can cause desiccation.
Tips For Propagating Redberry Juniper
Use sharp, sterile tools
Ensure that all tools are clean and sharp to make precise cuts and reduce the risk of disease transmission.
Correct cutting length
Take cuttings that are about 4-6 inches long with a few healthy leaves or nodes to improve rooting success.
Well-draining medium
Employ a soil mix that drains well yet retains some moisture, such as a combination of sand, perlite, and peat.
Moderate watering
Water the cuttings sparingly to keep the substrate slightly moist but not waterlogged.
Sufficient indirect sunlight
Place cuttings in a location where they receive indirect light to promote steady growth without the risk of drying out.


