How to Propagate Pale rush?
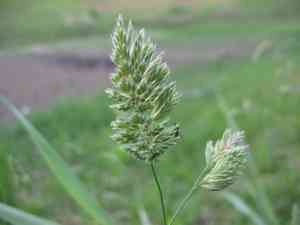
Pale rush thrives when multiplied via the division technique, which entails splitting the rhizomes or root masses during its period of vigorous development. Gently separate the root system, making sure every segment possesses roots and new growth. Immediately replant the separated portions in damp, adequately draining substrate, preserving steady hydration to aid in their establishment. This approach is exceptionally successful for increasing pale rush's prevalence in appropriate wet environments.
When Is the Optimal Time to Propagate Pale Rush?
Propagation Method
Division
Propagation Period
Spring,Autumn
What Implements Are Utilized in Pale Rush Propagation?
Spade or Garden Fork
Crucial for unearthing pale rush, these instruments enable careful removal of the plant without excessive harm to its root system. A spade or garden fork with a sharp, flat edge is preferred, as it can cut through soil effortlessly, preserving the root ball's integrity. Precision in extracting pale rush is vital for successful division.
Sharp Knife or Pruners
Employed for cleanly severing the root mass of pale rush. A sharp knife or pair of pruners ensures that divisions are made with minimal tearing or crushing of plant tissues, which is essential for the rapid recovery and regrowth of pale rush.
Watering Can or Hose with a Gentle Spray Setting
Important for promptly hydrating pale rush after division and replanting. Proper moisture helps lessen transplant shock, promotes quick root development, and maintains appropriate soil moisture levels for pale rush's growth.
Rooting Hormone (optional)
While not always required, applying a rooting hormone to the cut surfaces of pale rush's roots can encourage faster root development and improve survival and establishment rates. This aid is particularly useful in less than ideal soil conditions or when divisions are especially small.
Planting Pots or Trays (if starting divisions in containers)
Useful for propagating pale rush in controlled environments before transplanting to the final growing location. Pots or trays should have sufficient drainage and be filled with a suitable soil mix that retains moisture without becoming waterlogged, fostering healthy root growth.
How to Propagate Pale Rush?
Propagation Difficulty
Easy
How to Nurture Your Newly Propagated Pale Rush?
How to Nurture Your Newly Propagated Pale Rush?
To care for pale rush after propagation, maintain consistently damp soil conditions, as pale rush naturally thrives in moist environments. Position the plants in full sun to partial shade. Regularly inspect for and remove any weeds competing for nutrients. Fertilization is typically unnecessary if planted in nutrient-rich soil. Monitor for pests, though pale rush is generally resistant to common garden pests.
Common Errors to Avoid When Propagating Pale Rush
Excessive Watering
Saturating the soil can lead to root rot and fungal infections, severely impacting pale rush's health and reducing propagation success.
Utilizing Inferior Cuttings
Incorporating weak or diseased segments from pale rush can result in unsuccessful propagation, as unhealthy cuttings struggle to establish and grow.
Neglecting Root Development Requirements
Failing to provide the necessary conditions for root growth, such as correct soil composition and moisture, impedes the establishment of new pale rush plants, affecting overall propagation success.
Advice For Propagating Pale Rush
Use Healthy Cuttings
Select robust and disease-free sections of pale rush to optimize success rates. Healthy cuttings have a better chance of rooting and thriving.
Monitor Soil Moisture
Maintain consistent moisture levels that are balanced â not too dry or overly wet. Pale rush requires well-drained soil that is kept slightly moist to encourage root development.
Provide Adequate Light
Ensure pale rush is positioned in an environment that benefits from good light exposure but is protected from direct sunlight, which can be too harsh and lead to desiccation, especially in young plants.



