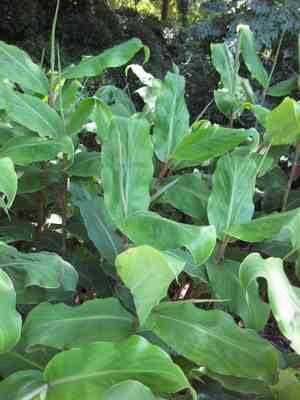
How to Propagate Kahili ginger?
Kahili ginger flourishes when multiplied by separating its rhizomes, making it perfect for beginner gardeners seeking an uncomplicated cultivation endeavor. When working with rhizomes, confirm each has a minimum of one vigorous sprout and a portion of root for best development. Embed these separated sections in soil that drains effectively, enhanced with organic material to foster sturdy progress. Consistent irrigation after planting aids in sound root formation, laying a firm groundwork for energetic growth.
Optimal Time for Kahili Ginger Propagation
Propagation Method
Utilize The Tubers
Propagation Period
Spring
Tools Required for Kahili Ginger Propagation
Sharp Knife or Scalpel
This instrument is vital for making clean cuts on kahili ginger tubers. A keen edge ensures precise incisions, minimizing disease risk and promoting faster healing and root growth. It's especially beneficial for kahili ginger due to its thick rhizomes, which need a clean cut to protect the plant's vascular system.
Gardening Gloves
Wearing gloves is essential when handling kahili ginger to prevent skin irritation from its sap and to improve grip on slick tubers. This guarantees safe handling of the plant during the cutting and separation process.
Rooting Hormone Powder or Gel
This product boosts root development in freshly cut kahili ginger tubers. Applying rooting hormone to the cut surfaces can significantly enhance the chances of successful root initiation and growth, crucial for establishing new plants.
Misting Bottle
A misting bottle is employed to maintain moisture around kahili ginger tubers during the initial propagation stages. Sufficient moisture is critical to prevent tubers from drying out, which could impede root development.
Potting Mix and Containers
A well-draining, sterile potting mix and appropriately sized containers are necessary for planting kahili ginger tubers. They provide an ideal environment for root growth and development, vital for successful kahili ginger propagation. The potting mix should be rich in organic matter yet pathogen-free to foster healthy growth.
Post-Propagation Care for Your Kahili Ginger
Post-Propagation Care for Your Kahili Ginger
After propagating kahili ginger, keep the soil moderately moist but avoid waterlogging to prevent root rot. Place plants in a spot with partial sunlight, as direct sun can scorch leaves. Regularly check for pests and diseases, especially during warm, humid months. Fertilize lightly during the growing season to encourage strong growth and blooming.
Common Errors to Avoid When Propagating Kahili Ginger
Overwatering cuttings
Excessive watering of kahili ginger cuttings can lead to root rot, a condition where roots decay due to too much moisture. This can hinder root development and decrease the likelihood of successful propagation.
Planting too deep
When kahili ginger rhizomes are planted too deeply, sprouting can be delayed or prevented due to insufficient light and air access. This can also increase susceptibility to fungal infections.
Using old or diseased rhizomes
Employing aged or diseased rhizomes for kahili ginger propagation can result in poor development or complete failure. It can also spread disease to other parts of your garden.
Tips For Propagating Kahili Ginger
Selection of healthy rhizomes
Choose robust and disease-free rhizomes with at least one or two healthy buds. This increases the probability of successful propagation as these are more likely to develop into healthy new plants.
Appropriate soil mix
Use a well-draining soil mix enriched with organic matter for kahili ginger. This supports healthy root growth without retaining excessive moisture, reducing the risk of root rot.
Proper planting depth
Plant kahili ginger rhizomes shallowly, ensuring the top of the rhizome is just beneath the soil surface. This allows for adequate exposure to light and air, which is crucial for successful sprouting.


