How to Propagate Natal bottlebrush?
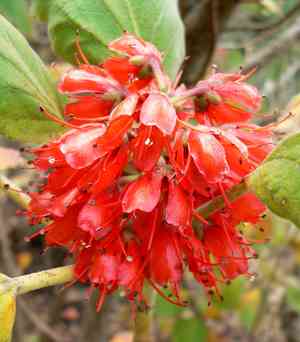
The Natal bottlebrush, a shrub indigenous to South Africa, is distinguished by its vivid crimson blossoms. For effective propagation, employ semi-hardwood cuttings to facilitate superior root development. Ensure elevated humidity and warmth to stimulate rooting, and choose robust stem segments. Don't forget to utilize rooting hormone to enhance the chances of success. This plant flourishes in soil that drains well and receives sufficient sunlight.
When Is the Best Time to Propagate Natal Bottlebrush?
Propagation Method
Cuttings
Propagation Period
Fall,Winter
What Tools Are Necessary for Natal Bottlebrush Propagation?
Pruning Shears
Crucial for obtaining healthy cuttings from natal bottlebrush. They ensure clean cuts, vital for preventing disease and promoting strong growth in the cuttings.
Rooting Hormone
Accelerates root formation in natal bottlebrush cuttings. It boosts the likelihood of successful propagation by stimulating root development.
Sterile Potting Mix
Guarantees that natal bottlebrush cuttings are planted in a pathogen-free environment. A well-draining mix is especially important to avoid waterlogging and root decay.
Propagation Trays
Used to hold and arrange multiple natal bottlebrush cuttings, offering a controlled setting for rooting. Trays with drainage holes are preferred to prevent water accumulation.
Humidity Dome
Helps maintain high moisture levels around natal bottlebrush cuttings, which is essential to prevent dehydration and encourage root development.
Heat Mat
Maintains a consistent temperature ideal for root growth in natal bottlebrush cuttings, particularly in colder climates. Heat mats can improve rooting speed and success rates.
Sharp Knife or Scalpel
An alternative to pruning shears for taking more precise natal bottlebrush cuttings, especially for finer branches. Ensures minimal damage to plant tissue.
Sanitizing Solution
Used to disinfect tools before and after taking natal bottlebrush cuttings. This prevents disease transmission and ensures a clean cut every time.
Spray Bottle
For misting natal bottlebrush cuttings to maintain necessary humidity levels, especially under a humidity dome. Regular misting prevents cuttings from drying out.
Label Tags
Useful for tracking different batches of natal bottlebrush cuttings. Aids in monitoring progress and identifying successful propagation.
How to Propagate Natal Bottlebrush?
Propagation Difficulty
Moderately Challenging
How to Care for Your Newly Propagated Natal Bottlebrush?
How to Care for Your Newly Propagated Natal Bottlebrush?
Following successful propagation, ensure natal bottlebrush receives consistent watering, especially during dry periods. It thrives in well-draining soil with ample sunlight. Prune regularly to encourage bushy growth and remove any dead or damaged branches. Fertilize annually in spring with a balanced, slow-release fertilizer to support healthy growth and vibrant blooms.
Common Mistakes to Avoid When Propagating Natal Bottlebrush
Excessive Watering
Overwatering is a common error that can lead to root rot, depriving natal bottlebrush of vital oxygen and increasing its susceptibility to fungal infections.
Incorrect Soil Usage
Using heavy, clay-based soil can hinder drainage, which is crucial for natal bottlebrush. Poor drainage can result in waterlogged roots and overall poor plant health.
Improper Light Exposure
Placing cuttings or seedlings in insufficient light can stunt their growth and weaken the plant, while too much direct sunlight can scorch delicate young plants.
Neglecting Humidity
Failure to maintain adequate humidity levels can cause natal bottlebrush leaves and cuttings to dry out, halting root development and impeding growth.
Lack of Sterilization
Using unsterilized tools or containers can introduce pathogens that may infect and harm natal bottlebrush, particularly during its vulnerable propagation stage.
Tips For Propagating Natal Bottlebrush
Optimal Watering
Ensure the soil is moist but drains well. Water cuttings lightly until roots establish to prevent rot while maintaining necessary moisture.
Well-Draining Soil
Utilize a mix containing sand or perlite to enhance drainage, ensuring roots don't remain waterlogged. Proper soil composition is vital for healthy root development.
Adequate Light
Position cuttings or young plants in bright, indirect light to promote healthy growth. Avoid exposing them to intense, direct sunlight to prevent scorching.
Maintaining Humidity
Increase humidity around cuttings using a humidity dome or by regularly misting the plants. This will help keep leaves hydrated and support root growth.
Sterilized Tools
Use sterilized scissors or knives and clean containers to prevent disease introduction. Sterilizing tools minimizes infection risk during propagation.


