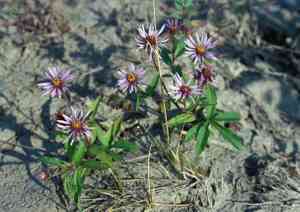
How to Propagate Arctic aster?
Arctic aster, a robust and appealing flora indigenous to frigid climates, thrives with proper care. To achieve successful propagation, disperse seeds into a potting blend that drains effectively, maintaining uniform dampness. Choose diffused illumination to prevent harm. Young plants require vigilance against infestations and benefit from mild nutrient application. After they are rooted, meticulously relocate them to a suitable outdoor spot. Providing ample room facilitates vigorous development and flowering.
When Is the Optimal Time to Propagate Arctic Aster?
Propagation Method
Seeding
Propagation Period
Spring
What Equipment Is Utilized for Arctic Aster Propagation?
Seed Trays
Seed trays are vital for initiating arctic aster seeds in a regulated setting. They offer a firm foundation for soil and seeds, promoting uniform germination and development. The tray compartments also aid in spacing and arranging seeds, reducing competition and fostering robust growth.
Premium Potting Mix
A top-tier potting mix formulated for seed starting is essential. It delivers the correct balance of aeration, drainage, and nutrients, all crucial for the healthy germination and growth of arctic aster seedlings.
Humidity Dome
A humidity dome maintains elevated humidity levels around the seeds, which is especially important for arctic aster as it helps prevent drying out and boosts germination rates. It creates a micro-environment that keeps the soil moist and warm, vital for seedling health.
Heating Mat
A heating mat positioned beneath the seed trays helps maintain a consistent and ideal soil temperature, which is important for arctic aster germination. This tool is particularly useful in colder climates or during early spring planting.
Seed Markers
Clear labeling with seed markers guarantees proper identification of arctic aster seeds. This is especially advantageous when propagating multiple species simultaneously, as it prevents confusion and ensures precise care and monitoring for each plant type.
Fine Mist Sprayer
A fine mist sprayer is employed to gently water the seeds without disturbing the soil or dislodging them. This helps maintain consistent moisture levels in the soil, which is critical for arctic aster's germination and initial growth phase.
Grow Lights
Supplemental grow lights provide the necessary light spectrum and intensity to support arctic aster seedling growth, particularly indoors or in low-light conditions. Consistent light exposure ensures healthy, strong seedlings ready for transplanting.
How to Propagate Arctic Aster?
Propagation Difficulty
Simple
How to Care for Your Newly Propagated Arctic Aster?
How to Care for Your Newly Propagated Arctic Aster?
After transplanting arctic aster seedlings, ensure they receive sufficient water to establish their root systems, especially during dry spells. Apply a layer of mulch to retain soil moisture and suppress weeds. Regularly check for pests and diseases, and prune any damaged or dead foliage to encourage healthy development. Adequate sunlight and well-drained soil are vital for the continued health and flowering of arctic aster.
Common Errors to Avoid When Propagating Arctic Aster
Overwatering
Excessive moisture can lead to root rot, impeding the establishment of new plants.
Poor Soil Drainage
Utilizing soil that retains too much water can stress the roots, making them vulnerable to disease.
Incorrect Cutting Techniques
Using dull tools or improper cutting angles can harm plant tissues, lowering the success rate of propagating cuttings.
Ignoring Plant Spacing
Overcrowding plants can hinder air circulation, promoting mold and fungal growth.
Inadequate Light
Insufficient sunlight can prevent photosynthesis, slowing growth and weakening new plants.
Advice For Propagating Arctic Aster
Utilize Well-Drained Soil
Ensure the soil mixture you use drains effectively to prevent waterlogging and root rot.
Sterilize Tools
Always use clean, sharp tools for taking cuttings to minimize disease transmission and damage.
Provide Ample Spacing
Space plants adequately to ensure good airflow, which can prevent fungal issues.
Water Prudently
Water sparingly and ensure the top inch of soil dries out between waterings to avoid overwatering.
Ensure Bright, Indirect Light
Place cuttings or seedlings in a location where they receive bright, indirect sunlight for optimal growth.


