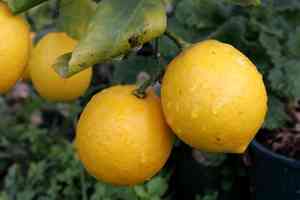
How to Propagate Grumichama?
Grumichama, a tropical cherry, can be multiplied by enthusiasts using several techniques, with grafting proving especially successful. Cuttings from a vigorous parent plant ought to be grafted onto rootstock that is sturdy and suited to the regional environment. Sustaining hydration and preventing duress are crucial for achieving a successful graft union. Diligent oversight during the early developmental phase is essential as the plant becomes established.
Optimal Time for Grumichama Propagation
Propagation Method
Grafting
Propagation Period
Spring,Winter
Tools for Grumichama Propagation
Grafting Knife
A sharp, sterilized grafting knife is essential for making precise cuts on the scion and rootstock of grumichama. Clean cuts ensure successful union and healing, minimizing damage and infection risk.
Pruning Shears
Pruning shears are used to trim the plant to a suitable size before grafting and to remove excess or unhealthy branches post-grafting. This promotes healthier growth and better resource distribution in grumichama, vital for graft success.
Grafting Tape or Strips
These materials securely bind and protect the graft junction. They maintain necessary humidity and temperature at the graft site, supporting quick healing and preventing pathogen entry during critical early stages of graft development in grumichama.
Rooting Hormone
While typically used in cutting propagation, rooting hormone can aid grafting by encouraging quicker root development in grafted sections of grumichama. This accelerates establishment and increases overall graft success rate.
Heat Mat
A heat mat helps maintain an optimal temperature at the base of the newly grafted grumichama, crucial for encouraging root growth and development. This tool is especially beneficial in cooler climates or controlled indoor environments.
Grumichama Propagation Difficulty
Propagation Type
Moderately Difficult
Caring for Newly Propagated Grumichama
Caring for Newly Propagated Grumichama
After grafting grumichama, keep the plant in a shaded area to avoid direct sunlight, which can stress the newly grafted plant. Water the rootstock regularly to keep the soil moist but not waterlogged. Once growth from the scion is observed, gradually introduce the plant to more sunlight. Monitor for pests and diseases, applying appropriate organic fungicides or insecticides if needed. Continue with regular, balanced fertilization to support healthy growth. Proper care ensures the grafted grumichama becomes well-established and thrives.
Common Propagation Errors for Grumichama
Using non-viable seeds
Grumichama seeds may quickly lose viability if not stored correctly, leading to poor germination rates.
Insufficient moisture
Failure to maintain consistent soil moisture during grumichama seed germination can result in desiccation and failure to sprout.
Excessive watering
Overwatering can cause rot in grumichama seeds and cuttings, hindering growth and potentially leading to plant death.
Ignoring pests
Neglecting to protect young grumichama plants from pests can result in damage or destruction, as they are vulnerable during early growth stages.
Planting depth errors
Grumichama seeds planted too deeply may not germinate successfully, while those planted too shallowly risk drying out.
Grumichama Propagation Advice
Fresh seed selection
Choose fresh grumichama seeds for propagation, as they have a higher germination rate compared to older, stored seeds.
Moisture control
Provide grumichama with balanced soil moisture, ensuring it is consistently damp but not waterlogged to support seed germination and root development.
Pest management
Implement preventative pest control measures when propagating grumichama to protect vulnerable cuttings and seedlings from pest-related stress.


