How to Propagate Alpine tufted sedge?
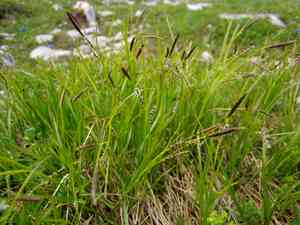
Carex scoparia 1 flourishes in adequately drained substrates with moderate hydration. For reproduction, separation is exceptionally efficient. Gently excavate the specimen, separate the clusters ensuring each possesses viable root structures, and immediately replant, preserving soil uniformity. Steady dampness assists root development, and applying mulch helps conserve moisture after separation. Verify that division implements are sanitized to avert pathogen spread. This technique fosters robust development and upholds genetic uniformity.
Optimal Period for Alpine Tufted Sedge Propagation
Propagation Method
Division
Propagation Period
Spring,Autumn
Tools Utilized for Alpine Tufted Sedge Propagation
Sharp Spade
An acute spade is crucial for effectively dividing alpine tufted sedge. It aids in cleanly severing the root ball, minimizing harm and promoting rapid recovery. This instrument guarantees precise separation, vital for the well-being of each divided segment.
Garden Fork
A garden fork proves useful for loosening the earth surrounding alpine tufted sedge clumps. It assists in carefully lifting the plant without harming its roots, simplifying the separation of sections for propagation.
Root Knife
A root knife is advantageous for more delicate tasks when dividing alpine tufted sedge. It permits accurate cuts around the roots to guarantee each section possesses an adequate root system, fostering successful re-establishment.
Watering Can with Fine Rose
This implement is important for gently irrigating the alpine tufted sedge post-division. The fine rose ensures uniform and gentle watering, which aids the newly separated plants in settling without causing root disturbance or erosion.
Potting Mix
A premium, well-draining potting mix is essential for planting the divided portions of alpine tufted sedge. It offers the correct balance of moisture and aeration, supporting robust root growth and ensuring transplant success.
Hand Trowel
A hand trowel is beneficial for planting the divided sections of alpine tufted sedge. It helps create appropriately sized holes for the new divisions and is excellent for precise planting in prepared beds or containers.
Labeling Stakes
Labeling stakes assist in tracking the location of each alpine tufted sedge division. This is particularly advantageous for monitoring development and evaluating the success of each separated section over time.
How to Propagate Alpine Tufted Sedge?
Propagation Type
Easy
Caring for Your Newly Propagated Alpine Tufted Sedge
Caring for Your Newly Propagated Alpine Tufted Sedge
Following alpine tufted sedge propagation, ensure the divisions maintain consistent moisture levels, especially during their initial growth season. Apply mulch around the plants to retain soil moisture and inhibit weed growth. Watch for any indications of stress or disease and address them promptly. Over time, the divisions will establish and begin to expand, forming healthy clusters.
Common Errors to Avoid When Propagating Alpine Tufted Sedge
Incorrect Soil Type
Utilizing soil that is excessively dense or water-retentive can lead to inadequate drainage, potentially causing root rot.
Overwatering
Supplying too much water can suffocate the roots, resulting in decay and stunted development.
Improper Light Exposure
Planting in areas lacking sufficient light can result in weak, elongated growth, impacting the plant's overall vitality.
Wrong Planting Depth
Planting too deeply or too shallowly can stress the plant, leading to poor establishment.
Neglecting Pest Control
Failing to monitor and manage pests can inflict significant harm on new growth, affecting propagation success.
Advice for Propagating Alpine Tufted Sedge
Choose Well-Draining Soil
Select a soil mixture that ensures good drainage to prevent waterlogging and root rot.
Moderate Watering
Water the plant regularly but ensure the soil is not oversaturated to maintain healthy root development.
Proper Light Conditions
Position the plant in an area with ample sunlight, ensuring it receives the necessary light for vigorous growth.
Correct Planting Depth
Ensure the plant is at the appropriate depth with the crown of the plant level with the soil surface to encourage healthy growth.
Monitor for Pests
Regularly inspect for pests and manage them promptly to safeguard the plant and its new growth.


