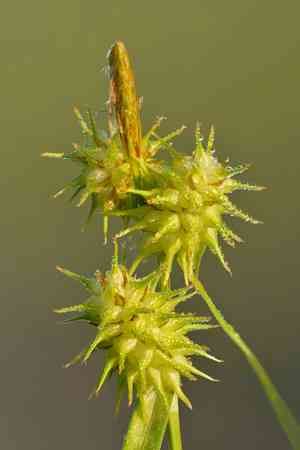
How to Propagate Hitchcock's sedge?
Carex hitchcockiana flourishes in forested environments featuring moderately damp to wet soil. For effective propagation, employ the division method by severing established plants at their root base and transplanting the detached segments. Verify that every piece possesses a robust root structure. Provide ample watering post-transplantation to aid in the establishment of the new specimens. Consistent observation and upkeep will foster robust development.
Optimal Time for Hitchcock's Sedge Propagation
Propagation Method
Division
Propagation Period
Spring,Autumn
Tools Required for Hitchcock's Sedge Propagation
Garden Fork
A garden fork is crucial for loosening the earth around hitchcock's sedge, facilitating easier separation of the clumps. It helps minimize root damage when removing the plant from the ground.
Sharp Knife or Spade
A sharp knife or small spade is vital for cleanly dividing the clumps of hitchcock's sedge. This tool ensures each section possesses sufficient roots and shoots for successful re-establishment.
Root Washing Station
A root washing station, such as a hose with a gentle spray nozzle, aids in removing excess soil from the roots of hitchcock's sedge. This is important for examining root health and making precise divisions.
Potted Soil Mix
A well-draining soil mixture is necessary when replanting the divided sections of hitchcock's sedge. It provides the ideal environment for new roots to establish and grow without becoming waterlogged.
Watering Can with Fine Rose
A watering can with a fine rose head assists in gentle irrigation of newly divided and replanted sections of hitchcock's sedge, ensuring the soil stays moist without dislodging it.
Mulching Material
Organic mulch helps retain moisture and regulate soil temperature for the newly planted divisions of hitchcock's sedge. This encourages healthy growth and reduces transplant shock.
Labeling Stakes
Labeling stakes are useful for identifying and tracking the various sections of hitchcock's sedge that have been divided. This aids in monitoring growth and health over time.
How to Propagate Hitchcock's Sedge?
Propagation Type
Easy
Caring for Your Newly Propagated Hitchcock's Sedge
Caring for Your Newly Propagated Hitchcock's Sedge
Post-propagation, keep hitchcock's sedge in a shaded or partially shaded location with well-drained soil. Water consistently to maintain soil moisture, but avoid saturation. Mulch around the plant bases to retain moisture and suppress weed growth. Monitor for pests and diseases, and prune any dead or damaged foliage to promote vigorous growth.
Common Errors to Avoid When Propagating Hitchcock's Sedge
Overwatering
Excessive watering can lead to root rot and foster an environment conducive to fungal diseases.
Insufficient light
Providing inadequate light can impede germination and slow down the growth process, weakening the plant.
Using inappropriate soil
Failing to use well-draining soil can result in waterlogged conditions, negatively impacting root health.
Incorrect spacing
Crowding plants can lead to poor air circulation, increasing the risk of disease and stunted growth.
Improper planting depth
Planting seeds or divisions too shallow or too deep can compromise root development and plant stability.
Tips For Propagating Hitchcock's Sedge
Moderate watering
Ensure the soil remains moist but not waterlogged during the initial growth stages to encourage healthy root development.
Adequate sunlight
Position the plant in a spot where it receives sufficient indirect sunlight to enhance growth and vitality.
Well-draining soil
Utilize a soil mix that provides good drainage to prevent root rot and support healthy growth conditions.
Proper spacing
Space the plants appropriately to ensure good air circulation and minimize disease risk, promoting robust growth.
Correct planting depth
Plant seeds or divisions at an appropriate depth to support strong root establishment and stable growth.


