How to Propagate Bicknell's sedge?
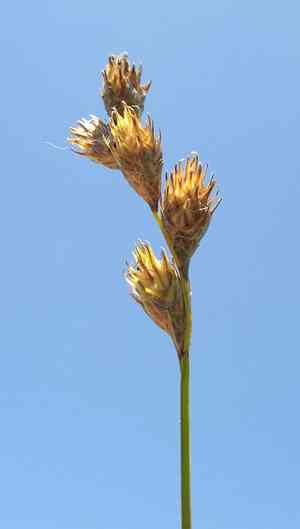
Bicknell's sedge flourishes when reproduced via separation, a technique ideal for sustaining its vitality and promoting robust development. Gently separate the root masses during the peak growing season to encourage prime establishment in every new specimen. Verify that each new segment possesses an adequate root structure to guarantee a vigorous beginning. This approach not only aids in enlarging your cultivated area but also revitalizes mature clumps that might be declining.
What Is the Best Time To Propagate Bicknell's Sedge?
Propagation Type
Division
Propagation Season
Spring,Autumn
What Tools Are Used in Bicknell's Sedge Propagation?
Spade or Garden Fork
Utilized for carefully lifting bicknell's sedge from the ground, minimizing root damage. These implements offer precise control, crucial for safely separating the bicknell's sedge root clump into smaller portions.
Pruning Shears
Essential for trimming bicknell's sedge foliage prior to division, helping manage its size and encourage healthier, more manageable sections. Sharp, clean shears ensure precise cuts, protecting the plant's vascular system.
Gardening Gloves
Shield the propagator's hands from sharp edges and potentially irritating plant saps or materials, while also allowing for gentle handling of bicknell's sedge during the division process.
Watering Can with a Fine Rose
Provides gentle irrigation for bicknell's sedge after division, vital for helping new divisions establish in their new environment without being overwhelmed by a strong water flow.
How to Propagate Bicknell's Sedge?
Propagation Type
Easy
How to Care for Your Newly Propagated Bicknell's Sedge?
How to Care for Your Newly Propagated Bicknell's Sedge?
Post-propagation, ensure bicknell's sedge receives consistent watering, especially during dry periods, to maintain soil moisture. Applying mulch around the base can help retain moisture and deter weeds. For nutrients, add a light layer of compost annually. Avoid over-watering or letting the soil completely dry out, as bicknell's sedge prefers a balanced moisture level.
Common Mistakes to Avoid When Propagating Bicknell's Sedge
Overwatering
While propagating bicknell's sedge requires moist soil, excessive water can lead to root rot, severely hindering the plant's ability to establish and grow.
Deep planting
Placing bicknell's sedge crowns too deeply in the soil can restrict adequate air and light, potentially causing the plant to rot instead of sprouting.
Ignoring rhizome health
Using damaged or diseased rhizomes for propagation can spread issues like fungal infections, negatively impacting the growth and survival of bicknell's sedge.
Crowding
Planting bicknell's sedge rhizomes too close together can impede their growth due to competition for resources such as nutrients and light, resulting in weaker plants.
Tips For Propagating Bicknell's Sedge
Moisture management
Keep the soil damp but not waterlogged to support bicknell's sedge growth without risking root rot.
Appropriate planting depth
Ensure bicknell's sedge crowns are positioned at or slightly below the soil surface to allow for sufficient air and light exposure, essential for sprouting.
Select healthy rhizomes
Always choose robust, healthy rhizomes for propagation to ensure strong growth and minimize the risk of disease transmission.
Spacing
Provide ample space for each rhizome to grow by spacing them appropriately. This prevents resource competition and promotes healthier, fuller growth.



