How to Propagate Griffin's bellflower?
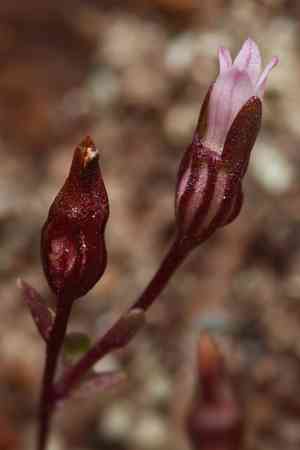
Griffin's bellflower is a member of the Campanulaceae family. Effective propagation involves sowing seeds in well-draining soil, ensuring they receive adequate moisture without waterlogging. Lightly covering the seeds with soil helps. Using seed trays with a clear cover can create a conducive germination environment. Regularly monitor and maintain consistent moisture levels while allowing ventilation to prevent fungal issues. Transplant seedlings to individual pots once strong enough to handle.
What Is the Best Time To Propagate Griffin's Bellflower?
Propagation Type
Sowing
Propagation Season
Spring
What Tools Are Used in Griffin's Bellflower Propagation?
Seed Trays
Used for starting seeds indoors, providing a controlled environment for germination. Seed trays help organize and manage multiple seedlings effectively.
Seed Starting Mix
A lightweight, well-draining medium specifically formulated for seed germination. It supports healthy root development and minimizes damping-off disease.
Humidity Dome
Placed over seed trays to maintain high humidity levels and consistent moisture, critical for griffin's bellflower's seed germination.
Heat Mat
Provides consistent bottom heat to seed trays, promoting quicker and more uniform germination for griffin's bellflower, especially in cooler conditions.
Spray Bottle
Gently mists the soil surface to keep the seed starting mix moist without dislodging seeds, ensuring adequate moisture for griffin's bellflower's seed germination.
Labels and Marker
Used to label different seed varieties and dates of sowing, keeping track of griffin's bellflower's development stages and preventing mix-ups.
Pricking Out Tool
Assists in the delicate process of transferring seedlings from seed trays to individual pots, minimizing root disturbance for griffin's bellflower.
Seedling Pots
Provides individual growing space for transplanted seedlings, allowing roots to develop more freely and reducing the risk of disease spread among griffin's bellflower seedlings.
How to Propagate Griffin's Bellflower?
Propagation Type
Easy
How to Care for Your Newly Propagated Griffin's Bellflower?
How to Care for Your Newly Propagated Griffin's Bellflower?
After transplanting, water the young plants regularly, keeping the soil consistently moist but not waterlogged. Provide balanced, all-purpose fertilizer every 4-6 weeks. Position griffin's bellflower in a location with partial to full sun, ensuring the plants receive at least 4-6 hours of direct sunlight daily. Mulch around the base to retain moisture and suppress weeds. Regularly check for pests and diseases, treating them promptly to ensure healthy growth.
Common Mistakes to Avoid When Propagating Griffin's Bellflower
Overwatering
Excess water can lead to root rot, subsequently causing the plant to die or fail to establish roots.
Using Heavy Soil
Soil that is too dense may impede drainage, leading to poor root development and increased risk of disease.
Insufficient Light
Lack of adequate light will inhibit photosynthesis, resulting in weak, spindly growth.
Inadequate Humidity
Failure to maintain appropriate humidity levels can dry out the plant, hampering its ability to develop roots.
Improper Cutting Techniques
Using blunt tools or making jagged cuts can damage plant tissues, reducing the chances of successful propagation.
Tips For Propagating Griffin's Bellflower
Use Well-Draining Soil
Select a soil mix that offers good aeration and drainage to prevent root rot and promote healthy root growth.
Maintain Moderate Watering
Water the plant moderately, ensuring that the soil remains moist but not waterlogged.
Provide Adequate Light
Place the plant in a location where it can receive bright, indirect sunlight to support healthy growth.
Maintain High Humidity
Use a humidity dome or mist the plant regularly to keep environmental humidity levels high, aiding root development.
Use Sharp, Sterile Tools
Ensure cutting tools are sharp and sterilized to make clean cuts and reduce the risk of infection or tissue damage.



