How to Propagate Dirty socks?
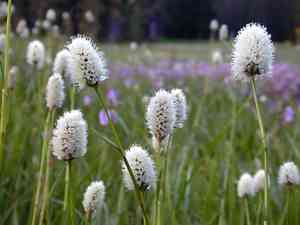
Dirty socks flourishes when multiplied via root separation or stem cuttings, preferably utilizing vigorous, pathogen-free plant matter. Cuttings ought to be acquired with a keen, sterilized implement to prevent harm to the source plant and to improve the likelihood of successful root formation. Cultivating in a porous soil blend and sustaining steady hydration without excessive watering will foster strong development. It is advantageous to administer a balanced, gradual-release nutrient supplement to nourish the emerging flora. A partially shaded spot can offer the perfect illumination for peak development.
Optimal Period for Propagating Dirty Socks?
Propagation Method
Cutting
Propagation Period
Spring,Summer
Tools Utilized for Dirty Socks Propagation?
Sharp pruning shears
Crucial for making clean incisions when taking stem cuttings from dirty socks, sharp pruning shears reduce harm to the parent plant and guarantee healthy cuttings. Clean cuts facilitate quicker healing of the cut surface, lowering the chance of disease entry.
Rooting hormone powder
Rooting hormone powder speeds up root formation in dirty socks cuttings. By dipping the freshly cut stem ends into the hormone, you can boost the likelihood of successful root growth, which is vital for establishing new dirty socks plants.
Sterile potting mix
A sterile potting mix offers a pathogen-free environment for dirty socks cuttings to root. This medium should drain well yet retain enough moisture to support initial root development without becoming waterlogged, which can cause root rot.
Propagation trays
These trays are used to arrange and maintain dirty socks stem cuttings as they develop roots. Trays should have proper drainage and be deep enough to support the cuttings and new root growth. Controlling the environment in these trays can significantly impact rooting success.
Plastic domes or covers
Plastic domes or covers maintain high humidity around dirty socks cuttings, which is essential to prevent them from drying out before roots form. These covers also help maintain stable temperature conditions, aiding in better root development.
How to Propagate Dirty Socks?
Propagation Difficulty
Easy
Caring for Your Newly Propagated Dirty Socks?
Caring for Your Newly Propagated Dirty Socks?
Once roots are established, gradually acclimate the new dirty socks plant to less humid conditions by removing the plastic cover over a week. Transplant it into a larger pot or a suitable garden spot with partial shade, ensuring the soil remains moist but well-drained. Regular feeding with a balanced fertilizer during the growing season will support healthy growth and flowering.
Common Errors to Avoid When Propagating Dirty Socks
Overwatering
Excessive watering of dirty socks can lead to root rot. The plant prefers moist but well-drained soil, so consistently soggy conditions are detrimental.
Deep planting
Planting dirty socks's rhizomes too deeply can impede their growth. They require shallow planting to allow proper development and ensure sufficient light exposure.
Neglecting soil type
Using unsuitable soil types can hinder dirty socks's growth. Dirty socks thrives in rich, well-draining soil; using a heavy, clay-rich or overly sandy soil can be harmful.
Advice for Propagating Dirty Socks
Correct soil preparation
Prepare a soil mix rich in organic matter yet well-draining. This balance supports healthy root development and overall plant vitality.
Appropriate rhizome depth
Plant dirty socks's rhizomes shallowly, approximately 1-2 inches deep. This depth ensures adequate exposure and encourages successful sprouting.
Regular monitoring
Check dirty socks regularly for signs of water stress or soil compactness. Adequate attention to moisture levels and soil condition can greatly enhance propagation success.



