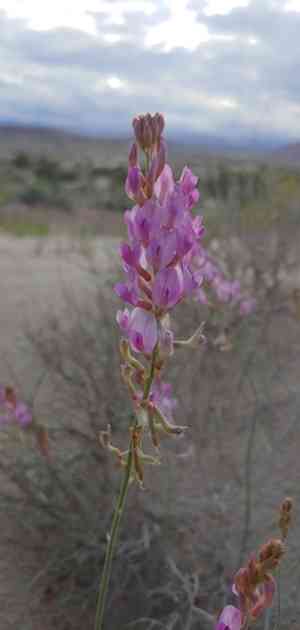
How to Propagate Colton's milkvetch?
Colton's milkvetch flourishes in porous, sandy substrates under direct sunlight. Optimal planting necessitates seed stratification to overcome dormancy. Employing a sanitized substrate assists in averting damping-off affliction. Moisten seeds before cultivation to boost germination percentages. Maintain steady hydration without saturation during initial growth phases for peak development. Adequate airflow contributes to robust propagation. Implementing these specific techniques guarantees the prosperous growth and rooting of colton's milkvetch.
Optimal Period for Propagating Colton's Milkvetch?
Propagation Method
Seeding
Propagation Period
Spring
Instruments Utilized in Colton's Milkvetch Propagation?
Seed Tray
Employed for initiating sprouts in a regulated setting. Seed trays offer sufficient room for each seed to sprout, ensuring proper air circulation and moisture control vital for colton's milkvetch.
Seedling Heat Mat
Positioned beneath the seed tray to sustain a steady temperature, crucial for promoting seed germination. Colton's milkvetch thrives with warm soil conditions for improved sprouting.
Sterile Potting Mix
A soil medium devoid of disease-causing agents that can impede the germination process. Supplies essential nutrients and appropriate moisture retention for colton's milkvetch seeds to emerge healthily.
Humidity Dome
Placed over the seed tray to establish a micro-environment with elevated humidity levels, which aids in preventing seed drying and fosters uniform germination in colton's milkvetch.
Seed Starting Mix
A lightweight substrate that encourages delicate root growth. Particularly important for colton's milkvetch, which may possess fine roots requiring unhindered establishment.
Mister or Spray Bottle
Used to lightly mist the soil surface, preventing disruption of freshly sown seeds. Ensures that colton's milkvetch seeds remain in contact with the soil for consistent moisture without becoming waterlogged.
Labels and Markers
Crucial for tracking the planting date and various batches of colton's milkvetch to accurately monitor germination rates and growth progression.
Cold Stratification Materials
Such as moist paper towels or sand, used to mimic natural winter conditions. This might be necessary for colton's milkvetch to break seed dormancy and enhance germination success.
Scalpel or Razor Blade
For scarification, a technique to gently scratch the seed coat. This allows water to penetrate and assists in the germination of colton's milkvetch, which may have a tough seed coat.
Disinfectant Solution
Used to sanitize all propagation tools and containers to ward off fungal and bacterial infections, ensuring that young colton's milkvetch plants remain disease-free.
Method for Propagating Colton's Milkvetch?
Propagation Type
Simple
Post-Propagation Care for Your Colton's Milkvetch?
Post-Propagation Care for Your Colton's Milkvetch?
Following germination, gradually introduce the seedlings to direct sunlight by increasing their exposure over several days. Transplant the seedlings into individual containers once they have developed a pair of true leaves. Utilize well-draining soil and ensure they receive ample sun. Water moderately, allowing the soil to dry out between waterings to prevent root rot. Regularly inspect for pests and diseases, and support their development with a balanced fertilizer during the growing season.
Common Errors to Avoid When Propagating Colton's Milkvetch
Overwatering
Excessive moisture can lead to root decay, which is harmful to colton's milkvetch's health and propagation success.
Poor soil drainage
Employing soil that retains too much water can suffocate roots and cause fungal problems.
Inadequate light
Insufficient sunlight can hinder growth and weaken colton's milkvetch, making propagation challenging.
Improper seed storage
Storing seeds in a damp or excessively warm environment can diminish their viability, resulting in poor germination rates.
Neglecting soil sterilization
Using unsterilized soil can introduce pathogens that may harm young plants during propagation.
Advice for Propagating Colton's Milkvetch
Utilize well-draining soil
Ensure the soil mixture provides excellent drainage to prevent root rot and encourage robust root development.
Maintain moderate watering
Water consistently but sparingly, allowing the topsoil to dry out between waterings to avoid waterlogged roots.
Provide ample light
Position colton's milkvetch in an area with abundant sunlight to promote vigorous growth and successful propagation.
Store seeds properly
Keep seeds in a cool, dry location to maintain their viability for optimal germination.
Sterilize soil and equipment
Use sterilized soil and clean tools to avoid introducing pathogens that can impede the propagation process.


