How to Propagate Arcytophyllum nitidum?
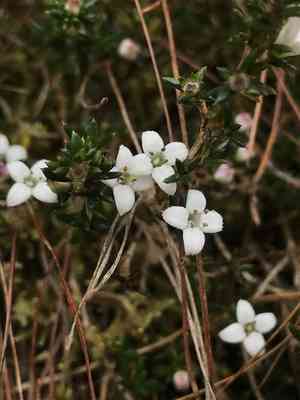
To propagate arcytophyllum nitidum, utilize stem sections, preferably harvested from a robust, established specimen. Verify that each section possesses several nodes and vibrant foliage. Submerge the severed tip into rooting compound to encourage accelerated development, then embed it in a substrate that drains effectively. Maintain consistent moisture in the soil and position the cuttings in a warm area with diffused illumination to aid in root formation. Periodically monitor hydration levels and modify care to prevent decay or excessive drying.
Optimal Period for Arcytophyllum Nitidum Propagation
Propagation Method
Cutting
Propagation Period
Spring,Summer
Tools Required for Arcytophyllum Nitidum Propagation
Pruning Shears
Utilized for taking accurate cuttings from arcytophyllum nitidum. Ensure sharpness and cleanliness to avoid harm and disease.
Rooting Hormone
Aids in stimulating root growth from cuttings. Crucial for boosting the propagation success rate for arcytophyllum nitidum.
Propagation Trays
Offers a regulated setting for cuttings to form roots. Employ trays with good drainage to prevent waterlogging issues.
Humidity Dome
Helps sustain elevated humidity levels around cuttings, vital for arcytophyllum nitidum to minimize moisture loss and encourage root development.
Sterile Growing Medium
Provides a pathogen-free substrate for cuttings to root. A blend of perlite and peat moss is frequently suggested for arcytophyllum nitidum.
Misting Bottle
Keeps cuttings hydrated without excessive watering. Regular misting is important for maintaining moisture levels around arcytophyllum nitidum.
Heat Mat
Supplies consistent bottom warmth to cuttings, which can accelerate root development for arcytophyllum nitidum, particularly in cooler climates.
Labels and Markers
Used to keep track of various cuttings and types. Essential for ensuring proper identification and care of arcytophyllum nitidum throughout the propagation process.
How to Propagate Arcytophyllum Nitidum?
Propagation Type
Moderately Difficult
Caring for Your Newly Propagated Arcytophyllum Nitidum
Caring for Your Newly Propagated Arcytophyllum Nitidum?
Once rooted, gradually introduce the new plant to standard conditions by removing the plastic cover over a week. Keep the soil consistently moist and place the plant in an area with indirect sunlight. Fertilize with a balanced, water-soluble fertilizer about once a month during the growing season. Regularly check for pests and prune as necessary to encourage bushier growth.
Common Errors to Avoid When Propagating Arcytophyllum Nitidum
Overwatering
Providing too much water can lead to root rot, which can severely hinder the propagation process and overall health of arcytophyllum nitidum.
Insufficient Light
Not providing adequate light can cause weak, leggy growth, making the plant less likely to thrive.
Improper Soil Mix
Using the wrong soil mix can lead to poor drainage and nutrient deficiencies, affecting root development and overall plant health.
Incorrect Cutting Technique
Taking cuttings incorrectly can result in failure to root or slow rooting, diminishing propagation success.
Neglecting Humidity
Failing to maintain high humidity levels can cause cuttings to dry out and fail to root.
Tips For Propagating Arcytophyllum Nitidum
Moderate Watering
Ensure the soil remains consistently moist but not waterlogged to prevent root rot and support healthy growth.
Sufficient Light
Place cuttings in bright, indirect light to promote strong, vigorous growth without causing damage.
Well-Draining Soil
Use a well-draining soil mix, such as a combination of perlite, peat, and sand, to facilitate proper aeration and nutrient uptake.
Clean Cutting Tools
Utilize sterilized, sharp tools to take clean cuttings, which helps prevent infection and promotes faster rooting.
High Humidity
Maintain high humidity around cuttings by using a humidity dome or plastic bag to encourage successful rooting.



