How to Propagate Fringed amaranth?
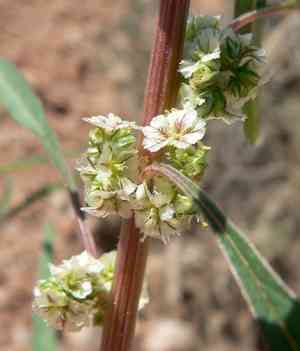
Fringed amaranth flourishes when propagated by seed, offering an easy method for cultivators. For best results, utilize a growing medium that drains effectively and ensure the seeds are barely covered. Steady hydration assists sprouting without saturating the root system. Providing sufficient distance between plants prevents congestion, fostering vigorous development. Ample illumination is crucial, with direct sunlight being preferable. Periodically inspect for infestations and control unwanted vegetation to guarantee strong progress. Consulting reliable gardening references validates these specific recommendations for successful cultivation.
Optimal Time for Fringed Amaranth Propagation
Propagation Method
Seeding
Propagation Period
Spring
Tools Required for Fringed Amaranth Propagation
Seed Tray
An essential item for initiating fringed amaranth from seeds. It offers a regulated setting for sprouting, ensuring seeds stay in place and get sufficient moisture and warmth.
Seedling Heat Mat
A heat mat for seedlings aids in keeping the soil temperature within the ideal range for seed germination, especially useful for fringed amaranth when started indoors or in cooler climates.
Mist Sprayer
A mist sprayer is utilized to keep the soil surface damp without disturbing the seeds. This tool guarantees that the tiny fringed amaranth seeds maintain contact with the soil and are uniformly hydrated.
Label Markers
Label markers are crucial for distinguishing between plants if cultivating multiple species. This prevents confusion and ensures fringed amaranth is correctly identified throughout its growth phases.
Seed Starting Mix
A premium seed starting mix offers a sterile, nutrient-rich substrate that promotes vigorous root growth and prevents illnesses that could hinder fringed amaranth's development.
Plastic Dome
A plastic dome placed over the seed tray assists in retaining moisture and maintaining a consistent humidity level, creating an ideal microenvironment for fringed amaranth germination.
Fine Sieve
Employing a fine sieve to gently cover the seeds with soil ensures even distribution and suitable depth, which is vital for the successful germination of fringed amaranth.
Planting Dibber
A planting dibber is employed to create small, precise holes in the soil for sowing seeds, ensuring fringed amaranth seeds are planted at the correct depth.
Steps to Propagate Fringed Amaranth
Propagation Difficulty
Simple
Caring for Your Newly Propagated Fringed Amaranth
Caring for Your Newly Propagated Fringed Amaranth
Once seedlings are established, decrease watering frequency but ensure the soil remains moderately damp. Provide full sun exposure for optimal development and check for pests or diseases. Regularly remove weeds around the base to prevent competition for nutrients and water.
Common Errors to Avoid When Propagating Fringed Amaranth
Overwatering
Excessive moisture can lead to root rot and fungal infections, impeding fringed amaranth's growth and propagation success.
Insufficient Sunlight
Lack of adequate sunlight can result in weak and elongated growth, diminishing the plant's vitality and overall health.
Poor Soil Drainage
Using soil that drains inadequately can cause waterlogging, fostering root diseases and negatively impacting plant health.
Improper Seed Depth
Planting seeds too deeply can hinder germination, while planting too shallowly can lead to seed desiccation and failure to establish.
Neglecting Pests and Diseases
Failure to monitor and manage pests and diseases can quickly lead to severe infestations that harm or kill fringed amaranth.
Advice for Propagating Fringed Amaranth
Utilize Well-Draining Soil
Ensure the propagation medium has excellent drainage to prevent waterlogged conditions and root rot.
Maintain Adequate Light
Provide ample bright, indirect sunlight to encourage robust growth and healthy development.
Proper Watering
Water fringed amaranth sparingly and only when the top inch of soil feels dry to avoid overwatering.
Correct Seed Placement
Plant seeds at the appropriate depth, approximately 1/4 inch deep, to ensure proper germination and establishment.
Regular Pest and Disease Checks
Inspect the plant regularly for signs of pests and disease and take prompt action to manage any issues effectively.



