How to Propagate Green-tinge spiderlily?
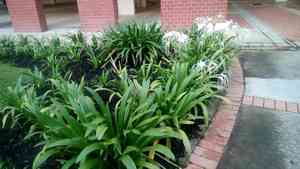
A member of the Amaryllidaceae family, green-tinge spiderlily is a tropical perennial recognized for its impressive, aromatic flowers. The primary method for multiplying green-tinge spiderlily is by dividing its tubers. Cultivators ought to meticulously detach the tubers while the plant is inactive, making certain that every piece contains a section of the root system. Insert these portions into soil that drains effectively, providing sufficient hydration and warmth to foster root formation. Appropriate nurturing will guarantee the prosperous establishment and reproduction of green-tinge spiderlily's unique allure.
Optimal Time for Green-tinge Spiderlily Propagation
Propagation Method
Utilize The Tubers
Propagation Period
Spring
Tools Required for Green-tinge Spiderlily Propagation
Sharp Knife or Garden Shears
Used for carefully separating tubers from the main green-tinge spiderlily clump. The cutting tool must be sharp and clean to ensure a precise cut, minimizing harm and reducing disease transmission risk. A clean cut aids faster tuber healing, promoting quicker root development during propagation.
Sterilizing Agent (e.g., Rubbing Alcohol or Bleach solution)
Before dividing tubers for propagation, it's crucial to sanitize cutting instruments. This step prevents introducing pathogens that could lead to infections or diseases in green-tinge spiderlily. Proper tool sterilization ensures healthier, more viable plants throughout their growth.
Potting Mix
After acquiring green-tinge spiderlily tubers, they should be potted in a loose, well-draining potting mix that encourages root growth and aeration. The ideal mix should offer sufficient nutrients and moisture retention while allowing excess water to drain, preventing root rot and disease.
Plant Pots or Propagation Trays
These containers house green-tinge spiderlily tubers during their rooting phase. They need adequate drainage to effectively manage moisture levels. Using pots or trays also simplifies managing and organizing newly propagated plants, especially at various growth stages.
Rooting Hormone
While not essential, a rooting hormone can significantly boost the success rate of green-tinge spiderlily tubers taking root. This substance promotes root development and can lead to a more robust and resilient plant as it grows from the propagated tuber.
Watering Can with a Gentle Pour
Consistent and appropriate watering is vital during the initial stages of green-tinge spiderlily propagation. A watering can with a gentle pour ensures the medium is uniformly moistened without disturbing newly planted tubers or causing potting mix erosion.
Caring for Your Newly Propagated Green-tinge Spiderlily
Caring for Your Newly Propagated Green-tinge Spiderlily
Ensure green-tinge spiderlily is placed in an area receiving partial to full sunlight. The soil should remain consistently moist but not waterlogged. Fertilize with a balanced, water-soluble fertilizer every four weeks during the growing season. Monitor for pests like spider mites and treat as needed. During winter, reduce watering and allow the plant a dormant period if grown in cooler climates.
Common Errors to Avoid When Propagating Green-tinge Spiderlily
Overwatering
Excessive watering can cause root rot and fungal infections, severely harming green-tinge spiderlily's root health. This is particularly critical post-propagation when the root system is still delicate and adapting.
Insufficient light
Placing green-tinge spiderlily in areas with inadequate light can hinder its growth. Poor lighting conditions impede the development of offsets, a crucial element for successful green-tinge spiderlily propagation.
Cutting size
Using bulb sections that are too small or too large when propagating green-tinge spiderlily by division may lead to unsuccessful root and shoot development. Incorrectly sized sections might lack sufficient energy or rot before establishing.
Neglecting root health
Failing to inspect root health when dividing or transplanting can result in propagating diseased or weak specimens, potentially jeopardizing the entire planting.
Advice for Propagating Green-tinge Spiderlily
Correct moisture level
Maintaining well-drained, moderately moist soil is crucial for green-tinge spiderlily during the initial propagation stages. This balances moisture needs without waterlogging, fostering healthy root development.
Optimal lighting
Providing bright, indirect sunlight supports vigorous green-tinge spiderlily growth. Appropriate lighting is essential for photosynthesis and overall energy production, facilitating better growth and root establishment from offsets.
Appropriate segment size
Ensure each bulb division is large enough to include several shoots or root nodes. This increases the likelihood of successful rooting and the division thriving.
Health examination
Before propagating, thoroughly check the bulb and root health. Remove any sections showing signs of disease or damage to prevent spreading issues to new plants.


