Batwing fern (Histiopteris incisa)
Also known as: Water fern
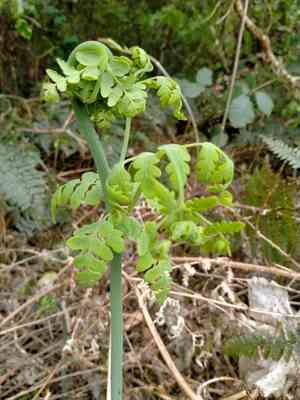
The fern you're asking about is Histiopteris incisa, also known as the batwing fern. Native to New Zealand and Tasmania, it is often used as a houseplant due to its ability to flourish in low-light environments. Its minimal light requirements make it a popular choice for indoor settings.
In This Article
Attributes of Batwing fern
Lifespan
Perennial
Plant Type
Herb
Plant Height
91 cm to 1.2 m
Spread
2 m
Leaf Color
Green Blue
Flower Size
N/A
Flower Color
N/A
Images of Batwing fern
Quickly Identify Batwing fern
1
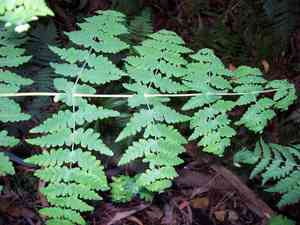
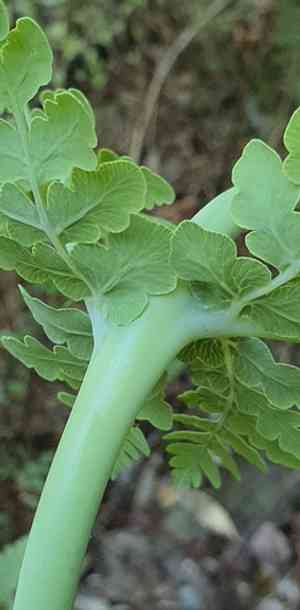
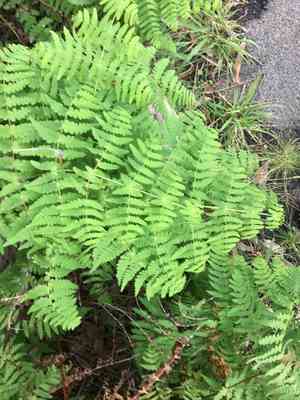
Histiopteris incisa can be identified by its thin, feathery fronds which are finely divided into numerous segments. The fronds are typically triangular in shape, and the plant has a creeping rhizome.
Scientific Classification of Batwing fern
Phylum
Vascular plants
Class
Ferns
Order
Polypodiales
Family
Bracken fern
Genus
Histiopteris
Species
Batwing fern
Planting and Growing of Batwing fern
Care Difficulty
Easy
Watering Schedule
Every 2 days
Sunlight Requirements
Partial sun
Sunshine Duration
4-8 hours
Ideal Temperature
59-77℉
Soil Type
Potting Mix, Peat Mix
Soil pH
5.5-7
Fertilizer Type
Balanced
Pruning Season
Spring, Summer
Pruning Area
Branches, Leaves
Pruning Frequency
2 times a year
Repotting Season
Spring
Pot Type
Plastic, Ceramic
 How to Water Batwing fern?
For Histiopteris incisa, the watering principle is to keep the soil consistently moist but not waterlogged. Water until it drains slightly from the bottom of the container, ensuring the soil has absorbed enough moisture without leaving standing water.
What are the symptoms of an underwatered Batwing fern?
›
What should I do if my Batwing fern is not getting enough water?
›
What are the symptoms of an overwatered Batwing fern?
›
How to save an overwatered Batwing fern?
›
 What Are the Sunlight Requirements for Batwing fern?
A mix of partial sun and full shade provides the ideal light range for Histiopteris incisa, allowing balanced light exposure. This balance supports healthy growth, vibrant foliage, and enables the photosynthetic processes vital for its development.
More About Sunlight Requirements Techniques→
What is the best lighting condition for Histiopteris incisa?
›
How can you ensure ideal light conditions?
›
What are the benefits of achieving ideal lighting?
›
 What Is the Ideal Temperature Range for Batwing fern?
The ideal temperature range for Histiopteris incisa is between 59°F and 77°F. This range provides optimal conditions for growth and photosynthesis, ensuring that the plant thrives without experiencing stress from extreme temperature fluctuations.
 What Soil is Best for Batwing fern?
Histiopteris incisa requires well-drained soil to thrive. Proper drainage prevents waterlogging, which can lead to root rot and other water-associated diseases. This ensures the plant receives adequate nutrients without the risk of excess moisture. This plant benefits from soil rich in organic matter. Organic materials aid in water retention and provide essential nutrients, enhancing the plant's overall vigor and encouraging lush growth. For optimal growth, soil must retain enough moisture without becoming soggy. Adequate moisture supports sustained nutrient uptake, promoting robust plant health and helping the plant to withstand periods of dry weather.
 How to Fertilize Batwing fern?
For Histiopteris incisa, a modest amount of fertilizer is recommended to prevent overfeeding. It is best to use a diluted solution of a balanced liquid fertilizer at half strength for liquid feedings. Solid fertilizers should be minimal, around 2 to 3 tablespoons of granular form annually, spaced equally in spring, summer, and autumn.
 How to Prune Batwing fern?
Use clean, sharp scissors or pruning shears for cutting. Ensure your tools are sterilized to prevent the spread of pests or diseases. If the plant is smaller, use finer tools to avoid damage to new growth. Start by removing any visibly damaged, dead, or yellowing fronds. Follow the frond down to the base and cut as close to the main stem as possible without damaging it. For shaping, trim overgrown or wayward fronds to maintain the desired shape. Always prune conservatively – it is better to remove too little and prune again than to cut too much at once.
More About Pruning Techniques→
 How to Propagate Batwing fern plant?
1
Before division, water the plant thoroughly to soften the soil. This helps in reducing stress when separating the roots. Ensure the plant is healthy and free from diseases or pests to maximize the success of propagation.
2
Gently lift the plant using a spade or garden fork and shake off excess soil. Identify the natural divisions or clusters of rhizomes. With sterilized scissors, separate these clusters, ensuring each new section has roots and fronds attached.
3
Replant the divided sections into suitable containers or prepared soil, ensuring each is watered well after planting. Cover the roots with a layer of mulch to retain moisture. Space divisions appropriately to ensure individual growth and prevent overcrowding.
 How to Repot Batwing fern plant?
1
Watch for roots poking through drainage holes or when the plant seems to outgrow its pot. These are signs that Histiopteris incisa needs repotting. Ideally, repot in Spring or Summer to give the plant enough time to settle in before the dormant periods of Autumn and Winter. Repotting during the growing seasons maximizes root development and minimizes shock.
2
Select a pot that's one or two inches larger in diameter than the current one. Ensure that the new pot has good drainage holes to prevent waterlogging. This size and feature prevent excessive soil mass, which can lead to overwatering issues, while allowing ample space for root growth. The material of the pot can be porous clay, which helps keep the moisture balanced around the root zone.
3
Opt for a well-draining soil mixed with sandy loam and organic matter. This combination ensures that water passes through quickly, preventing root rot. The organic content supplies essential nutrients during the plant's growth phases, while the sandy aspects ensure sufficient aeration. Balanced soil is crucial for healthy root systems, which support robust foliage growth.


