How to Transplant Yellow spiny daisy?
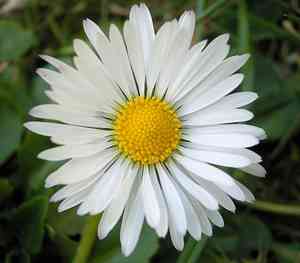
The ideal period for transplanting yellow spiny daisy spans from the initial signs of spring through its later, more vibrant stages. Select a bright spot featuring soil that drains effectively to accommodate yellow spiny daisy in its new environment, facilitating a smooth adjustment with periodic, moderate irrigation.
What Preparations are Needed Before Transplanting Yellow Spiny Daisy?
What is the Ideal Time for Transplanting Yellow Spiny Daisy?
The optimal period for relocating yellow spiny daisy spans from early spring's thaw until just before summer's peak. Moving yellow spiny daisy during this revitalizing phase capitalizes on nature's growth signals, ensuring a smooth transition. By transplanting in spring's gentle warmth, you enable yellow spiny daisy to establish roots and produce new growth in harmony with the season's natural rhythms. A friendly reminder: this is the plant's prime time, and your careful attention will help it flourish!
How Much Space Should You Leave Between Yellow Spiny Daisy Plants?
Hello there, gardening enthusiast! When preparing a new spot for your yellow spiny daisy, aim for a comfortable spacing of approximately 12-18 inches (30-46 cm) between plants. This provides your yellow spiny daisy ample room to thrive without feeling cramped.
What is the Best Soil Mix for Yellow Spiny Daisy Transplanting?
For your yellow spiny daisy, envision preparing a comfortable bed with soil that drains well. It prefers a mixture that isn't overly moist. Incorporate some slow-release fertilizer before planting to give it a robust start. Picture yourself preparing a nourishing meal for it!
Where Should You Relocate Your Yellow Spiny Daisy?
Your yellow spiny daisy enjoys the sun, so find a location where it can soak up full sunlight. It will reward you with vibrant growth! Select a spot that receives several hours of direct sunshine daily, and observe your yellow spiny daisy flourish.
What Equipments Should You Prepare Before Transplantation Yellow Spiny Daisy?
Gardening Gloves
To safeguard your hands while handling soil and plants.
Shovel or Spade
For excavating the yellow spiny daisy from its current spot and preparing the new planting hole.
Hand Trowel
Used for more precise work in preparing the hole and adjusting soil around the root system.
Watering Can or Garden Hose
To hydrate the yellow spiny daisy both prior to and following transplantation.
Pruning Shears
To trim any damaged roots or foliage as required.
Wheelbarrow or Garden Cart
For transporting the yellow spiny daisy and soil to and from the new planting site.
Soil Amendment
Depending on the quality of the soil at the new location, compost or other organic material may be necessary to enrich the planting area.
How Do You Remove Yellow Spiny Daisy from the Soil?
How Do You Remove Yellow Spiny Daisy from the Soil?
From Ground: Start by watering the yellow spiny daisy to reduce stress and make the soil easier to manage. Next, carefully dig a wide circle around the plant with a shovel or spade. Slide the tool under the root ball to gently lift the yellow spiny daisy, keeping the roots as intact as possible.From Pot: Water the yellow spiny daisy to moisten the soil. Hold the plant at its base and tip the pot sideways. Tap the bottom and sides of the pot to loosen the root ball, then carefully slide the plant out while supporting the root ball.From Seedling Tray: Water the yellow spiny daisy seedlings to ensure the soil is damp. Use a hand trowel or a small tool to carefully lift each seedling by digging into the soil beneath it. Make sure to retain as much soil around the roots as possible to protect them during the move.
Step-by-Step Guide for Transplanting Yellow Spiny Daisy
Prepare the New Site
Before extracting the yellow spiny daisy, prepare the new planting spot by digging a hole twice the width of the plant's root ball and the same depth as its previous growing position.
Remove the Plant
Gently take out the yellow spiny daisy from its original location, taking care to preserve the root system as outlined in the removal process.
Transplanting Technique
Place the yellow spiny daisy into the prepared hole, ensuring it sits at the same level as before. Adjust the depth as needed, filling in beneath the root ball with soil.
Soil Enrichment
If the soil is poor, mix in some compost or organic matter around the root zone; this will help the yellow spiny daisy thrive in its new environment.
Position and Backfill
Position the yellow spiny daisy so it stands upright, then gently refill the hole with soil. Firm the soil around the base to secure the plant and eliminate any large air pockets.
Watering In
Water the yellow spiny daisy thoroughly after transplanting to settle the soil around the roots and help alleviate transplant shock.
Mulching
Apply a layer of mulch around the base of the yellow spiny daisy, leaving some space around the stem. This will help retain moisture and suppress weeds.
How Do You Care For Yellow Spiny Daisy After Transplanting?
Monitoring for Stress
Observe the yellow spiny daisy for indications of stress, such as wilting or discolored leaves. If noticed, provide shade and additional water as necessary.
Regular Watering
Maintain a consistent watering schedule to ensure the yellow spiny daisy has sufficient moisture to establish its root system without becoming waterlogged.
Mulch Management
Periodically check the mulch to confirm it provides adequate coverage and isn't harboring pests.
Staking if Necessary
If the yellow spiny daisy appears to be leaning or unstable, support it with a stake and loosely tie it to help maintain an upright position until its roots take hold.
Gradual Adaptation
Allow the yellow spiny daisy to slowly adjust to its new location by providing a bit of extra care and protection from harsh conditions until it is fully established.
Troubleshooting Common Issues with Yellow Spiny Daisy Transplantation.
When's the best time to transplant yellow spiny daisy?
Ideally, transplant yellow spiny daisy during the transition from early to late spring, ensuring milder weather conditions.
How far apart should I space yellow spiny daisy when transplanting?
Space yellow spiny daisy 12-18 inches (30-46 cm) apart to allow ample room for growth and air circulation.
What soil conditions does yellow spiny daisy need when transplanting?
Ensure the soil is well-draining and fertile. If needed, amend with compost prior to transplanting.
How much should I water yellow spiny daisy after transplanting?
Water yellow spiny daisy generously post-transplant, then maintain consistent moisture without overwatering during establishment.
How deep should I plant yellow spiny daisy during transplanting?
Transplant yellow spiny daisy at the same depth it was in its previous container or location.
Can yellow spiny daisy tolerate transplanting during summer?
Transplanting yellow spiny daisy in summer is not ideal due to heat stress. Adhere to the recommended spring timeframe.
What should I do if yellow spiny daisy's leaves wilt after transplanting?
If leaves wilt, confirm adequate soil moisture and provide shade if temperatures are high after transplant.
Should I fertilize yellow spiny daisy immediately after transplanting?
Wait a few weeks before fertilizing to prevent root burn, then use a balanced fertilizer.
How can I protect yellow spiny daisy from transplant shock?
Minimize root disturbance during transplanting and keep the plant well-hydrated to reduce transplant shock.
Is mulch beneficial for yellow spiny daisy after transplanting?
Mulching helps retain soil moisture and temperature, so apply organic mulch around yellow spiny daisy after transplanting.



