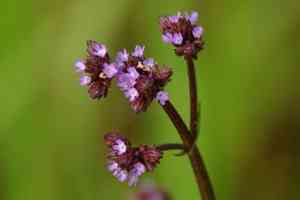
How to Transplant Brazilian vervain?
The optimal period for transplanting brazilian vervain is in the mild embrace of early to mid-spring, facilitating robust root development prior to the intensity of summer. Select a bright location featuring adequately draining earth to accommodate its lively existence.
What Preparations are Needed Before Transplanting Brazilian Vervain?
What is the Ideal Time for Transplanting Brazilian Vervain?
The best period to relocate brazilian vervain is after winter's chill subsides, moving into the warmth of spring. This season provides brazilian vervain with a gentle beginning, allowing roots to establish without stress. The mild yet supportive spring conditions encourage brazilian vervain to grow vigorously, promoting establishment before summer's intense heat.
How Much Space Should You Leave Between Brazilian Vervain Plants?
When preparing to plant your brazilian vervain, ensure each plant has approximately 12-18 inches (30-45 cm) of room to expand its root system. This spacing allows them to develop robustly without competing with nearby plants.
What is the Best Soil Mix for Brazilian Vervain Transplanting?
For brazilian vervain, prepare the planting area with soil that drains effectively. A good quality loamy or sandy soil will be very beneficial. To give them a strong start, incorporate a balanced, slow-release fertilizer into the soil before transplanting.
Where Should You Relocate Your Brazilian Vervain?
These beautiful brazilian vervain plants thrive in sunlight, so select a location that receives full sun for at least 6-8 hours daily. A sunny spot will ensure your brazilian vervain flourishes and produces abundant blooms!
What Equipments Should You Prepare Before Transplantation Brazilian Vervain?
Gardening Gloves
To safeguard your hands while handling soil and plants.
Shovel or Spade
For excavating the plant from its current spot and digging the new planting hole.
Hand Trowel
For more precise tasks and better control when digging up small plants or young seedlings.
Watering Can or Hose
To hydrate the plant before and after relocation, ensuring roots are sufficiently moist.
Pruning Shears
To trim any damaged roots or excess foliage prior to transplanting.
Wheelbarrow or Plant Dolly
To move the brazilian vervain if it is large or if the new site is far from its original position.
Rooting Hormone (optional)
To stimulate root development post-transplant, particularly useful for seedlings or cuttings.
How Do You Remove Brazilian Vervain from the Soil?
How Do You Remove Brazilian Vervain from the Soil?
From Ground: First, water the brazilian vervain to moisten the soil, making extraction easier. Then, carefully dig around the plant using a shovel or spade, ensuring ample space to avoid cutting into the root system. Gradually work beneath the plant, gently lifting it and its root ball from the soil.From Pot: Begin by thoroughly watering the brazilian vervain to help the root ball slide out of the pot. Gently tilt the pot and ease the plant out. If it resists, you can tap the pot's edges or roll it on its side to loosen the soil.From Seedling Tray: Ensure the seedling is well-hydrated before starting. Use a hand trowel or similar tool to carefully lift the seedling by pushing up from the bottom of the tray cell, preserving as much of the root system as possible.
Step-by-Step Guide for Transplanting Brazilian Vervain
Preparation
Gather all necessary tools and water the brazilian vervain before beginning the transplanting process to minimize stress on the plant's roots and leaves during the move. Wear gardening gloves to protect your hands throughout.
Removal
Depending on whether the brazilian vervain is in the ground, a pot, or a seedling tray, follow the specific removal procedure detailed in the 'removal process' section, taking care not to harm the root system.
Prep Transport
If moving the brazilian vervain a distance, use a wheelbarrow or plant dolly to transport it to its new location. Handle the plant gently to prevent shock.
Hole Digging
At the new site, excavate a hole that is twice as wide and the same depth as the plant's root ball. If transplanting a seedling or smaller plant, use a hand trowel instead of a shovel to create an appropriately sized hole.
Plant Positioning
Place the brazilian vervain in the center of the hole. Ensure the top of the root ball is level with the surrounding ground. Confirm that the plant is upright and straight.
Filling In
Carefully backfill the hole with soil, gently firming it around the roots to secure the brazilian vervain. Avoid over-compacting the soil, as this can hinder root growth and water penetration.
Watering
Water the brazilian vervain thoroughly immediately after planting to help settle the soil and provide essential hydration for recovery from transplant shock. A gentle flow around the plant's base is ideal.
Mulching
Apply organic mulch around the base of the brazilian vervain to retain moisture, regulate soil temperature, and reduce weed growth. Leave a small gap around the plant stem to prevent rot.
How Do You Care For Brazilian Vervain After Transplanting?
Monitoring
Observe the brazilian vervain for the initial few weeks to track its adaptation to the new environment. Look for signs of new growth, indicating successful transplantation.
Pruning
Trim any damaged or yellowing leaves with pruning shears to help the brazilian vervain direct its energy towards establishing new roots and growth.
Additional Watering
Continue to water the brazilian vervain regularly to maintain consistent moisture. Gradually decrease the frequency as the plant establishes, allowing the soil to dry slightly between waterings.
Staking (if necessary)
If the brazilian vervain appears unstable or is exposed to strong winds, use a stake to support it until it is strong enough to stand upright independently. Secure the stake carefully without harming the roots.
Troubleshooting Common Issues with Brazilian Vervain Transplantation.
When is the best time to transplant brazilian vervain?
The ideal transplanting period is early to mid-spring, when the weather is mild.
How far apart should I space brazilian vervain when transplanting?
Each brazilian vervain needs ample room to thrive; 12-18 inches (30-45 cm) apart is optimal.
What's the proper soil preparation for brazilian vervain transplantation?
Prepare a rich, well-draining soil mixture; brazilian vervain prefers a comfortable and nutrient-rich bed for growth.
How deep should I plant brazilian vervain's roots in the new location?
Gently place the roots, burying them to the same depth as they were in the previous pot.
Should I water brazilian vervain immediately after transplanting?
Yes, absolutely! Watering right after helps brazilian vervain settle and recover from the move.
How much sunlight is adequate for brazilian vervain after transplanting?
Post-transplant, brazilian vervain requires full to partial sun to flourish and grow.
Can I transplant brazilian vervain if it's already flowering?
For a smoother transition, it's best to transplant before brazilian vervain begins its blooming phase.
What is the ideal temperature range for transplanting brazilian vervain?
Warm and comfortable, but not hot; aim for 60-70°F (15-21°C) during transplanting days.
How do I choose the best brazilian vervain plants for transplanting?
Select the healthiest-looking brazilian vervain, with vibrant colors and sturdy stems; they will adapt best!
What should I do if my brazilian vervain wilts after transplanting?
Wilting indicates distress; ensure proper watering, adequate sunlight, and protection from harsh environmental factors.


