How to Transplant Damiana?
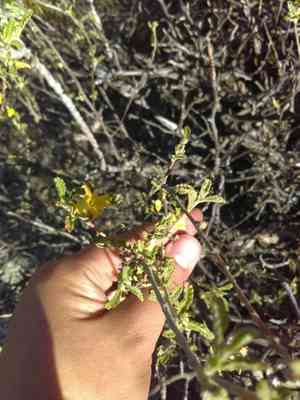
Damiana flourishes when relocated as winter recedes, ideally in a location receiving abundant sunshine and possessing soil that drains effectively. Promote a robust beginning by maintaining root moisture and refraining from planting too deeply to encourage vigorous development.
Essential Preparations Before Relocating Damiana
Optimal Period for Damiana Relocation?
Moving damiana during early to late spring, once the ground is workable and frost risk has passed, is ideal. This timing allows roots to establish prior to summer's heat. Transplanting then provides a head start on development, as moderate temperatures and increased daylight aid in robust root formation. Select this window for healthier, thriving damiana that benefit from a full growing season.
Recommended Spacing Between Damiana Plants?
Excellent, you're preparing to give your damiana ample room to flourish! Aim for a comfortable distance of approximately 18-24 inches (45-60 cm) between each plant. This ensures they have sufficient space to grow without overcrowding.
Ideal Soil Mixture for Damiana Relocation?
Let's prepare a welcoming bed for your damiana! Well-draining soil acts as a comforting embrace, and a touch of balanced fertilizer serves as a nourishing treat. Incorporate a small amount before planting to greet your new green companion.
Optimal Location for Your Damiana?
Your damiana enjoys basking in the sun! Select a bright spot where they can receive at least 6 hours of direct sunlight daily. It's like choosing the prime beach spot, one with abundant sunshine for a vibrant glow.
Equipment Needed Before Damiana Transplantation
Gardening Gloves
To safeguard your hands while handling soil and the plant.
Trowel
For excavating small holes and adjusting earth around the damiana.
Spade or Shovel
To extract the plant from the ground or a larger container.
Watering Can or Hose
To hydrate the damiana before and after its relocation.
Pruning Shears
To trim any lifeless or damaged roots or foliage.
Wheelbarrow
To transport the damiana and soil if necessary.
Mulch
To aid in retaining soil moisture around damiana post-transplant.
Method for Extracting Damiana from the Soil
Method for Extracting Damiana from the Soil?
From Ground: First, hydrate the damiana plant to moisten the soil. Next, excavate a wide trench around the plant using a shovel or spade, ensuring the plant's root ball remains intact. Carefully work the spade beneath the root ball to lift the plant from its original position.From Pot: Thoroughly water the damiana plant. Gently tilt the pot sideways and tap it to loosen the soil's grip. Gradually slide the root ball out, supporting the plant with your hands to prevent damage.From Seedling Tray: Water the damiana seedlings to dampen the soil, which facilitates removal. Carefully use a trowel or your fingers to lift the seedling from its cell, ensuring as much of the root system and soil remain intact as possible.
Step-by-Step Guide for Relocating Damiana
Hole Preparation
Excavate a hole in the ground where you intend to relocate damiana that is twice as wide and equally as deep as the root ball.
Root Inspection
Prior to placing damiana in the new hole, examine its roots. Gently untangle any circling roots to encourage outward growth.
Placement
Position the damiana's root ball into the hole, carefully aligning it so it stands upright and at the same depth it was originally growing.
Backfilling
Refill the area around the root ball with soil, gently pressing it down to eliminate air pockets without compacting the soil too firmly.
Watering In
Generously water the damiana after relocation to settle the soil around the roots and help alleviate transplant shock.
Post-Transplant Care for Damiana
Pruning
Remove any broken or damaged leaves to direct damiana's energy towards root establishment rather than repairing compromised foliage.
Watering
Water the damiana consistently to maintain evenly moist soil, allowing the plant to establish itself. Adjust watering frequency based on weather conditions and soil drainage.
Mulching
Apply a layer of mulch around the base of damiana to conserve moisture and regulate soil temperature.
Monitoring
Observe for indications of transplant shock, such as wilting or leaf discoloration, and address promptly with appropriate care or adjustments to the plant's environment.
Support
For larger damiana plants, consider using stakes or plant supports to ensure they can withstand wind and avoid toppling.
Resolving Common Issues with Damiana Transplantation.
What's the best time to move damiana?
The most favorable period for relocating damiana is from early to late spring, when its growth is robust.
How much space should I leave between damiana during relocation?
For a flourishing garden, allow 18-24 inches (45-60 cm) between each damiana plant.
Should I water damiana immediately after moving it?
Yes, water damiana right after planting to help settle the soil and remove air pockets.
What type of soil is ideal for relocating damiana?
Relocate damiana into well-draining soil, enriched with organic matter to promote root development.
How much sun exposure does damiana require after relocation?
Plant damiana in a sunny location with at least 6 hours of direct sunlight daily for optimal growth.
How do I prepare damiana's roots for relocation?
Gently untangle damiana's roots before planting to encourage them to spread into the new soil.
What's the correct depth to plant damiana when relocating?
Dig a hole as deep as the root ball and twice as wide to give damiana ample space to establish.
How can I prevent transplant shock in damiana?
Minimize root disturbance and keep the root ball moist when relocating damiana to lessen shock.
Can I fertilize damiana right after moving it?
It's advisable to wait a few weeks post-relocation before applying fertilizer to allow damiana to settle in.
My damiana appears wilted after moving, what should I do?
Provide shade, maintain moist soil, and avoid overwatering, as damiana may be experiencing relocation stress.



