How to Transplant Australian goldvine?
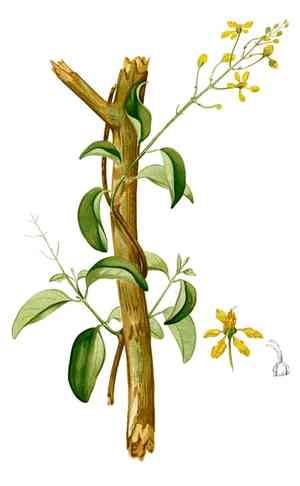
The most favorable period for relocating australian goldvine is in mid-spring, utilizing consistent weather conditions for root development. Select a bright, adequately drained location, and ensure regular hydration after transplantation to encourage robust growth.
Preparations Required Before Relocating Australian Goldvine
Optimal Period for Transplanting Australian Goldvine?
The best time to move australian goldvine is during mid-spring or as the season concludes. This period offers a unique combination of mild temperatures and consistent soil moisture, crucial for australian goldvine's root establishment and development. Placing australian goldvine in your garden at this stage ensures it benefits from spring's nurturing conditions. Move your australian goldvine to its new home during this window for vigorous and healthy growth!
Recommended Spacing Between Australian Goldvine Plants?
Prepare to plant your australian goldvine by creating ample room in your garden. Remember, these plants spread significantly, so allow approximately 5-7 feet (1.5-2.1 meters) between each one. This will guarantee they have sufficient space to expand and flourish.
Ideal Soil Mixture for Australian Goldvine Transplanting?
Your australian goldvine thrives in well-draining soil, so consider a blend of sand, silt, and clay, known as loamy soil. Be sure to enrich your soil with a base fertilizer rich in organic matter for optimal plant health. Keep it organic, and your plant will thrive!
Where to Replant Your Australian Goldvine?
When selecting a spot for your australian goldvine, choose an area that receives full sun to partial shade. They appreciate a good balance of sunlight but also welcome a bit of relief from intense heat. Your plant will adore its new sun-drenched location!
Equipment to Prepare Before Transplanting Australian Goldvine?
Gardening Gloves
To safeguard your hands during the transplanting process.
Trowel
A small hand tool essential for digging around and lifting the roots of the australian goldvine.
Garden Spade
Required for excavating a hole in the new site where you will replant the australian goldvine.
Watering Can
For hydrating the plant before and after the relocation.
Mulch
To help maintain soil moisture around the australian goldvine and support new growth.
Pruning Shears
These might be necessary if you need to trim any damaged roots during the transfer.
How to Extract Australian Goldvine from the Soil?
How to Extract Australian Goldvine from the Soil?
From Ground: First, water the australian goldvine plant to soften the surrounding soil. Using your trowel, gradually dig a wide circle around the plant, maintaining a distance of about 4-5 inches from the plant's base. This prevents damage to the roots. Carefully slide the trowel beneath the root ball and gently lift the plant.From Pot: Begin by watering the australian goldvine plant. Then, place your hand flat on top of the soil, with the plant's stem between your fingers. Invert the pot and gently tap it to loosen the plant and root ball. Slowly pull the pot away from the plant.From Seedling Tray: It's generally easier to remove seedlings when they are well-watered. Using a dibber or a pencil, push it into the soil next to the seedling. Gently lift it, supporting the leaves and not the stem with your hand. Hold the australian goldvine by its leaves, not its stem, as the stem is still too delicate and could easily break.
Detailed Guide for Transplanting Australian Goldvine
Preparation
Prepare the new site for the australian goldvine by digging a hole with your garden spade. The hole should be wide and deep enough to accommodate the plant's root ball. Ensure it's not too deep so the planting depth matches its previous location.
Transplanting
Carefully place the australian goldvine into the hole, spreading its roots outwards. Fill the hole with soil, pressing it down firmly but gently around the plant's base.
Watering
As soon as the australian goldvine is in its new position, water it. This settles the soil and eliminates any air pockets.
Mulching
Apply a layer of mulch around the plant's base. This will help regulate moisture and temperature levels, and deter weed growth.
Post-Transplant Care for Australian Goldvine
Pruning
If you observe any leaf wilting or drooping after transplant, don't be concerned. It's likely transplant shock. Prune back the wilted sections to help the australian goldvine direct its energy towards new growth.
Watering
Water the plant consistently, especially during the initial weeks following transplant. However, be mindful not to overwater.
Pest Observation
Monitor for pests. Transplanting can stress the australian goldvine, making it vulnerable to pests and diseases. If detected, treat with appropriate organic solutions.
Addressing Common Issues with Australian Goldvine Transplantation.
When is the optimal time to transplant australian goldvine?
The best period for moving australian goldvine is between late spring and early summer, when the plants are actively growing.
What should be the ideal spacing between two australian goldvine plants?
Allow approximately 5-7 feet (1.5-2.1 meters) between australian goldvine plants. This ensures each has ample room to spread.
What to do if australian goldvine wilts after transplant?
If australian goldvine wilts post-transplant, it may be experiencing transplant shock. Water it thoroughly, but avoid overwatering, and keep it in partial shade.
How to plant australian goldvine after buying from a nursery?
Dig a hole twice the size of the pot, position australian goldvine in the center, and backfill the hole. Water generously to encourage root development.
How deep should I plant a australian goldvine?
Plant australian goldvine at the same depth it was in its original container. Planting too deep can cause rot, and too shallow may expose roots.
Following transplant, how often should I water australian goldvine?
Initially, ensure australian goldvine is well-watered. Once established, watering once a week or when the top 2 inches (~5 cm) of soil are dry will suffice.
What type of soil does australian goldvine prefer for transplantation?
Australian goldvine thrives in well-drained, loamy soil. Enriching the chosen site with organic matter before planting will significantly benefit the plant's growth.
Does australian goldvine care about sun exposure following transplantation?
Yes, after transplanting, australian goldvine should receive full to partial sun. Too much shade may hinder vigorous growth and flowering.
How do I handle root-bound australian goldvine during transplanting?
For root-bound australian goldvine, gently separate the roots before planting. This encourages them to spread out and grow in the new location.
Should I prune australian goldvine before or after transplanting?
It's beneficial to trim back australian goldvine by one-third before transplanting. This reduces stress and encourages the plant to focus more on root development.



