How to Transplant Spotted wakerobin?
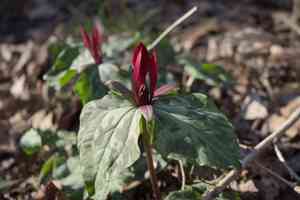
Trillium maculatum flourishes when relocated in the middle to latter part of spring, an ideal period owing to consistent warmth and humidity. Select a shaded location featuring soil that drains effectively. Guarantee the plant's root system remains intact for successful establishment.
What Preparations are Needed Before Transplanting Spotted Wakerobin?
What is the Ideal Time for Transplanting Spotted Wakerobin?
The best time to move spotted wakerobin is from late spring to early summer. This period allows the plant to root in warmer soil, encouraging better development and blooming. Transplanting at this time ensures spotted wakerobin has ample growth before winter dormancy.
How Much Space Should You Leave Between Spotted Wakerobin Plants?
When relocating spotted wakerobin, position them 12-18 inches (30-45 cm) apart. This spacing provides sufficient room for growth and prevents root competition for nutrients.
What is the Best Soil Mix for Spotted Wakerobin Transplanting?
For spotted wakerobin, prepare a fertile, well-draining loamy soil. Mix in compost or aged manure to supply essential nutrients.
Where Should You Relocate Your Spotted Wakerobin?
Spotted wakerobin flourishes in partial to full shade, so select a spot with filtered or dappled sunlight, mimicking its natural forest environment.
What Equipments Should You Prepare Before Transplantation Spotted Wakerobin?
Gardening Gloves
To safeguard your hands while handling soil and plants.
Shovel or Spade
For excavating around the plant's root ball and the new planting site.
Garden Fork
To loosen the soil without harming the roots.
Watering Can or Hose
To hydrate the plant before and after its relocation.
Pruning Shears
For trimming any dead or damaged root sections.
Wheelbarrow or Large Container
To move the plant if it is substantial or heavy.
How Do You Remove Spotted Wakerobin from the Soil?
How Do You Remove Spotted Wakerobin from the Soil?
From Ground: First, moisten the soil around the spotted wakerobin. Then, dig a wide trench around the plant with a shovel or spade, keeping the root ball intact. Carefully work the spade beneath the root ball to lift the plant from its original spot.From Pot: Gently tap the pot's sides to loosen the soil. Turn the pot sideways and carefully extract the root ball, supporting it with your hand. If stuck, carefully run a knife along the edges to free it.From Seedling Tray: Water seedlings thoroughly before removal. Gently loosen the soil around the seedling with a garden fork and carefully lift it by the stem's base, minimizing root disturbance.
Step-by-Step Guide for Transplanting Spotted Wakerobin
Preparing New Site
Ensure the new location is properly prepared with loosened, nutrient-rich soil. Dig a hole twice as wide but the same depth as the spotted wakerobin's root ball.
Removing the Plant
Use the appropriate method from the removal process to carefully extract the spotted wakerobin from its original spot, keeping the root ball intact.
Placing the Plant
Position the spotted wakerobin in the center of the prepared hole. Make sure the top of the root ball is level with the surrounding soil surface.
Backfilling the Hole
Fill the hole with soil, gently compacting it around the root ball to remove air pockets. Water thoroughly to settle the soil.
Mulching
Apply a layer of mulch around the plant's base to retain moisture and regulate soil temperature.
How Do You Care For Spotted Wakerobin After Transplanting?
Watering
Keep the soil around the spotted wakerobin consistently moist, but not waterlogged, for the initial weeks post-transplant to aid in root establishment.
Pruning
Trim any damaged or dead leaves immediately after transplanting to lessen stress on the plant.
Monitoring
Regularly inspect the spotted wakerobin for signs of transplant shock, such as wilting or yellowing foliage, and provide additional care as needed.
Troubleshooting Common Issues with Spotted Wakerobin Transplantation.
When should I transplant spotted wakerobin?
Relocate spotted wakerobin in late spring to early summer for optimal growth and establishment.
How far apart should I space spotted wakerobin when transplanting?
Space spotted wakerobin plants 12-18 inches (30-45 cm) apart to ensure proper development and air circulation.
What type of soil is best for transplanting spotted wakerobin?
Utilize well-draining, rich, and slightly acidic soil for the best outcomes when moving spotted wakerobin.
How deep should I plant spotted wakerobin bulbs?
Plant spotted wakerobin bulbs approximately 6 inches (15 cm) deep, ensuring the roots are fully covered.
How do I avoid shock when transplanting spotted wakerobin?
Water spotted wakerobin thoroughly before and after transplanting to minimize transplant shock.
What light conditions does spotted wakerobin need after transplanting?
Spotted wakerobin thrives best in partial to full shade after being transplanted.
Should I fertilize spotted wakerobin during transplanting?
Apply a balanced, slow-release fertilizer during planting to provide spotted wakerobin with a nutrient boost.
How do I handle spotted wakerobin roots during transplanting?
Handle spotted wakerobin roots gently, ensuring they are not harmed or dried out during the process.
How often should I water spotted wakerobin after transplanting?
Water spotted wakerobin regularly, keeping the soil consistently moist but not waterlogged after transplant.
What are common pests to watch out for when transplanting spotted wakerobin?
Be vigilant for slugs and snails, which can harm spotted wakerobin, especially after transplanting.



