How to Transplant Nodding wakerobin?
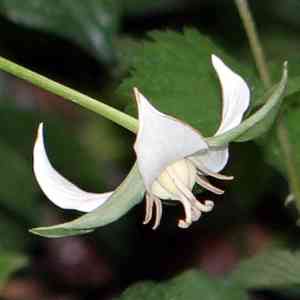
The optimal period for relocating nodding wakerobin is from early to mid-spring, as new development commences. Select a site that replicates nodding wakerobin's native forest environment, preferring filtered light and fertile, adequately draining earth. Careful management of fragile roots enhances successful integration.
What Preparations are Needed Before Transplanting Nodding Wakerobin?
What is the Ideal Time for Transplanting Nodding Wakerobin?
The optimal period for relocating nodding wakerobin occurs during the emerging warmth of late winter to early spring. This timing enables nodding wakerobin to settle as nature awakens, providing it with the full vigor of the growing season. Gently moving nodding wakerobin during this phase offers it an excellent start, as the soil is damp yet warming, which aids root development. Transplanting in this season grants nodding wakerobin the benefit of cooler, yet progressively longer days, ensuring minimal stress and maximal recovery and growth potential. Experienced gardeners agree, this season offers nodding wakerobin the comfort of establishing itself before the intensity of summer growth, aligning perfectly with its natural cycle to flourish.
How Much Space Should You Leave Between Nodding Wakerobin Plants?
For nodding wakerobin, it's crucial to ensure sufficient distance between individual plants. We advise positioning each plant approximately 1-2 feet (30-61 cm) apart. This provides ample room for each plant to develop and thrive. Happy gardening!
What is the Best Soil Mix for Nodding Wakerobin Transplanting?
Quality soil is essential! A rich, well-draining soil is perfect for nodding wakerobin. We recommend incorporating compost or a foundational fertilizer before planting. Remember, a healthy beginning leads to a beautiful plant!
Where Should You Relocate Your Nodding Wakerobin?
Placement, placement, placement! Nodding wakerobin thrives in areas with partial to full shade. Excessive sunlight may dehydrate your plant. Aim for a spot with bright, indirect light for the healthiest growth.
What Equipments Should You Prepare Before Transplantation Nodding Wakerobin?
Shovel or Spade
To excavate the nodding wakerobin plant from its original spot and to dig a new hole at the intended location.
Gardening Gloves
To safeguard your hands while handling soil and the plant.
Gardening Fork
To loosen the earth surrounding the root system.
Watering Can
To hydrate the plant both prior to and following its relocation.
Wheelbarrow or Bucket
To transport the plant from its initial position to the new one without harming the roots.
Mulch
To insulate the plant from heat and cold, and to help retain soil moisture.
Support Stakes (if needed)
To offer the plant stability in its new environment until its roots become established.
How Do You Remove Nodding Wakerobin from the Soil?
How Do You Remove Nodding Wakerobin from the Soil?
From Ground: Thoroughly water the nodding wakerobin plant a few hours before beginning the transplanting process. This will help keep the roots moist during relocation and can simplify the digging process. Use a shovel or fork to create a wide trench around the plant, being careful not to cut into the root ball. Once the trench is sufficiently wide and deep, gently lift the plant from the ground by carefully working the spade beneath it.From Pot: If the nodding wakerobin plant is in a container, water it well, then turn the pot sideways and gently tap it to loosen the plant. Carefully pull on the base of the plant to remove it. Try to keep the soil around the roots intact.From Seedling Tray: Water the seedlings, then use a small spoon or similar tool to lift them from the tray, ensuring as much soil as possible remains around the roots.
Step-by-Step Guide for Transplanting Nodding Wakerobin
Plant Preparation
Prepare the nodding wakerobin plant for relocation by watering it thoroughly before you begin the transplanting process. This will help keep the roots moist, which in turn, will lessen transplant shock.
Digging
Use your shovel or spade to excavate a hole in the new planting site. The hole should be twice as wide as the root ball of the nodding wakerobin plant and equally deep.
Transplanting
Carefully place the nodding wakerobin plant into the hole, ensuring that the top of the root ball is level with the ground surface.
Fill the Hole
Backfill the hole with the removed soil, making sure to cover all the roots. Gently firm the soil around the plant with your hands.
Watering
Provide the nodding wakerobin plant with a generous amount of water, thoroughly saturating the soil surrounding it.
Mulching
After watering, spread a thin layer of mulch around the base of the nodding wakerobin plant. This will assist in maintaining soil moisture and deterring weed growth.
How Do You Care For Nodding Wakerobin After Transplanting?
Watering
After relocating the nodding wakerobin plant, water it consistently and ensure the soil remains uniformly moist, but not waterlogged. This will aid the plant in recovering from transplant shock.
Rehydration
Some plants may droop after transplanting due to water loss. If this occurs, do not worry; continue to water regularly and resist the urge to overwater.
Protection
Until the nodding wakerobin plant is well-established, shield it from harsh weather conditions such as strong winds or intense sun.
Growth Monitoring
Carefully observe the development of the nodding wakerobin plant. If the plant exhibits signs of stress like yellowing or dropping leaves, it may require more attention, such as increased or decreased watering, or potentially a new location.
Troubleshooting Common Issues with Nodding Wakerobin Transplantation.
When is the optimal time to transplant nodding wakerobin?
The ideal period to transplant nodding wakerobin is during late spring to early summer (S1-S2). This allows the plant time to adjust to its new surroundings before winter's arrival.
How should I prepare the soil for transplanting nodding wakerobin?
Before transplanting nodding wakerobin, ensure the soil is rich, well-drained, yet moist. Incorporating compost or organic matter can significantly enhance soil conditions for nodding wakerobin to flourish.
What should be the correct spacing when planting nodding wakerobin?
For successful growth, space nodding wakerobin bulbs approximately 1 to 2 feet (approx. 30-60 cm) apart. This ample space allows each plant to grow without competing for resources.
How deep should I plant nodding wakerobin bulbs during transplanting?
When planting nodding wakerobin, position the bulbs roughly 3 inches (7.6 cm) deep in the soil. This depth enables the bulb to root securely while still receiving sufficient sunlight for growth.
Do I need to water nodding wakerobin immediately after transplanting?
Yes, watering the nodding wakerobin right after transplanting ensures the soil around the roots is moist and helps to minimize any transplant shock.
How do I protect transplanted nodding wakerobin from pests?
Apply organic deterrents or use mesh covers to safeguard your nodding wakerobin transplant from common pests. If issues persist, you can consult a local nursery or extension service.
What should I do if the nodding wakerobin looks wilted or sick after transplanting?
Ensure the plant is adequately watered and the soil drains properly. If it doesn't improve, consider applying a gentle organic fertilizer. If conditions persist, consult a local nursery or extension service.
Should I trim nodding wakerobin after transplanting?
Trimming is not typically necessary immediately after transplanting. Allow nodding wakerobin time to adapt to its new location before considering pruning or trimming.
How long does it take for nodding wakerobin to bloom after transplanting?
Nodding wakerobin generally takes about two to three years to flower after being transplanted. However, the plant requires proper care, including regular watering and pest protection.
Is it possible to transplant nodding wakerobin in winter?
While not ideal, nodding wakerobin can be transplanted in winter. However, ensure the plant is well-protected against extreme cold or any harsh winter conditions.



