How to Transplant Star clover?
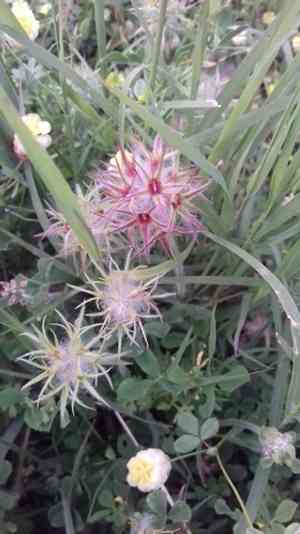
For star clover, the ideal period for relocation spans from mid-spring through its concluding stages, leveraging mild climatic conditions for superior integration. Select a sun-drenched location featuring soil that drains effectively. Careful manipulation aids in successful transplantation.
Preparations Required Before Relocating Star Clover
Optimal Timing for Star Clover Relocation?
The best time to move star clover is after winter's cold recedes but before summer's heat, typically during spring. Placing star clover in your garden as the ground warms provides ideal conditions for root development and robust growth. This timely action helps star clover benefit from longer days and mild temperatures, crucial for its vitality and flowering.
Recommended Spacing Between Star Clover Plants?
When arranging your star clover, aim for a separation of 4-6 inches (10-15 cm). This provides sufficient room for development and prevents overcrowding!
Ideal Soil Mixture for Star Clover Transplantation?
For star clover, prepare a well-draining loamy soil, enriched with compost as a foundational fertilizer. This will supply your star clover with the necessary nutrients for a strong beginning!
Where to Replant Your Star Clover?
Choose a sunny spot for your star clover, as they flourish with ample daylight. Ensure the site gets at least 6 hours of direct sunlight daily to encourage healthy development!
Equipment Needed Before Transplanting Star Clover
Gardening Gloves
To safeguard your hands while handling soil and plants.
Trowel
For digging and moving star clover young plants.
Watering Can
To thoroughly water the plant before and after its transfer.
Shovel or Spade
For extracting star clover plants from the ground with minimal root disturbance.
Garden Fork
To loosen the soil around the plant without harming its root systems.
Pruning Shears
For trimming any dead or excessive foliage.
Plant Label
To identify star clover in its new location.
Wheelbarrow or Bucket
For transporting the removed plant and soil.
Rooting Hormone (optional)
To aid root growth in the new spot, if necessary.
How to Extract Star Clover from the Soil?
How to Extract Star Clover from the Soil?
From Ground: Water star clover thoroughly to moisten the soil. Dig a wide circle around the plant with a shovel or spade, being careful not to cut through roots. Angle the spade under the root ball and gently lift the plant from the ground.From Pot: Tip the container sideways, gently tap, or apply pressure to release star clover. Support the plant by its root ball and carefully slide it out. If roots have encircled the container, gently untangle them before transplanting.From Seedling Tray: Water the seedlings to dampen the soil. Use a trowel or your fingers to carefully lift each star clover seedling by its leaves, not the delicate stem, to prevent damage.
Step-by-Step Guide for Relocating Star Clover
Preparation
Ensure you are transplanting star clover at the correct time, typically during the cooler hours of early morning or evening to prevent transplant shock.
Digging a Hole
With the spade or trowel, dig a hole slightly larger than the star clover's root ball, allowing roots to spread easily.
Plant Positioning
Place star clover in the center of the hole. The top of the root ball should be level with the surrounding soil surface.
Backfilling
Gently backfill the hole with the excavated soil, filling around star clover's root ball. Firm the soil to eliminate air pockets but avoid excessive compaction.
Watering
Immediately after transplanting, thoroughly water star clover to settle the soil and hydrate the roots.
Support
If star clover is weak or top-heavy, gently stake it to provide support until its roots are established.
Pruning
Trim any damaged or overly long roots before planting, and prune back excessive growth to balance root loss and top growth.
Post-Transplant Care for Star Clover
Mulching
Apply a layer of organic mulch around star clover to help retain moisture, regulate soil temperature, and reduce weed competition.
Monitoring
Check star clover daily for signs of water stress or wilting leaves; adjust care as needed.
Staking
If you used a stake for support, periodically check and gently adjust ties to ensure they are not constricting growth.
Pruning
In the following weeks, snip off any dead or yellowing leaves to encourage new growth.
Feeding
Wait for star clover to establish before applying any plant food, then choose a balanced, slow-release fertilizer according to the plant's specific requirements.
Resolving Common Star Clover Transplantation Issues
Why are my star clover seedlings wilting after transplanting?
Wilting can be due to shock or insufficient watering. Keep the soil consistently moist but not waterlogged, and shield the plants from strong winds or extreme temperatures post-transplant.
What's the best way to space star clover when transplanting?
For optimal growth, space your star clover at intervals of 4-6 inches (10-15 cm) apart. This spacing allows sufficient room for growth and air circulation.
Can I transplant star clover in early spring?
Transplanting star clover is most successful from mid to late spring, ensuring the soil has warmed sufficiently for the plant's growth needs.
How deep should I plant star clover seedlings?
Plant seedlings so the root ball is level with the soil surface; planting too deep or shallow can stress the plant and hinder its establishment.
What should I do if my star clover isn't thriving post-transplant?
Ensure proper sunlight, water, and spacing. If these are optimal, consider a soil test to check for nutrient levels and adjust your care accordingly.
What type of soil is best for transplanting star clover?
Use well-drained, fertile soil. Amending with compost can improve soil structure and provide essential nutrients for star clover's growth.
How much sunlight does transplanted star clover need?
Position star clover in a location where it can receive full to partial sunlight for healthy development.
Is it necessary to fertilize star clover after transplanting?
If your soil is nutrient-rich, additional fertilizer may not be necessary. Otherwise, a balanced, slow-release fertilizer can support new growth.
How do I protect my star clover from pests after transplanting?
Regularly inspect your star clover for signs of pests and treat them with appropriate organic or chemical controls promptly.
Can overwatering affect my transplanted star clover?
Overwatering can lead to root rot or fungal infections. Water when the top inch (2.5 cm) of the soil feels dry to the touch.



