How to Transplant Vogel's tephrosia?
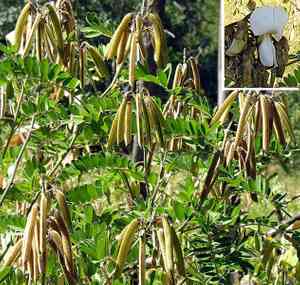
Vogel's tephrosia flourishes when relocated between the beginning and end of spring, owing to advantageous climatic conditions. Select a bright, adequately draining spot. When transferring from a container to the earth, proceed with care to prevent harm to the roots. A successful shift is guaranteed with patience.
What Preparations are Needed Before Transplanting Vogel's Tephrosia?
What is the Ideal Time for Transplanting Vogel's Tephrosia?
The most opportune period for relocating vogel's tephrosia is during the initial to mid-spring months. This timing ensures the ground has adequately warmed, fostering root growth, while avoiding the rigors of summer heat. The mild temperatures and increased rainfall typical of spring provide prime conditions for adaptation and development.
How Much Space Should You Leave Between Vogel's Tephrosia Plants?
For relocating vogel's tephrosia, ensure a separation of 12-24 inches (30-60 cm) between each plant to provide ample room for their development and flourishing.
What is the Best Soil Mix for Vogel's Tephrosia Transplanting?
Prepare well-draining soil rich in organic material for vogel's tephrosia. Incorporate a foundational fertilizer suitable for perennials, such as compost or a balanced slow-release nutrient.
Where Should You Relocate Your Vogel's Tephrosia?
Select a bright location for vogel's tephrosia, as they flourish in full sun. Aim for a spot that receives at least 6-8 hours of direct sunlight daily.
What Equipments Should You Prepare Before Transplantation Vogel's Tephrosia?
Gardening Gloves
To safeguard your hands while handling the soil and plant material.
Garden Shovel or Spade
To excavate broad trenches and assist in lifting the plant from its initial spot.
Hand Trowel
For precise adjustments and creating holes at the new planting site.
Watering Can or Hose
To hydrate the plant prior to and following its relocation.
Pruning Shears
To trim any damaged roots or stems during the transfer process.
Mulch
To aid in maintaining soil moisture after the transplant.
How Do You Remove Vogel's Tephrosia from the Soil?
How Do You Remove Vogel's Tephrosia from the Soil?
From Ground: First, irrigate the vogel's tephrosia plant to moisten the earth. Then, excavate a wide trench around the plant using a shovel or spade, ensuring the plant's root ball remains intact. Carefully work the spade beneath the root ball to lift the plant from its original position.From Pot: Water the vogel's tephrosia plant thoroughly. Gently tap the container's sides and bottom to loosen the soil. Carefully tilt the pot and slide the plant out while supporting the root ball with your hand.From Seedling Tray: Water the young plants well. Use a hand trowel or your fingers to gently lift each seedling from the tray, holding by the leaves rather than the stem to prevent harm.
Step-by-Step Guide for Transplanting Vogel's Tephrosia
Preparation
Ensure you have chosen a suitable location with adequate sunlight for your vogel's tephrosia plant. Have all your tools and supplies ready.
Digging the Transplant Hole
Excavate a hole at the new planting site that is twice as wide and the same depth as the root ball of your vogel's tephrosia plant.
Transplanting
Position the vogel's tephrosia plant into the hole, making sure the top of the root ball is level with the surrounding ground. Backfill the hole with soil and gently press down to eliminate air pockets.
Watering
Thoroughly water the relocated vogel's tephrosia plant to help settle the soil around its roots.
Mulching
Apply a layer of organic material around the base of the vogel's tephrosia plant to help retain moisture and regulate soil temperature.
How Do You Care For Vogel's Tephrosia After Transplanting?
Watering
Keep the soil around the vogel's tephrosia consistently damp, but not waterlogged, for the initial few weeks post-transplant to aid in establishing robust roots.
Pruning
Trim any damaged foliage or stems using pruning shears to encourage healthy growth and lessen stress on the plant.
Monitoring
Regularly inspect the vogel's tephrosia plant for indications of stress such as wilting or yellowing leaves and adjust care as necessary.
Support
For larger vogel's tephrosia plants, consider adding stakes or supports to help the plant remain upright during its establishment phase.
Troubleshooting Common Issues with Vogel's Tephrosia Transplantation.
When is the best time to transplant vogel's tephrosia?
It's ideal to relocate vogel's tephrosia from early to late spring for optimal outcomes.
How should I prepare the soil for transplanting vogel's tephrosia?
Ensure well-draining, fertile soil. Incorporate compost to enrich the planting area.
What spacing is ideal for transplanting vogel's tephrosia?
Plant vogel's tephrosia with a separation of 12-24 inches (30-60 cm) between each plant.
How deep should I plant vogel's tephrosia seedlings?
Plant vogel's tephrosia seedlings at the same depth they were previously growing.
What is the optimal temperature for transplanting vogel's tephrosia?
Relocate vogel's tephrosia when the temperature is consistently above 50°F (10°C).
How do I water vogel's tephrosia after transplanting?
Thoroughly water vogel's tephrosia after transplanting and keep soil consistently moist, but not waterlogged.
Should I fertilize vogel's tephrosia after transplanting?
Apply a balanced fertilizer a few weeks after transplanting to support growth.
How do I handle transplant shock in vogel's tephrosia?
Reduce stress by keeping the soil moist, providing partial shade, and avoiding immediate fertilization.
How to choose the right spot for transplanting vogel's tephrosia?
Select a sunny or partially shaded area with well-draining soil for relocating vogel's tephrosia.
Can I transplant vogel's tephrosia during a hot day?
Avoid relocating vogel's tephrosia on hot days; early morning or late afternoon is best.



