How to Transplant Sterculia ceramica?
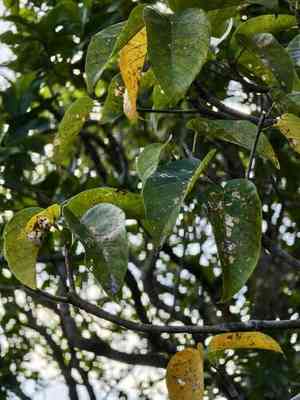
Sterculia ceramica, a perennial species, flourishes most effectively when relocated from the beginning of early winter through its conclusion. This period guarantees the least amount of root disturbance. Select a site with full sun exposure or partial shade, making certain the soil drains efficiently for peak development.
What Preparations are Needed Before Transplanting Sterculia Ceramica?
What is the Ideal Time for Transplanting Sterculia Ceramica?
The best time to move sterculia ceramica is from the beginning to the end of winter. This timing reduces stress from relocation and encourages root growth before spring's active development. By transplanting sterculia ceramica during this period, you ensure the plant is well-positioned to flourish in the upcoming growing season, enhancing its lifespan and vitality.
How Much Space Should You Leave Between Sterculia Ceramica Plants?
Ensure sterculia ceramica has sufficient room to expand by placing each plant 30-40 feet (9-12 meters) apart. This spacing will provide adequate air circulation and space for root expansion.
What is the Best Soil Mix for Sterculia Ceramica Transplanting?
Prepare soil that drains well with a pH ranging from slightly acidic to neutral. Improve the soil with compost or a balanced foundational fertilizer, ensuring a nourishing start for sterculia ceramica.
Where Should You Relocate Your Sterculia Ceramica?
Select a sunny location for moving sterculia ceramica. This plant grows best in full sun, receiving 6-8 hours of direct sunlight daily.
What Equipments Should You Prepare Before Transplantation Sterculia Ceramica?
Gardening Gloves
To safeguard your hands while handling soil and the plant.
Shovel or Spade
For excavating the planting hole and extracting the sterculia ceramica from its initial spot.
Hand Trowel
To aid in loosening soil around the plant.
Pruning Shears
For trimming any damaged or overgrown roots prior to transplanting.
Watering Can or Hose
To hydrate the plant before and after its relocation.
Mulch
To help maintain soil moisture post-transplant.
How Do You Remove Sterculia Ceramica from the Soil?
How Do You Remove Sterculia Ceramica from the Soil?
From Ground: First, water the sterculia ceramica plant to moisten the soil. Then, dig a wide trench around the plant using a shovel or spade, ensuring the plant's root ball remains intact. Carefully work the spade under the root ball to lift the plant from its original location.From Pot: Water the sterculia ceramica plant thoroughly to moisten the soil. Gently tilt the pot and tap the sides to loosen the soil. Slide the plant out of the pot, supporting the root ball with one hand to prevent damage.From Seedling Tray: Water the seedlings to make the soil easier to work with. Using a hand trowel or your fingers, gently lift each seedling out, making sure to keep the roots intact and undisturbed.
Step-by-Step Guide for Transplanting Sterculia Ceramica
Site Preparation
Ensure the new planting spot for your sterculia ceramica is ready beforehand, with the hole dug wide and deep enough to accommodate the root ball. Make sure the soil is well-prepared to support the plant.
Removing the Plant
Follow the removal process according to whether the sterculia ceramica is coming from the ground, a pot, or a seedling tray to lift the plant carefully and preserve the root system.
Placing in New Location
Position the sterculia ceramica in the center of the prepared hole. Ensure the top of the root ball is level with or slightly above the surrounding soil surface.
Backing Filling
Refill the hole with soil, gently compacting it around the root ball to eliminate air pockets. Be careful not to pack the soil too tightly.
Watering
Water the sterculia ceramica plant thoroughly after transplanting to help settle the soil and reduce transplant shock.
Mulching
Apply a layer of mulch around the base of the sterculia ceramica to help conserve moisture and regulate soil temperature.
How Do You Care For Sterculia Ceramica After Transplanting?
Watering
Keep the soil around the sterculia ceramica consistently moist, but not waterlogged, for the first few weeks after transplanting to help establish strong roots.
Monitoring
Regularly check the sterculia ceramica plant for any signs of transplant shock such as wilting or yellowing leaves. Prompt attention can ensure the plant recovers quickly.
Pruning
Trim any damaged or dying leaves to encourage new growth and reduce stress.
Support
If the sterculia ceramica is tall or top-heavy, consider staking it to provide support while it establishes in its new location.
Troubleshooting Common Issues with Sterculia Ceramica Transplantation.
When is the best time to transplant sterculia ceramica?
Transplant sterculia ceramica ideally from early winter to late winter to ensure the best growth conditions.
What is the ideal spacing for transplanting sterculia ceramica?
Space sterculia ceramica plants 30-40 feet (9-12 meters) apart for adequate room to grow and thrive.
How deep should the planting hole be for sterculia ceramica?
Dig a hole twice the width of the root ball and of equal depth for sterculia ceramica.
What soil type is best for sterculia ceramica?
Use well-draining, loamy soil enriched with organic compost to support sterculia ceramica's root development.
How should I water sterculia ceramica after transplanting?
Water sterculia ceramica thoroughly immediately after transplanting and maintain consistent moisture for the first few weeks.
Should I add fertilizers when transplanting sterculia ceramica?
Incorporate a balanced slow-release fertilizer at transplanting time to help establish sterculia ceramica's roots.
What temperature range is suitable for sterculia ceramica post-transplant?
Sterculia ceramica thrives in temperatures between 60-75°F (15-24°C) post-transplant to ensure healthy growth.
How to handle root-bound sterculia ceramica before transplanting?
Gently loosen the roots of root-bound sterculia ceramica without damaging them before placing in the new location.
Should I prune sterculia ceramica before transplanting?
Prune any damaged or dead branches before transplanting sterculia ceramica to reduce stress on the plant.
How can I reduce transplant shock in sterculia ceramica?
To minimize shock, water sterculia ceramica well, avoid root disturbance, and provide light shade initially.



