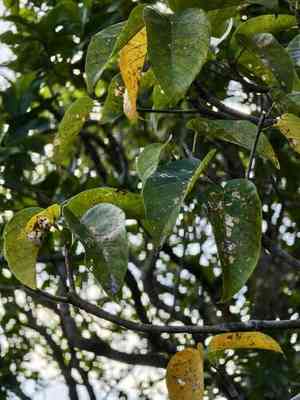
Sterculia ceramica (Sterculia ceramica)
Also known as: Ceram Sterculia
Sterculia ceramica is well-suited for tropical forests due to its sturdy trunk and expansive, palmate leaves that efficiently capture sunlight even in shaded areas. The tree's unique fruit pods, which rattle when ripe, facilitate effective seed dispersion. These adaptations enable it to compete successfully for light and nutrients in the dense forest environment, ensuring its survival and proliferation.
In This Article
Attributes of Sterculia ceramica
Lifespan
Perennial
Plant Type
Tree
Plant Height
15-20 meters
Spread
10-15 meters
Leaf Color
Green
Flower Size
5-7 cm
Flower Color
Red
Images of Sterculia ceramica
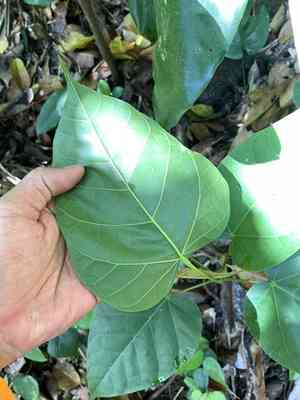
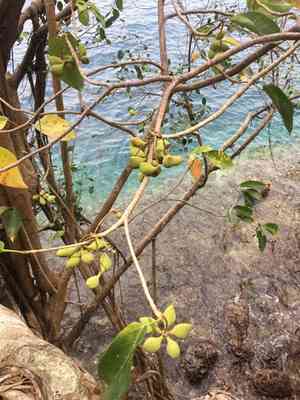
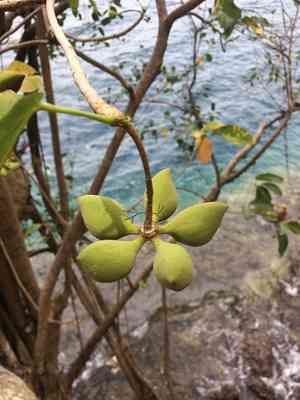
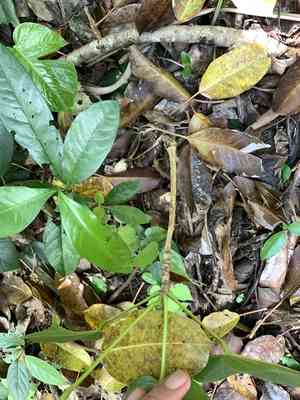
Quickly Identify Sterculia ceramica
1
Look for large, lobed leaves and bright red flowers. The tree usually has a thick trunk and can grow quite tall, making it stand out in tropical forests.
Scientific Classification of Sterculia ceramica
Phylum
Vascular plants
Class
Dicotyledons
Order
Malvales
Family
Mallow
Genus
Tropical chestnuts
Species
Sterculia ceramica
Planting and Growing of Sterculia ceramica
Care Difficulty
Moderate
Watering Schedule
Every 2 days
Sunlight Requirements
Partial sun
Sunshine Duration
6-10 hours
Ideal Temperature
75-85℉
Soil Type
Potting Mix, Peat Mix
Soil pH
6.5-7.5
Fertilizer Type
Balanced
Pruning Season
Spring, Summer
Pruning Area
Branches, Leaves
Pruning Frequency
2 times a year
Repotting Season
Spring
Pot Type
Plastic, Ceramic
 How to Water Sterculia ceramica?
The watering amount for Sterculia ceramica should be around 500 milliliters per session. This plant prefers moderate moisture levels, so ensure the top 2 inches of soil are dry before watering again. Water until you see a slight drainage from the pot's bottom, ensuring the roots receive adequate moisture without becoming waterlogged.
What are the symptoms of an underwatered Sterculia ceramica?
›
What should I do if my Sterculia ceramica is not getting enough water?
›
What are the symptoms of an overwatered Sterculia ceramica?
›
How to save an overwatered Sterculia ceramica?
›
 What Are the Sunlight Requirements for Sterculia ceramica?
Sterculia ceramica prefers partial to full sun, which allows healthy growth and vibrant leaf development. Ideal lighting ensures optimal photosynthesis and strengthens overall plant vitality.
What is the best lighting condition for Sterculia ceramica?
›
How can I achieve the ideal lighting for this plant?
›
What benefits does Sterculia ceramica gain from ideal lighting?
›
 What Is the Ideal Temperature Range for Sterculia ceramica?
For optimal growth, Sterculia ceramica thrives best in warm temperatures ranging from 75°F to 85°F. This range ensures adequate metabolism, photosynthesis, and development, aligning closely with its native tropical environment. Maintaining such stable temperatures promotes healthy foliage and overall plant vitality.
 What Soil is Best for Sterculia ceramica?
Sterculia ceramica thrives in nutrient-rich soil, which provides essential minerals and nutrients necessary for robust growth. The ample provision of nutrients supports vibrant foliage and strong root systems, enhancing the plant's ability to adapt to varying environmental conditions. This plant demands well-drained soil to prevent waterlogging, which can lead to root rot and other diseases. Ensuring proper drainage allows roots to breathe and absorb nutrients effectively, promoting healthy growth and reducing the risk of fungal infections. Maintaining moderately moist soil is crucial for Sterculia ceramica. This balance facilitates optimal hydration without oversaturating the roots, ensuring consistent nutrient uptake and minimizing stress during dry spells.
 How to Fertilize Sterculia ceramica?
Sterculia ceramica requires a moderate amount of fertilizer, as it's a hardy plant. Use around 1/2 cup of well-balanced liquid fertilizer per watering session, ensuring it's diluted to half the recommended strength. This helps in promoting healthy growth without overwhelming the plant.
 How to Prune Sterculia ceramica?
Begin by sterilizing your pruning shears to prevent disease spread. Start pruning by removing any dead, diseased, or damaged branches. Cut back to a healthy bud or lateral branch. Ensure you maintain the plant's natural shape by following its contour while pruning. This will help in maintaining aesthetics and structural strength. Afterward, thin out dense inner branches to improve sunlight penetration and air circulation. Finally, inspect your work and make any final adjustments to balance the plant's form.
More About Pruning Techniques→
 How to Propagate Sterculia ceramica plant?
1
Collect mature seeds from the pods of the plant. Ensure that the seeds are fully ripened to improve the chances of successful germination. Store them in a cool, dry place until you are ready to plant.
2
Select healthy stems and use pruning shears to cut segments about 10-15 cm long. Ensure each cutting has at least a couple of nodes. Remove leaves from the lower part to focus energy on root development.
3
Place seeds in seed trays with a suitable potting mix. For cuttings, dip the base in rooting hormone powder to encourage root growth, then plant them in prepared soil. Maintain a moist, warm environment to encourage growth.
 How to Repot Sterculia ceramica plant?
1
Sterculia ceramica should be repotted when it shows signs of becoming root-bound. If you notice roots growing out of the drainage holes or circling at the pot's surface, it's time to consider repotting. Additionally, if you observe stunted growth, it could mean the roots need more space.
2
Opt for a pot that is one size larger than the current one, with adequate drainage holes. A slightly larger pot allows for root expansion without overwhelming the plant. Selecting a pot with proper drainage helps prevent waterlogging and potential root rot, supporting healthy growth.
3
Use a well-draining potting mix, ideally one suited for tropical plants. This type of soil ensures that water flows through easily, reducing the risk of root rot. A mixture containing peat, perlite, and sand is ideal for providing the right balance of moisture retention and aeration.



