How to Transplant Stenostelma capense?
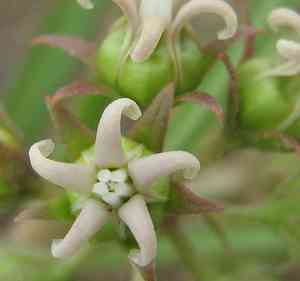
Stenostelma capense, a resilient perennial, flourishes when relocated as summer's warmth begins. Choose a location offering full sun to partial shade, featuring soil that drains effectively, to foster vigorous development. Handle with care to reduce root disturbance, promoting successful integration.
Essential Preparations Before Relocating Stenostelma Capense?
Optimal Timing for Stenostelma Capense Relocation?
The best time for moving stenostelma capense is from early to mid-summer. This period allows the plant to establish its root system in warm soil, encouraging robust development and improved survival rates. The abundant sunlight and moderate rainfall typical of these months facilitate a smoother transition, ensuring stenostelma capense flourishes in its new spot.
Required Spacing Between Stenostelma Capense Specimens?
When relocating stenostelma capense, position the plants approximately 12-15 inches (30-38 cm) apart. This provides ample room for their growth and development without becoming overcrowded.
Ideal Soil Blend for Stenostelma Capense Relocation?
Prepare a well-draining soil mixture containing sand and compost for stenostelma capense. Prior to planting, enrich the soil with a balanced base fertilizer to supply the necessary nutrients for healthy growth.
Selecting a New Location for Your Stenostelma Capense?
Choose a sunny location for moving stenostelma capense. This plant thrives in full sun, so ensure it receives at least 6-8 hours of direct light daily.
Equipment Needed Before Relocating Stenostelma Capense?
Gardening Gloves
To safeguard your hands while handling soil and the plant.
Shovel or Spade
For excavating the plant and preparing a new planting site.
Watering Can
To hydrate the plant and its new location.
Garden Fork
To loosen the soil surrounding the plant.
Wheelbarrow
For moving the plant, if necessary.
Mulch
To help maintain moisture and stabilize soil temperature at the new spot.
Pruners
To trim any damaged roots or foliage.
How to Extract Stenostelma Capense from the Ground?
How to Extract Stenostelma Capense from the Ground?
From Ground: Thoroughly water the stenostelma capense plant to moisten the surrounding soil. Use a shovel or spade to dig a wide trench around the plant, ensuring the root ball remains intact. Gently work the spade beneath the root ball and carefully lift the plant from the ground.From Pot: Water the stenostelma capense plant to help the soil cohere. Carefully tilt the pot on its side and slide the plant out, supporting the root ball as you do so.From Seedling Tray: Water the stenostelma capense seedlings to dampen the soil. Gently press the bottom of each cell to release the seedlings. Use a small tool, such as a spoon, to lift each seedling from the tray.
Step-by-Step Guide for Relocating Stenostelma Capense
Site Preparation
Prepare the new planting area by digging a hole twice as wide and as deep as the root ball of your stenostelma capense. Loosen the soil at the base of the hole.
Plant Placement
Position the stenostelma capense in the center of the hole at the same depth it was previously growing. Backfill the hole around the root ball with the original soil, gently firming it down as you proceed.
Watering
Thoroughly water the newly relocated stenostelma capense immediately after planting to help settle the soil and remove air pockets.
Mulching
Apply a layer of mulch around the base of the stenostelma capense, keeping it a few inches away from the stem to prevent rot.
Post-Relocation Care for Stenostelma Capense?
Watering
Maintain consistent moisture in the soil around the stenostelma capense, avoiding sogginess, especially during the initial weeks after relocation to aid in root establishment.
Monitoring
Regularly inspect the stenostelma capense for signs of stress like wilting or yellowing leaves, and adjust care as needed. Provide extra water during dry periods.
Weed Control
Remove any weeds near the stenostelma capense to reduce competition for nutrients and water.
Protection
Shield the stenostelma capense from harsh weather conditions, such as frost or excessive sun, until it is well-established.
Resolving Common Issues with Stenostelma Capense Relocation.
When is the best time to relocate stenostelma capense?
Relocating stenostelma capense is ideal in early to mid-summer when the plant is most adaptable.
How much space should I allow between each stenostelma capense?
Stenostelma capense plants should be spaced 12-15 inches (30-38 cm) apart for optimal growth.
What soil should I use for relocating stenostelma capense?
Use well-draining, loamy soil enriched with compost to ensure healthy stenostelma capense growth.
How do I prepare stenostelma capense for relocation?
Water stenostelma capense thoroughly the day before, gently loosen the root ball, and trim damaged roots.
Should I fertilize stenostelma capense after relocation?
Yes, apply a balanced fertilizer after relocating stenostelma capense to support root establishment.
How do I prevent transplant shock in stenostelma capense?
Minimize root disturbances, water immediately after replanting, and keep stenostelma capense shaded for a few days.
How deep should I plant stenostelma capense after relocation?
Plant stenostelma capense at the same depth it was previously growing to avoid stress.
What watering schedule should I follow post-relocation for stenostelma capense?
Water stenostelma capense deeply and consistently, ensuring the soil stays moist but not waterlogged.
Can I relocate stenostelma capense during hot weather?
Avoid relocating stenostelma capense during extreme heat; opt for cooler early to mid-summer weather.
Should I mulch around stenostelma capense after relocation?
Apply a layer of mulch around stenostelma capense to retain soil moisture and regulate temperature.



