How to Propagate Stenostelma capense?
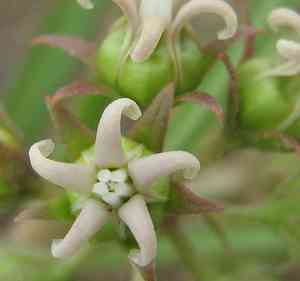
Stenostelma capense, a robust species within the Apocynaceae family, thrives with proper care. To achieve successful propagation, plant seeds in a growing medium that drains effectively and receives abundant sunlight. Keep the soil consistently moist, but avoid saturation to avert root decay, and utilize a seed tray for uniform distribution. Select a location that is both warm and protected to enhance sprouting. Periodically inspect for infestations and ailments to guarantee vigorous growth.
When Is the Optimal Time to Propagate Stenostelma Capense?
Propagation Type
Sowing
Propagation Season
Spring
What Tools Are Utilized for Stenostelma Capense Propagation?
Seed Trays
Seed trays are crucial for planting stenostelma capense seeds. They aid in organizing seeds and offer a controlled setting for germination. Employing seed trays also simplifies the management of consistent watering and lighting conditions.
Seed Compost
Seed compost is specifically formulated for optimal seed planting. It typically features a fine texture and balanced nutrients, enabling stenostelma capense seeds to sprout and develop robust root systems without excessive richness, which could harm delicate seedlings.
Transparent Dome or Plastic Cover
A clear dome or plastic cover helps create a miniature greenhouse effect, maintaining the humidity and warmth vital for successful stenostelma capense seed germination. Keeping the environment moist prevents seeds from drying and promotes consistent sprouting.
Spray Bottle
A spray bottle offers a gentle method to water seeds without disturbing the soil. Misting the soil ensures that stenostelma capense seeds remain uniformly moist without becoming waterlogged, which is crucial for their germination and initial growth.
Heating Mat
A heating mat positioned beneath seed trays helps maintain steady soil temperatures, which benefits stenostelma capense seed germination, especially if ambient temperatures are not ideal. Consistent warmth can significantly boost germination rates.
Grow Lights
If natural sunlight is insufficient, grow lights can supply the necessary light spectrum for stenostelma capense seedlings to grow strong and healthy. They ensure seedlings receive adequate light to prevent them from becoming leggy and weak.
Labels
Labels are simple yet vital for tracking the various stages of stenostelma capense propagation. They help prevent confusion and ensure each group of seedlings receives appropriate care based on their developmental stage.
How to Propagate Stenostelma Capense?
Propagation Type
Easy
How to Care for Your Newly Propagated Stenostelma Capense?
How to Care for Your Newly Propagated Stenostelma Capense?
Once stenostelma capense seedlings have emerged, gradually introduce them to their intended planting site by exposing them to outdoor conditions for a few hours daily. Ensure they receive ample sunlight and maintain consistent moisture levels. Carefully transplant the seedlings to avoid disturbing roots, and continue to nourish them with appropriate watering and nutrient provisions suited to their growth needs. Monitoring for pests and diseases will also ensure healthy development.
Common Mistakes to Avoid When Propagating Stenostelma Capense
Overwatering
Excessive moisture can lead to root rot and fungal diseases, impeding the rooting process and potentially killing the plant.
Improper Soil Mixture
Using soil that retains too much water or lacks proper aeration can hinder root development and result in poor propagation success.
Insufficient Light
Placing cuttings in areas with inadequate illumination can lead to weak, elongated growth and a failure to root properly.
Using Poor Quality Cuttings
Taking cuttings from diseased, weak, or unhealthy parent plants can decrease the likelihood of successful propagation.
Neglecting Humidity
Failing to provide a humid environment can cause cuttings to dry out, leading to unsuccessful rooting.
Tips For Propagating Stenostelma Capense
Well-Draining Soil
Utilize a soil mix that drains effectively, allowing excess water to escape, thereby reducing the risk of root rot and promoting robust root growth.
Moderate Watering
Water the cuttings just enough to keep the soil moist but not saturated, ensuring they have sufficient moisture without drowning.
Bright, Indirect Light
Position cuttings in a spot that receives bright but diffused light to encourage strong, healthy growth without scorching the delicate new roots.
Healthy Parent Plant
Select cuttings from a vigorous and disease-free parent plant to enhance the chances of successful rooting and propagation.
Maintain Humidity
Create a humid environment around the cuttings by using a propagator, plastic bag, or regular misting to prevent them from drying out and to encourage root development.



