How to Transplant Fleshy starwort?
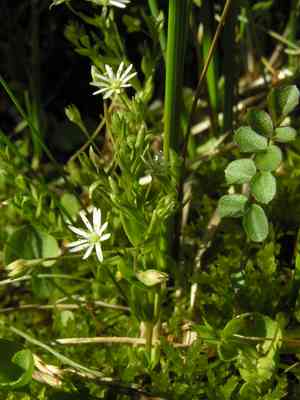
Fleshy starwort flourishes when relocated during the mild shift from late autumn to early winter or the vibrant phase of early to mid-spring. Select a site offering full sun to partial shade with soil that drains effectively for peak development. Handle with caution during these periods of the year.
Essential Preparations Before Moving Fleshy Starwort?
Optimal Period for Relocating Fleshy Starwort?
The ideal window for transplanting fleshy starwort spans from early to mid-spring or from late autumn to early winter. These periods offer moderate temperatures and ample moisture, facilitating root establishment with minimal strain. Relocating during these times ensures the plant experiences prime growth conditions and lessens the chance of transplant shock, fostering healthier, more vigorous development.
Required Spacing Between Fleshy Starwort Plants?
When relocating fleshy starwort, ensure a separation of 6-12 inches (15-30 cm) between them. This provides ample room for development and prevents overcrowding, guaranteeing sufficient airflow and nutrient access.
Best Soil Mixture for Fleshy Starwort Relocation?
Utilize well-draining soil with a pH range of 6.0 to 7.0 for fleshy starwort. Prior to planting, incorporate compost or a balanced slow-release granular fertilizer to enrich the soil and establish a strong foundation for growth.
Where to Replant Your Fleshy Starwort?
Select a location that receives partial to full sun for transplanting fleshy starwort. They flourish best with 4-6 hours of daily sunlight. In hot climates, some afternoon shade can offer protection from intense sun exposure.
Tools to Prepare Before Transplanting Fleshy Starwort?
Gardening Gloves
To safeguard your hands while handling soil and the plant.
Shovel or Spade
For excavating around the plant and preparing the ground.
Garden Trowel
Useful for precise digging and extracting the root ball.
Watering Can or Hose
To hydrate the plant before and after relocation.
Pruning Shears
To trim any damaged roots or stems as necessary.
Wheelbarrow
Beneficial for moving the plant to its new spot if required.
How to Extract Fleshy Starwort from the Ground?
How to Extract Fleshy Starwort from the Ground?
From Ground: First, moisten the fleshy starwort plant to dampen the soil. Next, dig a wide trench around the plant using a shovel or spade, ensuring the plant's root ball remains intact. Carefully work the spade beneath the root ball to lift the plant from its original position.From Pot: Thoroughly water the fleshy starwort plant. Gently tap the sides and bottom of the pot to loosen the soil. Carefully tip the pot and slide out the plant, supporting the root ball as you do so.From Seedling Tray: Water the fleshy starwort seedlings well before removal. Gently loosen the soil around each seedling with a garden trowel or your fingers. Carefully lift each seedling by its leaves, avoiding damage to the delicate stems and roots.
Step-by-Step Guide for Relocating Fleshy Starwort
Plant Preparation
Water the fleshy starwort thoroughly the day before transplanting to minimize shock and ensure the root ball stays cohesive.
Digging the Hole
Excavate a hole in the new site that is twice as wide and equally deep as the root ball of fleshy starwort. This provides ample space for root expansion and establishment.
Transplanting
Position the fleshy starwort into the hole, ensuring it sits at the same depth as in its previous location. Backfill with soil, gently firming it around the roots to eliminate air pockets.
Watering In
Thoroughly water the fleshy starwort after transplanting to help settle the soil and hydrate the plant. Aim for a slow, deep watering.
Post-Transplant Care for Fleshy Starwort?
Watering
Maintain consistent moisture around the fleshy starwort, avoiding sogginess, for the initial weeks after transplanting to aid in root establishment.
Mulching
Apply a layer of mulch around the base of fleshy starwort, keeping it clear of the stem. This helps retain moisture and regulate soil temperature.
Monitoring
Regularly inspect the plant for signs of distress, such as wilting or yellowing leaves. Adjust watering and provide additional support as needed.
Pruning
Trim any damaged or dead leaves and stems to encourage healthy growth and reduce stress on the relocated fleshy starwort.
Resolving Common Issues with Fleshy Starwort Relocation.
When is the best time to transplant fleshy starwort?
The optimal time is from early to mid-spring or late fall to early winter.
How much space should I leave between transplants?
Space each plant 6-12 inches (15-30 cm) apart for ideal growth.
How should I prepare the soil?
Enrich the soil with compost and ensure good drainage before transplanting.
Should I water fleshy starwort immediately after transplanting?
Yes, water thoroughly right after transplanting to help them settle.
What kind of sunlight does fleshy starwort need?
Ensure fleshy starwort receives partial to full sunlight for robust growth.
How deep should I plant fleshy starwort transplants?
Plant at the same depth they were growing previously to prevent stress.
What should I do if fleshy starwort appears wilted after transplanting?
Check soil moisture levels and water sufficiently. Avoid waterlogging.
How can I reduce transplant shock for fleshy starwort?
Transplant on a cool, cloudy day and keep roots as undisturbed as possible.
Why are the leaves of fleshy starwort turning yellow after transplanting?
Yellowing can indicate poor drainage or overwatering. Adjust watering practices accordingly.
Can I use mulch around fleshy starwort after transplanting?
Yes, applying mulch helps retain moisture and regulate soil temperature.



