How to Transplant Northern bur-reed?
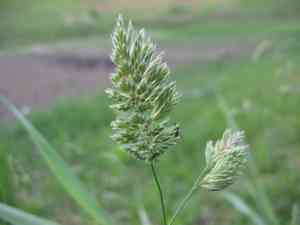
The ideal period for relocating northern bur-reed spans from the robust development phase of late spring through mid-summer, facilitating superior root integration. Select a damp location that receives either partial or complete sunlight. Sufficient distance between plants is crucial for northern bur-reed's development.
Essential Preparations Before Relocating Northern Bur-reed
Optimal Period for Relocating Northern Bur-reed?
The best time for moving northern bur-reed is from early to mid-summer. This timeframe offers ideal warmth and stable conditions, fostering robust root development. Transplanting northern bur-reed during this period capitalizes on prime temperatures and daylight, vital for its successful adjustment and growth in a new environment. It's a gentle reminder that establishing northern bur-reed in its new home during this active growth phase can lead to thriving, vigorous plants all year long.
Recommended Spacing Between Northern Bur-reed Plants?
Let's find the ideal placement for your northern bur-reed! Aim to provide these beautiful plants ample room to thrive by spacing them 18-24 inches (45-60 cm) apart. This ensures they have sufficient space to grow and display their lush foliage!
Ideal Soil Mixture for Northern Bur-reed Transplantation?
For your northern bur-reed, a strong start is crucial! Select a rich, loamy soil to welcome them. Before planting, enrich their new home with a balanced, slow-release fertilizer to give them a happy, healthy beginning.
Optimal Location for Relocating Your Northern Bur-reed?
Your northern bur-reed enjoys soaking up the sun but also tolerates some shade. Find them a sunny to partially shaded spot where they can absorb the light. This will help your northern bur-reed flourish and bring you abundant green delight!
Tools Required Before Transplanting Northern Bur-reed
Shovel or Spade
To carefully excavate the northern bur-reed plant without harming its root ball.
Gardening Gloves
To safeguard your hands while handling soil and the plant.
Watering Can or Hose
For hydrating the northern bur-reed plant during and after the relocation process.
Wheelbarrow or Plant Tray
For moving the northern bur-reed plant from its original spot to the new planting site.
Organic Mulch
For insulating and safeguarding the root area post-transplantation.
How to Extract Northern Bur-reed from the Ground?
How to Extract Northern Bur-reed from the Ground?
From Ground: Gently moisten the soil around the northern bur-reed to soften it. Use a shovel or spade to dig a trench around the plant, being careful not to harm the root system. Angle the shovel beneath the root ball and carefully lift to remove the plant from the earth.From Pot: Water the northern bur-reed thoroughly before transplanting to make the soil pliable. Tilt the pot sideways and gently tap or squeeze it to help loosen the root ball. Carefully ease the northern bur-reed out by the base of the main stem, supporting the root ball as you guide the plant out.From Seedling Tray: Dampen the soil to facilitate smoother transplanting. With a spoon or a small gardening tool, scoop out each northern bur-reed seedling along with its surrounding soil, taking care to preserve the root ball's integrity.
Step-by-Step Guide for Relocating Northern Bur-reed
Prepare the New Location
Dig a hole in the ground large enough to accommodate the northern bur-reed's root ball. The hole should be twice the width of the root ball and the same depth to ensure the plant sits at its original level.
Plant Positioning
Carefully place the northern bur-reed in the center of the prepared hole. Backfill around the root ball with soil, gently tamping it down to remove air pockets and ensure good root-to-soil contact.
Post-Transplant Watering
Immediately after planting, thoroughly water the northern bur-reed to settle the soil around the roots and help alleviate transplant shock.
Mulch Application
Spread a layer of organic mulch around the base of the northern bur-reed, but not directly against the stem, to help retain moisture, regulate soil temperature, and reduce weed growth.
Post-Transplant Care for Northern Bur-reed
Monitoring
Regularly observe the northern bur-reed plant for signs of stress like wilting or discolored leaves and address any issues promptly.
Supports
If the northern bur-reed plant appears unstable in its new spot, provide stakes to help it stay upright while its roots establish.
Watering
Maintain consistent moisture around the northern bur-reed, especially during the initial weeks after transplanting. However, be cautious not to overwater, which could lead to root rot.
Resolving Common Issues with Northern Bur-reed Transplantation.
Why is my northern bur-reed struggling after transplant?
Ensure you transplanted during late spring to mid-summer, when northern bur-reed has the best chance to establish. Also, check for proper soil moisture and avoid waterlogging.
How much space do northern bur-reed plants need when transplanting?
Space northern bur-reed about 18-24 inches (45-60 cm) apart. This gives them enough room to grow and access nutrients without competition.
What kind of soil is best for transplanting northern bur-reed?
Transplant northern bur-reed into rich, loamy soil that retains moisture well but also provides adequate drainage to prevent root rot.
How deep should I plant northern bur-reed when transplanting?
The root ball of northern bur-reed should be planted level with the soil surface, ensuring the crown isn't buried to prevent rot.
Can northern bur-reed be transplanted in full sun or shade?
Transplant northern bur-reed to a spot with full sun to partial shade, ensuring they receive ample light without scorching during peak hours.
What's the correct way to water northern bur-reed after transplanting?
Water northern bur-reed generously after transplanting to settle the soil around the roots, then maintain consistent moisture without overwatering.
How do I prepare the site before transplanting northern bur-reed?
Clear the area of weeds, loosen the soil, and add compost to enrich and enhance soil quality for northern bur-reed success.
Why are the leaves of my northern bur-reed yellowing after transplant?
Yellow leaves can indicate over or under-watering. Ensure the soil is moist but not waterlogged and adjust irrigation accordingly.
What should I do if my northern bur-reed shows signs of shock post-transplant?
Minimize stress by keeping the soil moist and protect northern bur-reed from extreme elements. It may take time to adapt to the new location.
Can I fertilize northern bur-reed right after transplanting?
Wait a few weeks before fertilizing northern bur-reed so the roots can first settle. Use a balanced fertilizer to encourage healthy growth.



