How to Transplant Elmleaf Goldenrod?
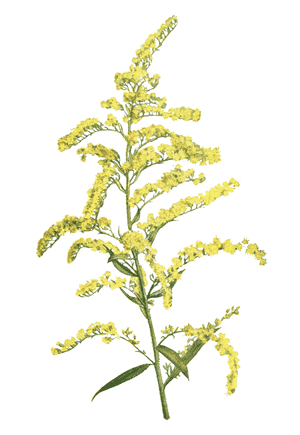
The most favorable period for relocating elmleaf Goldenrod extends from the onset of early spring through the conclusion of late spring, and also encompasses the tranquil interval from late fall into mid-winter. Choose a site featuring soil that drains effectively and receives partial to full sunlight to foster its robust development. Should it be necessary, amend the soil with organic matter to enhance its vigor.
What Preparations are Needed Before Transplanting Elmleaf Goldenrod?
What is the Ideal Time for Transplanting Elmleaf Goldenrod?
For elmleaf Goldenrod, the prime period for relocation spans from early spring's thaw to late spring's bloom, or from late autumn's calm through mid-winter's mildness. Moving elmleaf Goldenrod during these windows allows its root system to establish when soil is damp and temperatures are moderate, encouraging vigorous development. This careful timing ensures elmleaf Goldenrod benefits from ideal natural conditions to flourish in its new spot, enhancing your garden's appeal.
How Much Space Should You Leave Between Elmleaf Goldenrod Plants?
When preparing to plant your elmleaf Goldenrod, aim for a separation of roughly 18-24 inches (45-60 cm). This provides each elmleaf Goldenrod sufficient room to thrive without crowding, promoting robust development.
What is the Best Soil Mix for Elmleaf Goldenrod Transplanting?
Prepare a welcoming bed for your elmleaf Goldenrod by selecting well-drained soil rich in organic matter. Before transplanting, blend in a balanced, slow-release fertilizer to give your elmleaf Goldenrod a nourishing start in its new home.
Where Should You Relocate Your Elmleaf Goldenrod?
Locate a sunny to partly shaded area in your garden for elmleaf Goldenrod. These plants flourish best with ample lightâapproximately 6 hours of direct sunlight daily will make your elmleaf Goldenrod most content!
What Equipments Should You Prepare Before Transplantation Elmleaf Goldenrod?
Gardening Gloves
To safeguard your hands while handling soil and plants.
Shovel or Spade
For digging and moving elmleaf Goldenrod.
Garden Fork
To loosen the earth around the plant's root structure.
Trowel
For minor adjustments and excavating smaller holes.
Watering Can or Hose
To hydrate the plant before and after its relocation.
Wheelbarrow or Garden Cart
To transport the elmleaf Goldenrod and soil.
Pruning Shears
For trimming any damaged roots or foliage.
How Do You Remove Elmleaf Goldenrod from the Soil?
How Do You Remove Elmleaf Goldenrod from the Soil?
From Ground: First, moisten the elmleaf Goldenrod plant to dampen the soil. Next, excavate a wide trench around the plant using a shovel or spade, ensuring the plant's root ball stays intact. Carefully work the spade beneath the root ball to lift the plant from its original spot.From Pot: Hydrate the elmleaf Goldenrod in its container to ensure the soil is moist. Turn the pot sideways, grasp the plant by its base, and gently tap the bottom to dislodge the plant. Gradually ease the root ball out while supporting the plant.From Seedling Tray: Dampen the soil in the seedling tray. Use a trowel or your fingers to carefully lift the elmleaf Goldenrod seedling, ensuring a good amount of soil remains around the roots to protect them during transit.
Step-by-Step Guide for Transplanting Elmleaf Goldenrod
Preparation
Ensure all necessary tools are ready and the new planting site is prepared before beginning the removal of elmleaf Goldenrod.
Root Ball Care
When excavating elmleaf Goldenrod, create a broad perimeter to prevent root damage. The root ball should be kept as whole as possible.
Transplant Hole
Dig a hole in the new location that is twice as wide and equally as deep as the root ball. Loosen the surrounding soil with a garden fork.
Placement
Position elmleaf Goldenrod in the center of the hole at the same depth it was previously growing. Orient the plant in the desired direction for its continued growth.
Filling In
Backfill the hole with the excavated soil. Gently firm down the soil around the base of elmleaf Goldenrod to eliminate air pockets.
Watering
Water elmleaf Goldenrod thoroughly after planting to settle the soil and hydrate the roots. Use a watering can or hose to gently saturate the area.
How Do You Care For Elmleaf Goldenrod After Transplanting?
Mulching
Apply mulch around the base of elmleaf Goldenrod, leaving some space around the stem, to help retain moisture and regulate soil temperature.
Initial Watering
Water elmleaf Goldenrod daily for the first week unless there is significant rainfall. Afterwards, reduce to once or twice a week depending on weather conditions.
Checking Stakes and Supports
If the elmleaf Goldenrod is tall or planted in a windy area, check that stakes or supports are secure without damaging the plant.
Observation
Monitor elmleaf Goldenrod for signs of stress such as wilted or discolored leaves, and adjust care as necessary.
Troubleshooting Common Issues with Elmleaf Goldenrod Transplantation.
Why is my elmleaf Goldenrod wilting after transplanting?
Wilting post-transplant may indicate shock. Keep the soil moist and avoid direct sunlight for a few days to help it recover.
How often should I water elmleaf Goldenrod after transplanting?
Water elmleaf Goldenrod generously after transplanting and then regularly, ensuring the soil remains lightly moist but not waterlogged.
What's the best time to transplant elmleaf Goldenrod for successful establishment?
Transplant elmleaf Goldenrod in the gentler weather of early to mid-spring or from late fall to mid-winter for optimal root development.
How deep should I plant elmleaf Goldenrod when transplanting?
The root ball should sit level with the soil surface. Ensuring proper depth promotes healthy growth.
Could I be spacing elmleaf Goldenrod incorrectly when transplanting?
Yes, elmleaf Goldenrod should be spaced about 18-24 inches (45-60 cm) apart to provide ample room for growth.
Can I propagate elmleaf Goldenrod during transplanting?
Yes, you can divide elmleaf Goldenrod during transplanting. Gently separate the root mass into smaller sections to propagate.
What type of sunlight is needed for elmleaf Goldenrod after transplanting?
After transplanting, elmleaf Goldenrod thrives in full to partial sun. Gradually acclimate it to prevent shock.
Why are elmleaf Goldenrod's leaves turning yellow after being transplanted?
Yellowing may be due to transplant shock, overwatering, or nutrient deficiencies. Ensure proper care and soil conditions.
What soil amendments are necessary when transplanting elmleaf Goldenrod?
Incorporate compost or well-rotted manure to enrich and improve soil structure, benefiting elmleaf Goldenrod's growth.
Is mulching beneficial for elmleaf Goldenrod after transplanting?
Mulching helps to retain moisture, regulate soil temperature, and reduce weed competition. Apply a 2-3 inch (5-7.5 cm) layer around elmleaf Goldenrod.



