How to Transplant Grayleaf skullcap?
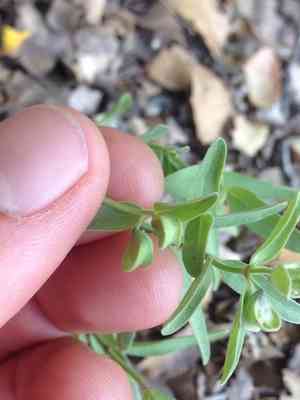
Grayleaf skullcap flourishes when relocated during the revitalizing period of early to late spring, benefiting from moderate temperatures and vigorous root development. Select a bright location with soil that drains effectively. Exercise caution to lessen the impact of transplant stress.
What Preparations are Needed Before Transplanting Grayleaf Skullcap?
What is the Ideal Time for Transplanting Grayleaf Skullcap?
Grayleaf skullcap is best moved from early to late spring, when the ground is damp and temperatures are mild, promoting root development. Relocating during this period helps grayleaf skullcap adapt before summer heat, lessens transplant stress, and encourages vigorous growth. Ensure proper soil preparation and watering after moving for optimal outcomes.
How Much Space Should You Leave Between Grayleaf Skullcap Plants?
When relocating grayleaf skullcap, ensure plants are spaced 12-18 inches (30-45 cm) apart. This provides ample room for each plant to grow and flourish without being overcrowded.
What is the Best Soil Mix for Grayleaf Skullcap Transplanting?
For grayleaf skullcap, utilize well-draining soil enriched with organic material. Prepare the soil by incorporating a balanced fertilizer like a 10-10-10 (N-P-K) to supply essential nutrients.
Where Should You Relocate Your Grayleaf Skullcap?
Select a spot that gets full to partial sun, ideally 6-8 hours of daylight daily. This will ensure grayleaf skullcap receives the energy it requires to thrive.
What Equipments Should You Prepare Before Transplantation Grayleaf Skullcap?
Gardening Gloves
To safeguard your hands while handling soil and plants.
Shovel or Spade
For excavating the hole and trench around the plant.
Trowel
To assist in lifting the plant and working with the soil.
Watering Can or Hose
To hydrate the plant before and after relocation.
Pruning Shears
To trim any damaged sections if necessary.
Mulch
To aid in moisture retention and weed suppression around the plant.
How Do You Remove Grayleaf Skullcap from the Soil?
How Do You Remove Grayleaf Skullcap from the Soil?
From Ground: First, water the grayleaf skullcap plant to moisten the soil. Then, dig a wide trench around the plant using a shovel or spade, ensuring the plant's root ball stays intact. Carefully work the spade beneath the root ball to lift the plant from its original spot.From Pot: Water the grayleaf skullcap plant thoroughly to facilitate removal. Gently tap the sides and bottom of the pot to loosen the soil. Invert the pot, supporting the plant with your hand, and slide the plant out. If stuck, use a trowel to carefully loosen the edges.From Seedling Tray: Water the seedlings well before extraction. Use a trowel or your fingers to carefully lift each seedling from the tray, taking care to keep as much soil around the roots as possible. Be gentle to avoid harming the delicate roots.
Step-by-Step Guide for Transplanting Grayleaf Skullcap
Site Preparation
Choose a location with adequate sunlight and room for your grayleaf skullcap plant to reach its full size. Prepare the soil by loosening it and ensuring it is free of weeds and debris.
Digging the Hole
Excavate a hole in the prepared spot that is twice the width and the same depth as the grayleaf skullcap's root ball. This will give the roots ample space to spread and grow.
Positioning the Plant
Place the grayleaf skullcap in the hole, making sure it sits at the same depth as it was in its previous location. The top of the root ball should be level with the surrounding soil.
Backfilling the Hole
Refill the hole with soil, gently pressing it down around the roots to eliminate air pockets. Be careful not to compact the soil too much as this can impede root growth.
Watering
Water the grayleaf skullcap thoroughly after transplanting to help settle the soil and provide initial moisture for the roots.
Adding Mulch
Apply a layer of mulch around the base of the plant to help retain moisture, regulate soil temperature, and reduce weed growth. Keep the mulch a few inches away from the stem to prevent rot.
How Do You Care For Grayleaf Skullcap After Transplanting?
Watering
Keep the soil around the grayleaf skullcap consistently moist, but not waterlogged, for the first few weeks after transplanting to help establish strong roots.
Monitoring
Observe the plant for signs of transplant shock, such as wilting or yellowing leaves. Provide additional care and attention if needed.
Protection
If transplanting in hot weather, consider providing temporary shade for a few days to shield the grayleaf skullcap from direct sunlight. During cold snaps, use protective coverings to guard the plant.
Pruning
Remove any damaged or dead parts after the plant has settled. This redirects the plant's energy into healthy growth.
Troubleshooting Common Issues with Grayleaf Skullcap Transplantation.
When is the best time to transplant grayleaf skullcap?
Early to late spring is ideal for relocating grayleaf skullcap for optimal growth.
How far apart should I space grayleaf skullcap plants?
Space grayleaf skullcap plants 12-18 inches (30-45 cm) apart for best growth and health.
How do I prepare the soil before transplanting grayleaf skullcap?
Loosen soil to a depth of 10 inches (25 cm) and mix in compost for nutrient enrichment.
What should I do if grayleaf skullcap plants wilt after transplanting?
Water the plants thoroughly and ensure they are not exposed to direct sunlight initially.
How deep should I plant grayleaf skullcap during transplanting?
Plant grayleaf skullcap at the same depth they were growing in their original containers.
How to avoid root damage while transplanting grayleaf skullcap?
Gently remove grayleaf skullcap from the container and avoid disturbing the root ball.
Do I need to prune grayleaf skullcap before transplanting?
Prune any damaged or dead foliage to encourage healthy growth after transplanting.
What is the ideal watering schedule for newly transplanted grayleaf skullcap?
Water grayleaf skullcap immediately after transplanting and keep the soil moist but not waterlogged for the first few weeks.
Can I use fertilizer when transplanting grayleaf skullcap?
Use a balanced, slow-release fertilizer sparingly to avoid burning the roots of newly transplanted grayleaf skullcap.
Grayleaf skullcap leaves are yellowing post-transplant; whatâs wrong?
Yellowing can indicate overwatering, poor drainage, or transplant shock. Adjust watering and check soil conditions.



