How to Transplant Green bulrush?
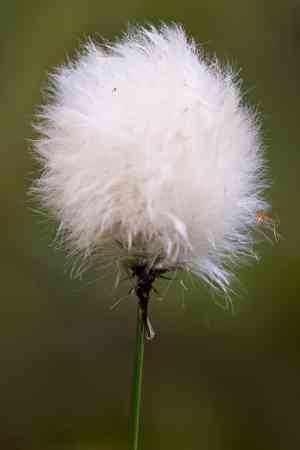
The optimal period for relocating green bulrush spans from the gentle warmth of late spring through the peak of mid-summer, fostering vigorous development. Select a location that retains moisture and receives abundant sunlight. Exercise caution during handling to preserve the root system's wholeness, facilitating smooth establishment.
What Preparations are Needed Before Transplanting Green Bulrush?
What is the Ideal Time for Transplanting Green Bulrush?
The optimal period for relocating green bulrush spans from the onset of late spring through the core of the summer season. Moving green bulrush during this timeframe capitalizes on mild temperatures and gentle weather, enabling roots to firmly establish without the stress of frost or intense heat. This timing guarantees a smooth transition for green bulrush, with nature's full backing. By transplanting within this fertile window, you provide green bulrush with extended daylight for photosynthesis, boosting growth and vigorâa definite step toward a lush, flourishing presence in its new environment.
How Much Space Should You Leave Between Green Bulrush Plants?
When preparing for your green bulrush, aim to provide ample room for growth by spacing them 18-24 inches (45-60 cm) apart. This ensures each plant has sufficient space to develop while creating a dense, full appearance in your garden.
What is the Best Soil Mix for Green Bulrush Transplanting?
For green bulrush, prepare a location with nutrient-rich, well-draining soil. Incorporate organic compost as a foundational fertilizer to give the roots a healthy start. The ideal pH should range between 5.5 and 7, which supports vigorous growth.
Where Should You Relocate Your Green Bulrush?
Select a location with full sun to partial shade for your green bulrush, as they flourish with a balance of sunlight and shade throughout the day. An area receiving morning sun and afternoon shade would be perfect!
What Equipments Should You Prepare Before Transplantation Green Bulrush?
Gardening Gloves
To safeguard your hands while handling soil and plants.
Shovel or Spade
For excavating the plant from its current spot and digging the new transplanting hole.
Garden Fork
To loosen the soil around the plant's root system and aid in its removal.
Watering Can or Hose
To hydrate the plant before extraction and after replanting.
Wheelbarrow or Garden Cart
To move the plant from its original position to the new site.
Pruning Shears
To trim any damaged roots or foliage prior to transplanting.
Burlap or Tarp
To wrap the root ball during transit to prevent dehydration.
How Do You Remove Green Bulrush from the Soil?
How Do You Remove Green Bulrush from the Soil?
From Ground: First, moisten the green bulrush plant to soften the soil. Next, dig a wide trench around the plant using a shovel or spade, ensuring generous space around the root ball. Carefully work the shovel beneath the root ball to lift the plant from the ground without harming the roots.From Pot: Begin by watering the green bulrush plant to facilitate the root ball's removal from the pot. Tilt the pot sideways and gently tap its sides to loosen the root ball. Gradually slide the plant out, supporting the base and stem.From Seedling Tray: Water the green bulrush plant's soil to simplify removal. Use a garden fork or spoon to lift the seedling along with its root mass from the tray, exercising caution as roots and shoots are delicate at this stage.
Step-by-Step Guide for Transplanting Green Bulrush
Prepare the Plant
Thoroughly water the green bulrush plant before beginning the transplant to ensure root hydration.
Root and Plant Health
Inspect the root ball for any damaged roots and use pruning shears to trim as needed. Check for any damaged or diseased foliage and prune to maintain plant health.
Prepare New Location
Dig a hole slightly wider and of the same depth as the root ball. Loosen the soil at the bottom of the hole with a garden fork to encourage root growth.
Placement
Carefully position the green bulrush plant in the center of the hole, ensuring it is at the same soil level as it was in its original location.
Backfilling
Gently refill the hole with soil, lightly tamping down to eliminate air pockets. Avoid compacting the soil too firmly, as this can impede root growth.
Watering
After transplanting, water the green bulrush plant thoroughly to settle the soil around the roots and help mitigate transplant shock.
Mulching
Apply a layer of mulch around the base of the green bulrush plant to help retain moisture and regulate soil temperature.
How Do You Care For Green Bulrush After Transplanting?
Regular Watering
Maintain consistent moisture levels around the green bulrush plant, ensuring the soil is damp but not waterlogged, which can promote root rot.
Monitor Growth
Observe the green bulrush plant's growth and development, looking for indicators of stress such as wilting or discolored leaves, which may signal a need for care adjustments.
Pest and Disease Management
Regularly inspect the green bulrush plant for any signs of pests and diseases. Address such issues promptly with appropriate treatments, if necessary.
Seasonal Care
As a perennial, the green bulrush plant will require varied care throughout the seasons. Prepare for winter by adding extra mulch and reducing watering as the plant enters dormancy.
Troubleshooting Common Issues with Green Bulrush Transplantation.
Why is my green bulrush not thriving after transplant?
Ensure it was transplanted in late spring to mid-summer, the optimal period for root establishment, and it's spaced correctly at 18-24 inches (45-60 cm).
What's the best spacing for green bulrush to encourage growth?
For optimal growth, space them 18-24 inches (45-60 cm) apart to allow for adequate air circulation and sunlight penetration.
Should I water green bulrush frequently after transplanting?
Water generously immediately after transplanting, then adjust to moderate watering ensuring the soil remains moist but not waterlogged.
How deep should I plant the green bulrush root ball?
Plant the root ball level with the soil surface, not too deep, to prevent rot and allow for proper root spread.
Why are the leaves of my green bulrush turning yellow post-transplant?
Yellowing could indicate overwatering or poor drainage. Ensure the soil is moist but drains well and reduce watering slightly.
Can I fertilize green bulrush immediately after transplanting?
Wait a few weeks after transplanting before fertilizing to allow roots to settle without burning them with immediate fertilizer application.
Why is my green bulrush wilting after I transplanted it?
Wilting can occur from transplant shock. Minimize root disturbance during transplanting, keep the soil moist, and provide shade if necessary.
How much sun does green bulrush need after transplanting?
Provide green bulrush with full sunlight to partial shade post-transplant to help it establish but protect from intense sun initially.
Do I need to prune green bulrush after transplanting?
Prune only damaged or dead foliage to direct energy to root establishment. Avoid extensive pruning until the plant is established.
Is it normal for green bulrush to look dormant after transplanting?
Some dormancy appearance is normal as green bulrush adjusts to its new location. Ensure proper care and it should recover as it establishes.



