How to Transplant Menzies' burnet?
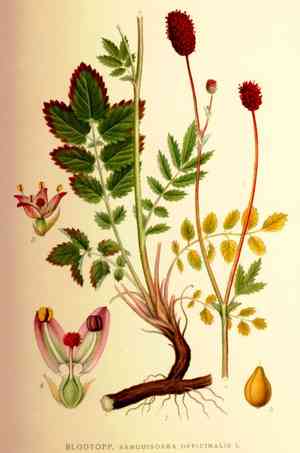
Relocating menzies' burnet is most effective from early to mid-spring, facilitating superior root development. Select a site offering full sun to partial shade and possessing good drainage for thriving cultivation. Bear in mind, careful manipulation improves the likelihood of a successful transplant.
What Preparations are Needed Before Transplanting Menzies' Burnet?
What is the Ideal Time for Transplanting Menzies' Burnet?
The optimal period for relocating menzies' burnet spans from early to late spring. This timeframe benefits from mild temperatures and increased precipitation, which minimize transplant stress and encourage root development. Moving plants during this season guarantees robust growth and improved adaptation, enhancing the plant's overall vitality and lifespan.
How Much Space Should You Leave Between Menzies' Burnet Plants?
When relocating menzies' burnet, ensure each plant is spaced approximately 18-24 inches (45-60 cm) apart. This spacing provides sufficient air circulation and room for healthy development.
What is the Best Soil Mix for Menzies' Burnet Transplanting?
Prepare a well-draining soil, rich in organic matter, for menzies' burnet. A suitable foundational fertilizer is a balanced, slow-release type. Incorporating compost or well-rotted manure can also supply vital nutrients.
Where Should You Relocate Your Menzies' Burnet?
Select a location for menzies' burnet that receives full sun to partial shade. They thrive in full sunlight, but some afternoon shade can be beneficial in hotter climates. Ensuring they receive about 4-6 hours of daily sunlight should be adequate.
What Equipments Should You Prepare Before Transplantation Menzies' Burnet?
Gardening Gloves
To safeguard your hands while handling soil and plants.
Shovel or Spade
For excavating around the plant and preparing the new planting site.
Watering Can or Hose
To hydrate the plant before and after its relocation.
Wheelbarrow (Optional)
To effortlessly move larger plants.
Pruning Shears (Optional)
To trim any damaged roots or foliage.
Trowel
For making precise hole adjustments and managing smaller plants.
How Do You Remove Menzies' Burnet from the Soil?
How Do You Remove Menzies' Burnet from the Soil?
From Ground: First, moisten the menzies' burnet plant's soil. Then, using a shovel or spade, dig a wide trench around the plant, ensuring the root ball remains intact. Carefully work the spade beneath the root ball to lift the plant from its original spot.From Pot: Gently water the menzies' burnet plant to loosen the soil. Tilt the pot sideways and lightly tap it to release the root ball. If the plant is resistant, use a trowel to carefully loosen the soil around the edges before extracting the plant.From Seedling Tray: Ensure the tray's soil is damp. Carefully lift each seedling by gently squeezing the tray's bottom while supporting the plant with your other hand. Aim to keep the root system intact during the transfer.
Step-by-Step Guide for Transplanting Menzies' Burnet
Hole Preparation
Excavate a hole in the new site that is twice as wide and equally deep as the root ball of your menzies' burnet. This facilitates easy root expansion.
Plant Placement
Position the menzies' burnet plant in the hole, ensuring the root ball is level with the surrounding soil. Adjust the depth as needed with your trowel.
Backfilling
Refill the hole with soil, gently tamping it down to eliminate air pockets. Confirm the plant is stable and upright.
Watering
Thoroughly water the menzies' burnet plant immediately after transplanting to help settle the soil and remove any remaining air pockets.
Mulching (Optional)
Applying a layer of mulch around the base can aid in retaining soil moisture and regulating temperature.
How Do You Care For Menzies' Burnet After Transplanting?
Watering
Maintain consistent moisture in the soil around the menzies' burnet, avoiding sogginess, for the initial weeks post-transplant to encourage strong root development.
Monitoring
Regularly inspect the menzies' burnet plant for indications of stress, such as wilting or yellowing leaves, and modify care as necessary.
Pruning
Remove any damaged or dead foliage to prompt the plant to prioritize root growth.
Mulching
Maintain a layer of mulch around the plant's base to assist with moisture retention, but prevent the mulch from touching the plant stem to avert rot.
Troubleshooting Common Issues with Menzies' Burnet Transplantation.
When is the best time to transplant menzies' burnet?
Relocate menzies' burnet between early and late spring for optimal growth conditions.
How far apart should menzies' burnet plants be spaced?
Space menzies' burnet plants 18-24 inches (45-60 cm) apart to ensure ample room for growth.
How do I prepare the soil for menzies' burnet?
Ensure well-draining, fertile soil enriched with compost or organic matter for optimal growth.
What should I do if menzies' burnet wilts after transplanting?
Water thoroughly and provide partial shade until the plant adjusts and shows new growth.
How deep should the planting hole be for menzies' burnet?
Dig a hole twice the width and the same depth as the root ball for menzies' burnet.
What is the best way to remove menzies' burnet from its original pot?
Gently squeeze the pot sides, tip it, and carefully slide out the root ball without damage.
How often should I water menzies' burnet after transplanting?
Water menzies' burnet deeply once a week, more frequently during dry spells, until established.
Is it necessary to fertilize menzies' burnet immediately after transplanting?
Avoid immediate fertilization; wait until menzies' burnet shows active new growth before applying a balanced fertilizer.
How do I handle menzies' burnet roots when transplanting?
Gently tease apart tangled roots, trimming any damaged ones to promote healthier growth.
What should I do if menzies' burnet shows signs of transplant shock?
Provide consistent moisture, avoid excessive sun exposure, and wait patiently for recovery.



