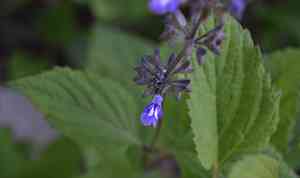
How to Transplant Nettleleaf sage?
For nettleleaf sage, the optimal transplanting window is in the mild conditions of late spring to early summer, as stable weather promotes root establishment. Select a location that receives abundant sunlight and possesses good drainage. Amend the area with compost to provide nettleleaf sage with a strong beginning.
What Preparations are Needed Before Transplanting Nettleleaf Sage?
What is the Ideal Time for Transplanting Nettleleaf Sage?
The optimal period for relocating nettleleaf sage spans from the gentle onset of late spring through the warmth of early summer. This timeframe provides moderate temperatures and suitable soil conditions, promoting robust root development prior to the intense heat of midsummer. Settle these hardy perennials into their new location during this window to observe their vigorous growth, as they benefit from longer days and mild weather, essential for establishing a strong root system. A timely move ensures nettleleaf sage's success, enhancing its growth and flowering potential for the season.
How Much Space Should You Leave Between Nettleleaf Sage Plants?
Greetings! When preparing to move your nettleleaf sage, remember to provide ample room for each plant to flourish. Aim to space them approximately 18-24 inches (45-60 cm) apart. This spacing allows for sufficient growth and air circulation among your beautiful nettleleaf sage plants.
What is the Best Soil Mix for Nettleleaf Sage Transplanting?
To give your nettleleaf sage the best start, select well-draining soil rich in organic matter. Incorporating a balanced, slow-release fertilizer into the soil before planting will aid nettleleaf sage in developing strong roots. Simply follow the fertilizer's instructions for the correct application amount.
Where Should You Relocate Your Nettleleaf Sage?
Your nettleleaf sage thrives in sunlight, so locate a garden spot that receives plenty of it! An area offering full sun for at least 6-8 hours daily would be ideal. This ensures your nettleleaf sage obtains the necessary energy for beautiful growth.
What Equipments Should You Prepare Before Transplantation Nettleleaf Sage?
Gardening Gloves
To safeguard your hands while handling the plant and soil.
Shovel or Spade
To excavate the root ball and prepare the new planting site.
Watering Can or Hose
For hydrating the plant before and after its relocation.
Wheelbarrow or Garden Cart
For moving the plant and soil if required.
Garden Fork
To loosen the soil around the root ball, if necessary.
Stakes and String or Plant Cage
To support nettleleaf sage if it is particularly tall or top-heavy post-transplant.
Pruning Shears
To trim any dead or damaged roots or foliage.
How Do You Remove Nettleleaf Sage from the Soil?
How Do You Remove Nettleleaf Sage from the Soil?
From Ground: Water the nettleleaf sage thoroughly to moisten the soil, facilitating easier removal. Then, carefully dig a wide circle around the plant with a shovel or spade, taking care not to harm the root ball. Gently pry the spade beneath the plant to lift it from its current spot.From Pot: Water the nettleleaf sage well beforehand. Turn the pot on its side and tap the bottom to dislodge the plant. Gently pull the plant by its base while supporting the root ball. If the plant is stuck, use a knife to separate the roots from the pot without causing damage.From Seedling Tray: Water the seedlings to ensure the soil is damp, which will make removal simpler. Use a fork or a small tool to lift the nettleleaf sage out of its cell without harming the roots or stem.
Step-by-Step Guide for Transplanting Nettleleaf Sage
Prepare the Plant
Water the nettleleaf sage in its current location to ensure the soil is moist, which will minimize stress and root damage during extraction.
Remove the Plant
Follow the steps outlined in the 'removal process' to safely extract nettleleaf sage from its current spot, whether in the ground, a pot, or a seedling tray.
Prepare the New Hole
Dig a hole twice as wide and the same depth as the root ball of the nettleleaf sage. Loosen the soil around the edges of the hole to allow for easier root expansion.
Placement
Gently lower nettleleaf sage into the new hole. Ensure it sits at the same soil level as it was previously. If the plant is too deep or too shallow, adjust the soil level at the bottom of the hole.
Backfill
Fill in around nettleleaf sage with soil, gently tamping down to remove air pockets. Be careful not to compact the soil too tightly, as this can hinder water from reaching the roots.
Water Immediately
Thoroughly water nettleleaf sage after transplanting to help settle the soil and hydrate the roots.
Support if Necessary
If nettleleaf sage is top-heavy or tall, use stakes and string or a plant cage to provide additional support and protect it from wind damage or its own weight.
How Do You Care For Nettleleaf Sage After Transplanting?
Monitoring
Regularly check nettleleaf sage for signs of stress, such as wilting or discolored leaves, and address any issues promptly.
Watering
For the initial weeks, keep the soil around nettleleaf sage moist to aid root establishment. Water deeply and consistently, but avoid overwatering to prevent root rot.
Mulching
Apply a 2-inch layer of organic mulch around nettleleaf sage, keeping it away from the plant's base to conserve moisture and maintain stable soil temperatures.
Pruning
Trim any dead or damaged leaves or stems to encourage healthy growth and reduce disease risk.
Supporting
Verify the stability of any stakes or plant cages initially installed and adjust as nettleleaf sage grows and settles into its new location.
Feeding
Avoid fertilizing immediately after transplanting to prevent root burn. Once nettleleaf sage has established, you can begin feeding with a general-purpose fertilizer, following package directions.
Troubleshooting Common Issues with Nettleleaf Sage Transplantation.
What's the best time to transplant nettleleaf sage?
Aim for the ideal period of late spring or early summer when the soil begins to warm.
How far apart should I space nettleleaf sage when transplanting?
Allow each nettleleaf sage ample room to thrive by spacing them approximately 18-24 inches (45-60 cm) apart.
How deep should the hole be for transplanting nettleleaf sage?
Excavate a hole just deep enough for nettleleaf sage's root ball to be level with the soil surface.
Should I water nettleleaf sage immediately after transplanting?
Absolutely! Provide nettleleaf sage with a good drink to help settle the soil and eliminate air pockets.
What kind of sunlight does nettleleaf sage need post-transplant?
Position nettleleaf sage in a location that receives abundant sunlight, ideally full sun, to ensure vigorous growth.
How do I prepare the soil before transplanting nettleleaf sage?
Enrich the soil with compost to boost nutrients before settling nettleleaf sage into its new home.
Can I fertilize nettleleaf sage after transplanting?
Refrain from fertilizing until nettleleaf sage has settled and shows signs of new growth.
What should I do if nettleleaf sage's leaves wilt after transplanting?
Don't worry! Sometimes nettleleaf sage simply needs time to adapt. Ensure consistent moisture and observe for recovery.
How can I protect nettleleaf sage during hot weather post-transplant?
Offer some shade during the hottest parts of the day to help nettleleaf sage acclimate to its new environment.
Why is my nettleleaf sage not flowering after transplanting?
Be patient as nettleleaf sage prioritizes root establishment first. Proper care will soon lead to blooms!


