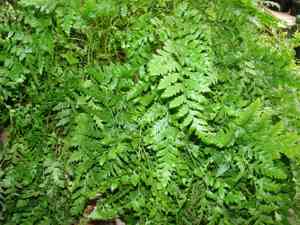
How to Transplant Leatherleaf fern?
The ideal period for relocating leatherleaf fern is in the revitalizing season of spring. This guarantees root establishment in moderate temperatures. Select a dim, damp spot. Advice: Carefully untangle roots to promote expansion.
Essential Preparations Before Relocating Leatherleaf Fern
Optimal Timing for Relocating Leatherleaf Fern?
The start of the growing season, specifically early to mid-spring, presents the best opportunity for relocating leatherleaf fern. This timeframe is perfect as it coincides with the beginning of the plant's natural growth cycle, allowing ample time for root establishment in warming soil before summer's full intensity. Moving leatherleaf fern during this period leverages its vigorous growth phase, ensuring better adaptation and resulting in a flourishing fern with vibrant, strong fronds. By embracing this season, gardeners will delight in seeing their leatherleaf fern thrive in its new location.
Required Spacing Between Leatherleaf Fern Plants?
Prior to relocating leatherleaf fern, ensure proper spacing. Ideally, maintain a distance of approximately 1-2 feet (30-60 cm) between each plant. This provides sufficient room for their growth and development.
Best Soil Mixture for Leatherleaf Fern Relocation?
For leatherleaf fern, a well-draining soil is essential. Incorporating organic materials such as compost or peat moss will enhance its fertility. A slow-release fertilizer, blended into the soil before planting, will establish a nutrient-rich foundation for leatherleaf fern.
Ideal New Location for Your Leatherleaf Fern?
Leatherleaf fern will flourish best in areas receiving filtered sunlight, as direct sun can scorch its leaves. A spot with dappled or partial shade would be perfect for your leatherleaf fern.
Equipment Needed Before Relocating Leatherleaf Fern
Gardening Gloves
To safeguard your hands from soil and minor injuries.
Shovel or Trowel
For excavating the plant without harming its root system.
Garden Spade
To create a new planting hole for the fern.
Pruners
To trim any damaged roots or fronds.
Watering Can or Hose
To hydrate the plant before and after relocation.
Compost
To enrich the soil and ensure the plant receives adequate nutrients.
How to Extract Leatherleaf Fern from the Soil?
How to Extract Leatherleaf Fern from the Soil?
From Ground: Moisten the soil around the leatherleaf fern to facilitate removal. Dig a wide trench around the plant using a shovel, ensuring the root ball remains intact. Carefully work the spade beneath the root ball and gently lift the plant from its spot. It's crucial to preserve as much of the root system as possible for successful relocation.From Pot: Water the leatherleaf fern thoroughly, then, turn the pot on its side and gently pull the plant from its base to slide it out. If it resists, tap the pot's edges to loosen it. Handle the plant by its root ball, not its fronds.From Seedling Tray: Water the seedlings. Slide your fingers under each individual seedling, lifting them from the tray. Handle the plant delicately to avoid damaging its fragile root system.
Step-by-Step Guide for Relocating Leatherleaf Fern
Preparation
Prepare the new planting site for your leatherleaf fern; it should be twice as wide and the same depth as the plant's root ball. Position the garden spade where you intend to plant and press down to cut into the soil. Remove soil to form the hole.
Positioning
Place the leatherleaf fern in the hole with its top surface level with the ground. If needed, add or remove soil to adjust its position correctly.
Backfilling
Refill the hole with soil and compost, gently firming as you go to eliminate air pockets and ensure the root ball is fully covered.
Watering
Water the leatherleaf fern thoroughly once planted. This helps the soil settle around the roots and provides the plants with a good drink to recover from the stress of relocation.
Post-Relocation Care for Leatherleaf Fern
Watering
Keep the soil around leatherleaf fern consistently moist, but not waterlogged, for the initial weeks after relocation. This aids in root establishment in its new environment.
Pest Inspection
Closely monitor the leatherleaf fern for pests or diseases, especially during the first few weeks. If any issues are observed, act promptly to prevent their spread.
Pruning
Remove any dead fronds from the fern to encourage new growth and maintain a neat appearance.
Fertilizer Avoidance
Do not fertilize leatherleaf fern immediately after relocation as this could harm the roots. Wait at least one month before adding any additional nutrients to the soil around the fern.
Resolving Common Issues with Leatherleaf Fern Relocation.
When is the best time of year to relocate leatherleaf fern?
The optimal period for relocating leatherleaf fern is during seasons 'S1-S2', offering the highest chance for successful growth.
What spacing should I maintain when planting multiple leatherleaf fern together?
Approximately 1-2 feet (30-60 cm) of space between leatherleaf fern plants is ideal. This ensures their comfortable growth and expansion.
What to do if leatherleaf fern shows signs of wilting after relocation?
Provide adequate water, but avoid overwatering. Ensure the soil drains well and the plant is not sitting in water. Its root system requires aeration.
What type of soil should I use when relocating leatherleaf fern?
Leatherleaf fern prefers well-drained, humus-rich soil. If your soil is heavy clay or sandy, consider adding organic matter to improve drainage.
How deeply should I plant leatherleaf fern during relocation?
Plant leatherleaf fern at the same depth as it was in its previous location. Planting too deep can suffocate roots; too shallow can cause them to dry out.
How should I prepare leatherleaf fern for relocation?
Before relocating leatherleaf fern, water it thoroughly. This eases the shock of relocation and helps it settle more quickly in the new environment.
Why are my relocated leatherleaf fern leaves turning yellow?
Yellow leaves may indicate overwatering, poor drainage, or nutrient deficiency. Check soil conditions, consider less frequent watering, and possibly use a balanced fertilizer.
Should I prune leatherleaf fern before or after relocating?
It is beneficial to prune any dead or old fronds on leatherleaf fern before relocating. This allows the plant to direct more energy into establishing new roots.
What steps can prevent transplant shock in leatherleaf fern?
Transplant shock can be minimized by selecting the correct time, thoroughly watering the plant before and after moving, and properly preparing the new site.
How long should I wait to fertilize leatherleaf fern after relocating?
Wait approximately 4 weeks (1 month) after relocating leatherleaf fern before applying fertilizer. This allows the plant to adapt to its new surroundings.


