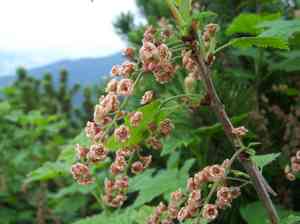
How to Transplant Rock redcurrant?
Relocate Ribes rubrum during the most favorable windows of early to late spring or mid to late autumn to achieve optimal outcomes. Choose a site featuring adequately draining earth and exposure to partial to full solar illumination. Verify that the soil is sufficiently warm to foster robust root establishment.
What Preparations are Needed Before Transplanting Rock Redcurrant?
What is the Ideal Time for Transplanting Rock Redcurrant?
The optimal time for relocating rock redcurrant is during early to late spring or mid to late autumn. These periods ensure the ground is manageable and offer prime conditions for root development prior to harsh weather. Moving them at these times reduces stress, boosts growth, and aids better establishment in the new spot.
How Much Space Should You Leave Between Rock Redcurrant Plants?
When relocating rock redcurrant, ensure each plant is spaced 4 to 6 feet (1.2 to 1.8 meters) apart. This provides ample room for the plants to expand comfortably, promoting robust growth and ease of care.
What is the Best Soil Mix for Rock Redcurrant Transplanting?
Prepare the soil for rock redcurrant by selecting well-draining soil with a pH between 6.0 and 6.5. Incorporate organic compost or a balanced base fertilizer (10-10-10) to enrich the soil before planting for healthy root development.
Where Should You Relocate Your Rock Redcurrant?
Choose a site for rock redcurrant that receives full sun or partial shade. Aim for at least 6 hours of daily sunlight. This ensures the plants get sufficient light for optimal growth and fruit production.
What Equipments Should You Prepare Before Transplantation Rock Redcurrant?
Gardening Gloves
To safeguard your hands while handling soil and plants.
Shovel or Spade
For digging around and lifting the plant from its original spot.
Garden Trowel
For excavating small, precise holes.
Watering Can or Hose
To hydrate the plant before and after relocation.
Pruning Shears
To trim any damaged roots or stems.
Bucket or Container
To transport the plant if necessary.
Mulch
To help retain moisture and regulate soil temperature post-transplant.
How Do You Remove Rock Redcurrant from the Soil?
How Do You Remove Rock Redcurrant from the Soil?
From Ground: First, moisten the rock redcurrant plant to dampen the soil. Then, excavate a wide trench around the plant using a shovel or spade, ensuring the plant's root ball remains intact. Carefully work the spade beneath the root ball to lift the plant from its original location.From Pot: Thoroughly water the rock redcurrant plant. Gently tap the pot's sides to loosen the soil. Turn the pot sideways and carefully slide the plant out, supporting the root ball with your hand.From Seedling Tray: Water the seedlings to facilitate easier removal. Using a garden trowel or your fingers, gently lift the seedlings from the tray by their leaves, taking care not to harm the delicate roots.
Step-by-Step Guide for Transplanting Rock Redcurrant
Prep New Location
Clear the new planting area of weeds and debris. Dig a hole that is twice as wide and just as deep as the rock redcurrant plant's root ball.
Watering
Water the hole before placing the plant to ensure the soil is adequately moist.
Plant Placement
Position the rock redcurrant plant in the center of the hole. Adjust the plant so that the top of the root ball is level with the surrounding soil.
Backfilling
Fill in the hole with soil, pressing gently to eliminate air pockets. Ensure the plant is stable and upright.
Watering Again
Water the rock redcurrant plant thoroughly after planting to help settle the soil around the roots.
Mulching
Apply a layer of mulch around the base of the plant to retain moisture and suppress weeds.
How Do You Care For Rock Redcurrant After Transplanting?
Watering
Keep the soil around the rock redcurrant consistently moist, but not soggy, for the first few weeks after transplanting to help establish strong roots.
Monitoring
Watch for signs of transplant shock, such as wilt or yellowing leaves, and provide extra care as needed.
Pruning
Trim any damaged or dead stems to encourage healthy growth.
Protection
Protect the plant from extreme weather conditions, such as frost or intense heat, as it acclimates to its new location.
Troubleshooting Common Issues with Rock Redcurrant Transplantation.
When is the best time to transplant rock redcurrant?
Relocate rock redcurrant from early spring to late spring or mid-fall to late fall for optimal results.
How far apart should I space rock redcurrant plants?
Space rock redcurrant plants 4-6 feet (1.2-1.8 meters) apart to ensure proper growth.
How do I prepare the soil for rock redcurrant?
Use well-drained, slightly acidic soil. Consider adding compost to enrich soil quality.
How deep should I plant rock redcurrant?
Plant rock redcurrant at the same depth it was growing previously to avoid stress.
What type of mulch should I use for rock redcurrant?
Use organic mulch like straw or wood chips to help retain moisture and prevent weeds.
How often should I water rock redcurrant after transplanting?
Water rock redcurrant deeply after transplanting and keep soil consistently moist, but not waterlogged.
Should I prune rock redcurrant before transplanting?
Prune any damaged or diseased branches before transplanting to promote healthy growth.
How do I minimize transplant shock in rock redcurrant?
Avoid transplanting in extreme weather and water thoroughly to reduce stress on rock redcurrant.
Can I fertilize rock redcurrant immediately after transplanting?
Wait a few weeks before fertilizing rock redcurrant to allow the plant to establish roots.
What pests should I look out for when transplanting rock redcurrant?
Watch for aphids and spider mites; use organic insecticidal soap to manage these pests.


