How to Transplant Hairy-stem gooseberry?
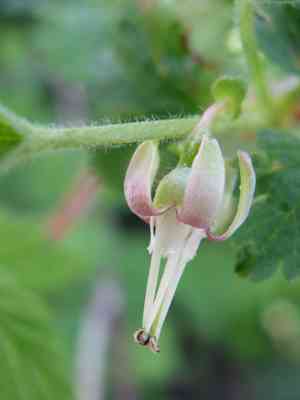
The most favorable period for transplanting hairy-stem gooseberry is during the season of rejuvenation, specifically from early to mid-spring. Select a site featuring cool, damp earth, and provide partial shade to mimic their native forest environment. Careful manipulation is crucial to prevent damage to the root system.
What Preparations are Needed Before Transplanting Hairy-stem Gooseberry?
What is the Ideal Time for Transplanting Hairy-stem Gooseberry?
The best period to move your hairy-stem gooseberry is during the gentle onset of early to mid-spring. This timing promotes strong root development before summer's heat. Relocating your hairy-stem gooseberry in spring allows it a full growing season to strengthen and thrive, ensuring a smooth transition. A helpful tip - a spring transplant perfectly matches hairy-stem gooseberry's natural growth cycle, making it an excellent choice for garden balance!
How Much Space Should You Leave Between Hairy-stem Gooseberry Plants?
When relocating hairy-stem gooseberry, you'll want to provide ample room for each plant to expand. Aim to position each hairy-stem gooseberry approximately 2-3 feet (60-90 cm) apart. This will guarantee they have sufficient space to flourish without competing for resources.
What is the Best Soil Mix for Hairy-stem Gooseberry Transplanting?
To prepare the soil for hairy-stem gooseberry, select a well-draining soil type rich in organic matter. It's advisable to incorporate a foundational fertilizer such as bone meal or compost into the soil prior to planting. This step will supply nutrients and encourage healthy growth of hairy-stem gooseberry.
Where Should You Relocate Your Hairy-stem Gooseberry?
When choosing a new spot for your hairy-stem gooseberry, seek out a location that receives abundant sunlight. It thrives in full sun to partial shade, but remember, the more sun it gets, the sweeter your hairy-stem gooseberry will be!
What Equipments Should You Prepare Before Transplantation Hairy-stem Gooseberry?
Gardening Gloves
To safeguard your hands while handling soil and hairy-stem gooseberry.
Shovel or Spade
To excavate the planting hole or extract the hairy-stem gooseberry from its original spot.
Trowel
To manage small quantities of earth or soil during the hairy-stem gooseberry transplanting process.
Gardening Fork
To aerate and loosen the soil in the new location before planting.
Pruning Shears
To trim any damaged or dead branches of hairy-stem gooseberry following transplantation.
Watering Can or Hose
To hydrate the hairy-stem gooseberry during and after the relocation procedure.
Mulch
To insulate the soil and maintain moisture after transplanting.
How Do You Remove Hairy-stem Gooseberry from the Soil?
How Do You Remove Hairy-stem Gooseberry from the Soil?
From Ground: First, moisten the hairy-stem gooseberry plant to soften the soil. Then, dig a wide trench around hairy-stem gooseberry using a shovel or spade, ensuring the plant's root ball remains intact. Carefully work the spade beneath the root ball to lift hairy-stem gooseberry from its initial position.From Pot: Begin by watering the potted hairy-stem gooseberry. Once the soil is damp, tilt the plant sideways while supporting the main stem. Gently extract the plant from the pot, carefully preserving the root ball's integrity.From Seedling Tray: For hairy-stem gooseberry in a seedling tray, dampen the soil and use a small tool or your fingers to gently loosen the soil surrounding the roots. Lift the seedling by its roots, avoiding pulling on the stem.
Step-by-Step Guide for Transplanting Hairy-stem Gooseberry
Preparation
Prepare the new site by digging a hole that is twice as wide and the same depth as the hairy-stem gooseberry's root ball.
Root Inspection
Examine the roots of hairy-stem gooseberry and trim any damaged or dead sections. If the roots are circling, gently untangle them to encourage outward growth.
Planting
Position hairy-stem gooseberry in the center of the hole. Backfill with soil, gently firming it around the plant's base. The top of the root ball should be level with the ground surface.
Watering
Thoroughly water hairy-stem gooseberry after planting to settle the soil and give the roots a good start.
Mulching
Apply a layer of mulch around the plant's base to conserve moisture and regulate soil temperature.
How Do You Care For Hairy-stem Gooseberry After Transplanting?
Watering
Keep the soil around hairy-stem gooseberry consistently moist, but not waterlogged, for the initial weeks post-transplant to aid in strong root establishment.
Pruning
Trim off any damaged or dead branches to stimulate new growth. Regular pruning also helps to maintain hairy-stem gooseberry's shape and vitality.
Monitoring
Observe hairy-stem gooseberry for the first couple of weeks for indications of transplant shock, such as yellowing leaves or wilting. If this occurs, shield the plant from intense sun and review your watering schedule.
Protection
Utilize garden fabric or covers to shield hairy-stem gooseberry from frost during colder months, as hairy-stem gooseberry is a cold-hardy plant but could still benefit from the additional layer of protection. Remember to remove any coverings when the temperature rises.
Troubleshooting Common Issues with Hairy-stem Gooseberry Transplantation.
When is the best time to transplant hairy-stem gooseberry?
The optimal period to transplant hairy-stem gooseberry is from late fall to early spring (S1-S2). This is when the plant is dormant and has the highest chance of survival.
What kind of soil does hairy-stem gooseberry need for transplanting?
Well-draining soil with a pH level between 6-7.5 is ideal for hairy-stem gooseberry. It prefers soil rich in organic matter, so enriching with compost before transplanting can be beneficial.
How deep should the hole be for transplanting hairy-stem gooseberry?
The hole should be twice as wide and equal in depth to the hairy-stem gooseberry's root ball. This typically should be about 10 inches (25 cm).
What is the optimal distance between hairy-stem gooseberry during transplanting?
When transplanting, space hairy-stem gooseberry plants approximately 2-3 feet (60-91 cm) apart. This provides each plant ample room to grow and spread.
How often should hairy-stem gooseberry be watered after transplanting?
Water hairy-stem gooseberry thoroughly after transplanting. Keep the soil consistently moist, not saturated, for the first few weeks until established. Reduce watering frequency as the plant matures.
How much sunlight is needed when hairy-stem gooseberry is transplanted?
Hairy-stem gooseberry thrives in full sun to partial shade. Ensure the new location receives at least 5-6 hours of sunlight daily for the best growth outcome.
What to do if the leaves of hairy-stem gooseberry turn yellow after transplanting?
Yellow leaves could indicate overwatering or nutrient deficiency. Ensure the soil drains well and consider a slow-release fertilizer to improve nutrient availability.
Why are my transplanted hairy-stem gooseberry not bearing fruit?
This could be due to excessive shade, improper watering, or insufficient pollination. Ensure your plants receive enough sunlight, water, and pollinator-friendly companions.
How can I protect my newly transplanted hairy-stem gooseberry from pests?
Regularly inspect your hairy-stem gooseberry for signs of pests. Use an eco-friendly pesticide if necessary. Encourage beneficial insects by planting a variety of flowers nearby.
Can hairy-stem gooseberry thrive if I transplant it to a pot instead of ground?
Yes, hairy-stem gooseberry can grow in a pot with good drainage. However, the pot should be large enough (at least 12 inches/30 cm in diameter) to accommodate its growth.



