How to Transplant Caribbean snoutbean?
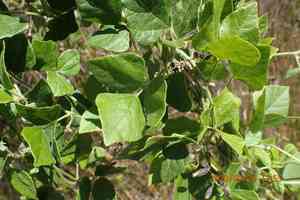
Caribbean snoutbean, a resilient perennial, flourishes optimally when relocated from the beginning to the end of spring or throughout late autumn, owing to mild temperatures. Select a bright spot with soil that drains effectively. Adhering to these requirements aids caribbean snoutbean in developing a robust root structure.
Essential Preparations Before Relocating Caribbean Snoutbean
Optimal Timing for Transplanting Caribbean Snoutbean
For successful caribbean snoutbean transplantation, target early to late spring or late autumn. These periods offer moderate temperatures and adequate soil moisture, minimizing transplant stress. Relocating during these seasons allows caribbean snoutbean sufficient time to develop a strong root system before the rigors of summer heat or winter cold.
Recommended Spacing Between Caribbean Snoutbean Plants
Ensure each caribbean snoutbean is positioned 12-18 inches (30-45 cm) apart. This spacing provides ample room for root expansion and fosters healthy development without overcrowding.
Ideal Soil Mixture for Caribbean Snoutbean Transplanting
For caribbean snoutbean, prepare well-draining soil enriched with organic matter. A suitable blend would be sandy or loamy soil combined with compost. Incorporating a balanced base fertilizer, such as a 10-10-10 NPK mix, can supply vital nutrients.
Selecting the New Location for Your Caribbean Snoutbean
Choose a sunny location for transplanting caribbean snoutbean, as it flourishes in full sunlight. Confirm the area receives at least 6-8 hours of direct sun daily for optimal growth.
Equipment Needed Before Transplanting Caribbean Snoutbean
Gardening Gloves
To safeguard your hands while handling soil and the plant.
Shovel or Spade
For excavating around and lifting the plant from its initial spot.
Trowel
Useful for smaller, delicate tasks like digging a hole for the new plant.
Watering Can or Hose
To hydrate the plant before and after its relocation.
Pruning Shears
To trim any dead or damaged roots prior to replanting.
Mulch
To help maintain moisture levels around the newly transplanted specimen.
Techniques for Removing Caribbean Snoutbean from the Soil
Techniques for Removing Caribbean Snoutbean from the Soil
From Ground: First, moisten the caribbean snoutbean plant to dampen the soil. Next, dig a wide trench around the plant using a shovel or spade, ensuring the plant's root ball remains intact. Carefully work the spade beneath the root ball to lift the plant from its original position.From Pot: Water the caribbean snoutbean plant thoroughly before extraction to keep the soil cohesive around the roots. Gently tilt the pot and tap its sides to loosen the soil, carefully pulling the plant out by its base.From Seedling Tray: Water the tray to facilitate easier seedling removal. Use a trowel or your fingers to gently lift each caribbean snoutbean seedling by its base, keeping the root ball undisturbed.
Detailed Guide for Transplanting Caribbean Snoutbean
Site Preparation
Prepare the planting site by digging a hole that is twice as wide and equally deep as the caribbean snoutbean plant's root ball.
Soil Preparation
Loosen the soil within the hole to facilitate easier root spread.
Planting
Place the caribbean snoutbean plant into the hole, ensuring it sits at the same depth as it was in its previous location. Gently backfill with soil, pressing lightly to eliminate any air pockets.
Watering
Thoroughly water the transplanted caribbean snoutbean to help settle the soil around its roots.
Mulching
Apply a layer of mulch around the plant's base to help retain soil moisture and regulate soil temperature.
Post-Transplantation Care for Caribbean Snoutbean
Watering
Keep the soil around the caribbean snoutbean consistently moist, but not waterlogged, for the initial weeks after transplanting to aid in establishing strong roots.
Monitoring
Regularly inspect the plant for indications of transplant shock, such as wilting or yellowing leaves, and promptly address any issues.
Mulching
Reapply mulch as necessary, particularly after heavy rainfall, to maintain soil moisture levels.
Pruning
Trim any dead or damaged leaves and stems to encourage healthy new growth.
Resolving Common Issues with Caribbean Snoutbean Transplantation
When is the best time to transplant caribbean snoutbean?
Early to late spring, or late fall is ideal for relocating caribbean snoutbean.
How far apart should I plant caribbean snoutbean?
Space caribbean snoutbean plants 12-18 inches (30-45 cm) apart for optimal growth.
How do I prepare the soil for transplanting caribbean snoutbean?
Loosen the soil up to 12 inches (30 cm) deep and incorporate compost.
What should I do if caribbean snoutbean shows signs of transplant shock?
Maintain consistent soil moisture and provide some shade until it recovers.
How can I reduce transplant stress for caribbean snoutbean?
Water caribbean snoutbean thoroughly before and after transplanting and handle roots gently.
Should I fertilize caribbean snoutbean after transplanting?
Wait a few weeks before fertilizing to allow roots time to establish.
How do I handle caribbean snoutbeanâs roots during transplanting?
Exercise caution to prevent root damage; consider trimming longer roots to stimulate new growth.
How deep should I plant caribbean snoutbean in the new location?
Plant caribbean snoutbean at the same depth it was in its original spot in the new location.
What type of mulch is best for caribbean snoutbean after transplanting?
Use organic mulch like straw or wood chips to conserve moisture and regulate temperature.
How often should I water caribbean snoutbean after transplanting?
Water caribbean snoutbean regularly for the first few weeks, ensuring the soil remains moist but not saturated.



