How to Transplant Turkey oak?
The most favorable period for relocating turkey oak occurs in the mild conditions of mid to late spring or early summer, facilitating strong root development prior to severe heat or cold. Choose a sunny spot with soil that drains effectively to provide turkey oak with an advantageous beginning. A delicate approach, rather than aggressive handling, is crucial when settling turkey oak into its new environment.
What Preparations are Needed Before Transplanting Turkey Oak?
What is the Ideal Time for Transplanting Turkey Oak?
The best time for relocating turkey oak is from mid to late spring, extending into early summer. During this period, mild temperatures and consistent moisture levels create an optimal environment for root establishment, which is crucial for the successful relocation of turkey oak. Transplanting in this season leverages the benefits of longer daylight hours and warmer soil, encouraging robust growth and minimizing plant stress. Follow this advice, and your turkey oak will flourish in its new spot!
How Much Space Should You Leave Between Turkey Oak Plants?
Ensure turkey oak saplings are spaced approximately 20-30 feet (6-9 meters) apart. This allows for ample root development and prevents overcrowding, giving your tree the best chance for a strong, healthy life.
What is the Best Soil Mix for Turkey Oak Transplanting?
For turkey oak, prepare well-drained soil enriched with organic matter. Additionally, a base fertilizer â ideally one high in nitrogen â provides the essential nutrients to stimulate growth in its new setting.
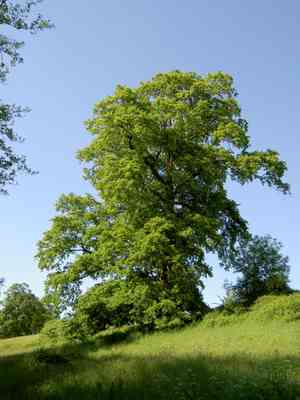
Where Should You Relocate Your Turkey Oak?
Select a sunny spot for transplanting turkey oak. While adaptable to various conditions, they thrive best in an area with full sunlight. Remember to shield it from strong winds if feasible.
What Equipments Should You Prepare Before Transplantation Turkey Oak?
Gardening Gloves
To safeguard your hands while working with the soil and turkey oak.
Shovel or Spade
To excavate the hole for the relocation of turkey oak and also to carefully extract turkey oak from its original position.
Pruning Shears
To trim any damaged or excess branches from turkey oak prior to transplanting.
Trowel
To move small quantities of soil.
Gardening Fork
To gently separate the roots of turkey oak if it is root bound.
Watering Can or Hose
To hydrate turkey oak once it has been relocated.
Mulch
To cover the soil after turkey oak has been transplanted, which helps retain soil moisture and regulate soil temperature.
How Do You Remove Turkey Oak from the Soil?
How Do You Remove Turkey Oak from the Soil?
From Ground: Begin by watering turkey oak to moisten the soil. This facilitates easier removal of the plant without harming the root system. Next, dig a wide circle around turkey oak using a shovel or spade, aiming to keep the plant's root ball intact. Once the trench is sufficiently wide, carefully work the spade or shovel beneath the root ball to lift turkey oak without causing damage.From Pot: Water turkey oak and wait until water drains from the bottom of the pot, ensuring a moist root ball for simpler removal. Then, lay the pot on its side and gently ease turkey oak out. If the plant is stuck, you might need to use a gardening fork to loosen the roots.From Seedling Tray: Water turkey oak to keep the roots moist. Gently pull turkey oak from its cell, taking care to handle it by its leaves, not by its stem or roots. For stubborn seedlings, it may be necessary to push from the bottom of the cell to release them.
Step-by-Step Guide for Transplanting Turkey Oak
Digging
Excavate a hole that is twice as wide and deep as the root ball of turkey oak. This provides ample space for the roots to spread and grow.
Positioning
Place turkey oak in the hole. Adjust the plant so it stands upright and the top of the root ball is level with the ground.
Backfilling
Carefully refill the hole with the excavated soil, gently patting it down around turkey oak to ensure no air pockets remain.
Watering
Water turkey oak thoroughly once it's in its new spot. This aids in settling the soil around the roots.
Mulching
Apply a layer of mulch around turkey oak. This helps to conserve moisture and suppress weeds.
How Do You Care For Turkey Oak After Transplanting?
Regular Watering
Ensure to continue watering turkey oak for the initial few weeks to help it establish in its new location. The soil should be kept moist, but not waterlogged.
Monitoring
Keep a close watch on turkey oak for any indications of transplant shock. Wilting leaves or a lack of new growth may suggest that turkey oak is struggling to establish. If this occurs, continue to provide adequate watering and consider seeking advice from a local nursery or extension service.
Pruning
Do not prune turkey oak immediately after transplanting as it would place additional stress on the plant. Wait until turkey oak is well established before beginning any form of pruning.
Troubleshooting Common Issues with Turkey Oak Transplantation.
When is the best time to transplant turkey oak?
The ideal period to relocate turkey oak is between late spring and early autumn. This allows the plant sufficient time to establish before winter.
How often should I water turkey oak after transplanting?
Initially, water turkey oak thoroughly and then at consistent intervals. Aim for 1 inch (2.5 cm) of water weekly, adjusting for weather conditions.
How far apart should I plant turkey oak saplings?
Ensure each turkey oak has ample room to grow. Allow a spacing of 20-30 feet (6-9 meters) between each sapling.
Why are the leaves of my transplanted turkey oak turning yellow?
Yellowing leaves could be a result of stress or insufficient watering. Make sure the plant receives adequate water and protection from extreme conditions.
How deep should I dig the hole for the turkey oak transplantation?
The hole for turkey oak should be twice as wide and equal to the depth of the root ball. This provides the roots space to expand.
Do I need to stake my turkey oak after transplanting?
Staking isn't always necessary, but if your turkey oak is large or in a windy location, staking can offer needed support until the roots establish.
How to protect my newly transplanted turkey oak from pests?
Regular inspections for pest activity and preventative measures, such as using organic or recommended pesticides, can help keep your turkey oak safe from pests.
Why is my transplanted turkey oak not showing new growth?
Lack of growth could be due to transplant shock or insufficient nutrients. Provide proper care and patience; growth should resume once the plant adjusts.
How will I know if my turkey oak transplantation is successful?
Successful transplantation will be indicated by new growth. Look for budding leaves or new sprouts. This shows your turkey oak has adapted well to its new location.
What care should be taken while handling turkey oak during transplanting?
Handle your turkey oak gently during transplanting. Avoid damaging the roots as much as possible and ensure the plant is properly centered and upright once placed in the hole.


