How to Transplant Oregon woollyheads?
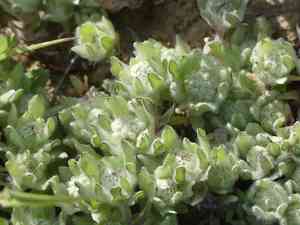
Oregon woollyheads flourish most effectively when relocated between the beginning and end of spring, benefiting from mild temperatures and sufficient precipitation. Select a bright spot with soil that drains efficiently to support vigorous development. Provide regular watering after transplanting for proper establishment.
What Preparations are Needed Before Transplanting Oregon Woollyheads?
What is the Ideal Time for Transplanting Oregon Woollyheads?
Oregon woollyheads, an annual, flourishes when moved during the initial to mid-spring period. This timing facilitates prime root development as temperatures rise, fostering vigorous growth. Transplanting within this window guarantees the plant fully utilizes the entire growing season, leading to robust development and enhanced resilience.
How Much Space Should You Leave Between Oregon Woollyheads Plants?
Ensure to position oregon woollyheads plants approximately 6-8 inches (15-20 cm) apart to provide ample room for growth without crowding.
What is the Best Soil Mix for Oregon Woollyheads Transplanting?
For optimal outcomes, utilize soil that drains effectively. Enhance the soil with compost or a balanced foundational fertilizer suitable for annuals to supply vital nutrients.
Where Should You Relocate Your Oregon Woollyheads?
Select a spot that receives ample sunlight, meaning a minimum of 6 hours of direct sun daily, to help oregon woollyheads flourish.
What Equipments Should You Prepare Before Transplantation Oregon Woollyheads?
Gardening Gloves
To safeguard your hands while handling soil and plants.
Trowel
To assist in digging around the plant without harming the root ball.
Shovel or Spade
For excavating a hole at the new planting site.
Watering Can or Hose
To hydrate the plant prior to and following its relocation.
Plant Labels
To identify the new placement if you are moving multiple plants.
How Do You Remove Oregon Woollyheads from the Soil?
How Do You Remove Oregon Woollyheads from the Soil?
From Ground: First, irrigate the oregon woollyheads plant to moisten the soil. Next, excavate a broad trench around the plant using a trowel or small spade, ensuring the plant's root ball remains intact. Carefully lift the plant from its initial spot by working the trowel beneath the root ball.From Pot: Gently water the soil in the container to loosen it. Invert the pot and tap its base to ease the plant out. If the plant resists, use a trowel to loosen the soil along the edges.From Seedling Tray: Water the seedlings to facilitate their removal. Employ a small tool like a pencil or dibber to carefully lift the seedling from the tray by its leaves, not the stem, to prevent damage.
Step-by-Step Guide for Transplanting Oregon Woollyheads
Site Preparation
Prepare the new location by digging a hole twice as wide and equally deep as the root ball of the oregon woollyheads plant.
Removal from Original Spot
Refer to the method outlined in the removal_process section based on your current setup.
Transplanting
Position the oregon woollyheads plant in the prepared hole. Ensure the top of the root ball is level with or slightly above the surrounding soil.
Backfill and Firm
Refill the hole with soil, gently compacting it around the plant's root ball to eliminate any air pockets. Be careful not to over-compact the soil.
Watering
Thoroughly water the plant after transplanting to help settle the soil around the roots.
How Do You Care For Oregon Woollyheads After Transplanting?
Watering
Maintain consistent moisture in the soil around the oregon woollyheads, avoiding sogginess, for the initial weeks post-transplant to aid in strong root establishment.
Mulching
Apply a thin layer of mulch around the plant's base to help retain moisture and suppress weeds.
Monitoring
Observe the oregon woollyheads closely for the first few weeks for any indications of transplant shock, such as wilting or yellowing foliage. If these symptoms appear, confirm the plant is receiving adequate water.
Troubleshooting Common Issues with Oregon Woollyheads Transplantation.
When is the best time to transplant oregon woollyheads?
Oregon woollyheads should ideally be transplanted from early spring to late spring for optimal growth.
What is the recommended spacing for transplanting oregon woollyheads?
Space the plants 6-8 inches (15-20 cm) apart to allow for proper growth and airflow.
How do you prepare the soil for transplanting oregon woollyheads?
Ensure well-draining soil with organic matter. Loosen it to a depth of 6 inches (15 cm).
How do you handle oregon woollyheads seedlings during transplant?
Handle seedlings gently by their leaves to avoid damaging the delicate stems or roots.
How much should you water oregon woollyheads after transplanting?
Water thoroughly immediately after transplanting and keep the soil consistently moist but not soggy.
What common pests should you watch out for when transplanting oregon woollyheads?
Watch for aphids and slugs, which can be managed with natural predators or organic treatments.
How much sunlight does oregon woollyheads need post-transplant?
Oregon woollyheads thrives in full sun. Ensure the transplant site receives at least 6 hours of sunlight daily.
What should you do if oregon woollyheads shows signs of transplant shock?
Provide shade, keep the soil moist, and avoid disturbing the plant while it recovers.
Can you fertilize oregon woollyheads immediately after transplanting?
Wait a few weeks before fertilizing to allow the roots to establish and avoid burning them.
How can you improve survival rates of transplanted oregon woollyheads?
Transplant on a cloudy day or late afternoon to reduce stress from heat and sunlight.



