How to Transplant Hinckley's polemonium?
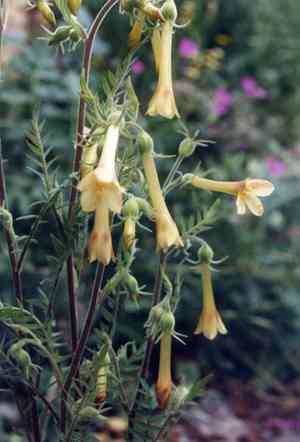
The most favorable period for relocating hinckley's polemonium is from mid-spring to late spring or in early winter; these intervals enable the plant to develop its root system prior to harsh climatic conditions. Select a site offering partial shade and soil that drains effectively to guarantee a successful transfer.
Essential Preparations Before Relocating Hinckley's Polemonium?
Optimal Timing for Relocating Hinckley's Polemonium?
For peak development, hinckley's polemonium should be moved between mid-spring and late spring, or during early winter. This period offers mild temperatures and adequate moisture, aiding root establishment and minimizing transplant shock. Relocating during these times ensures hinckley's polemonium can adjust effectively to its new spot before summer heat or harsh winter conditions.
Recommended Spacing Between Hinckley's Polemonium Plants?
Ensure hinckley's polemonium plants are spaced approximately 12-18 inches (30-45 cm) apart. This provides ample room for growth and sufficient air circulation, thereby lowering disease risk.
Best Soil Mixture for Hinckley's Polemonium Relocation?
Prepare well-draining soil enriched with compost. Hinckley's polemonium thrives in loamy or sandy soil. Incorporating a balanced fertilizer (e.g., 10-10-10) into the soil base will provide an excellent start.
Where to Replant Your Hinckley's Polemonium?
Hinckley's polemonium flourishes in full sun to partial shade. Select a location that receives at least 4-6 hours of daily sunlight. This will promote vigorous growth and vibrant blooms.
Necessary Tools for Transplanting Hinckley's Polemonium?
Gardening Gloves
To safeguard your hands while handling soil and plants.
Shovel or Spade
For excavating the plant and preparing a hole for its relocation.
Trowel
Useful for working with soil in close proximity to the plant.
Watering Can or Hose
To hydrate the plant before and after its move.
Pruning Shears
For trimming any damaged roots or foliage.
Mulch
To help maintain soil moisture and inhibit weed growth around the plant.
How to Extract Hinckley's Polemonium from the Soil?
How to Extract Hinckley's Polemonium from the Soil?
From Ground: First, moisten the soil around the hinckley's polemonium plant. Then, using a shovel or spade, dig a wide trench around the plant, ensuring the root ball remains intact. Carefully work the spade beneath the root ball to lift the plant from its original spot.From Pot: Thoroughly water the hinckley's polemonium plant before removing it from its container. Gently tap the pot's sides to loosen the soil. Hold the plant by its base and carefully slide it out. If it resists, use a trowel or knife to loosen the edges.From Seedling Tray: Ensure the seedling tray's soil is damp before handling. Use a small trowel or your fingers to carefully lift each hinckley's polemonium seedling by its base, taking care not to damage the delicate roots.
Step-by-Step Guide for Relocating Hinckley's Polemonium
Site Preparation
Prepare the new location by digging a hole slightly larger than the hinckley's polemonium plant's root ball. This will help reduce root stress and encourage quicker establishment.
Plant Removal
Follow the extraction method described above, depending on whether the hinckley's polemonium plant is in the ground, a pot, or a seedling tray.
Planting
Position the hinckley's polemonium plant in the prepared hole, ensuring its roots are well-distributed. The top of the root ball should be level with the ground. Backfill the hole with soil, gently firming it around the roots.
Watering
Thoroughly water the hinckley's polemonium plant after transplanting to help settle the soil and eliminate air pockets around the roots.
Mulching
Apply a layer of mulch around the base of the hinckley's polemonium plant to retain moisture and suppress weeds.
Post-Transplantation Care for Hinckley's Polemonium?
Watering
Keep the soil around the hinckley's polemonium consistently moist, but not waterlogged, for the initial weeks after transplanting to promote strong root development.
Monitoring
Regularly inspect the plant for signs of distress, such as wilting or yellowing leaves, and adjust care as necessary.
Protection
Shield the hinckley's polemonium plant from harsh weather, including strong winds or excessive rain, which can impede its establishment.
Pruning
Trim any damaged or dead foliage to encourage new growth and reduce stress on the plant.
Resolving Common Issues with Hinckley's Polemonium Transplantation.
When is the best time to transplant hinckley's polemonium?
The optimal period to transplant hinckley's polemonium is from mid-spring to late spring or early winter.
How far apart should I space hinckley's polemonium plants?
Space hinckley's polemonium plants 12-18 inches (30-45 cm) apart to allow for ample growth.
How deep should I plant hinckley's polemonium?
Plant hinckley's polemonium at the same depth it was growing in its original location.
What type of soil is best for hinckley's polemonium?
Hinckley's polemonium prefers well-drained, fertile soil rich in organic matter.
How do I prepare the soil for transplanting hinckley's polemonium?
Incorporate compost or organic material into the soil to enhance fertility and drainage.
How should I water hinckley's polemonium after transplanting?
Water thoroughly after transplanting, then consistently maintain slightly moist soil.
What is the ideal location for transplanting hinckley's polemonium?
Choose a spot with partial to full sun, receiving at least 4-6 hours of daily sunlight.
How do I handle the roots when transplanting hinckley's polemonium?
Handle roots gently to prevent damage, ensuring none are broken or overly disturbed.
Should I fertilize hinckley's polemonium after transplanting?
Wait a few weeks post-transplanting before lightly fertilizing with a balanced, slow-release fertilizer.
What should I do if hinckley's polemonium looks wilted after transplanting?
Ensure adequate watering and provide shade to lessen transplant shock; it should recover over time.



