How to Transplant Poa sphondylodes?
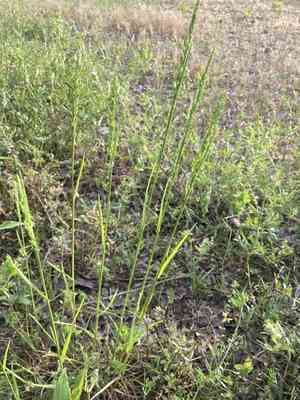
Poa sphondylodes, a perennial species, flourishes when relocated from the beginning to the end of spring due to mild temperatures and ample precipitation. Select a bright spot with soil that drains effectively. Sufficient room and limited disruption are vital for successful rooting.
What Preparations are Needed Before Transplanting Poa Sphondylodes?
What is the Ideal Time for Transplanting Poa Sphondylodes?
Poa sphondylodes, a perennial, flourishes when moved from early to late spring. This timeframe allows the plant to develop its root system prior to the intense summer heat or winter's cold. Transplanting at this point guarantees vigorous growth and aids the plant in adapting more easily to new surroundings, boosting its long-term health and resilience.
How Much Space Should You Leave Between Poa Sphondylodes Plants?
When relocating your poa sphondylodes, ensure a spacing of 12-18 inches (30-45 cm) between plants. This provides sufficient room for growth and promotes healthy air circulation.
What is the Best Soil Mix for Poa Sphondylodes Transplanting?
For optimal outcomes, plant your poa sphondylodes in well-draining soil enriched with compost. A foundational fertilizer rich in nitrogen and potassium will support your plant's development.
Where Should You Relocate Your Poa Sphondylodes?
Select a spot that gets full sun to partial shade. Poa sphondylodes prefers at least 6 hours of daily sunlight for best growth.
What Equipments Should You Prepare Before Transplantation Poa Sphondylodes?
Gardening Gloves
To safeguard your hands while handling soil and plants.
Shovel or Spade
For excavating trenches and holes.
Trowel
For smaller, more precise digging tasks.
Garden Hose or Watering Can
To hydrate the plants before, during, and after relocation.
Wheelbarrow or Bucket
For moving the plant if necessary.
Pruners or Scissors
To trim any damaged roots or foliage.
Mulch
To help maintain soil moisture post-transplant.
How Do You Remove Poa Sphondylodes from the Soil?
How Do You Remove Poa Sphondylodes from the Soil?
From Ground: First, water the poa sphondylodes plant to moisten the soil. Next, dig a wide trench around the plant using a shovel or spade, making sure the plant's root ball stays intact. Carefully work the spade beneath the root ball to lift the plant from its original spot.From Pot: Water the poa sphondylodes plant to dampen the soil. Gently hold the base of the plant and invert the pot. Tap the pot's rim to loosen the soil and slide the plant out, being careful to keep the root ball whole.From Seedling Tray: Water the poa sphondylodes seedlings to soften the soil. Use a small trowel or your fingers to carefully lift each seedling from the tray, ensuring you extract the entire root system without causing harm.
Step-by-Step Guide for Transplanting Poa Sphondylodes
Site Preparation
Prepare the new planting location by digging a hole that is twice as wide and slightly deeper than the root ball of the poa sphondylodes plant.
Soil Preparation
Ensure the soil in the new spot drains well. If needed, amend the soil with compost to enhance its structure and nutrient content.
Transplanting
Place the poa sphondylodes plant in the hole at the same depth it was previously growing. Backfill the hole with soil, gently firming it around the root ball to remove air pockets.
Watering
After positioning the poa sphondylodes plant in its new location, water it thoroughly to help settle the soil around the roots and provide immediate hydration.
Mulching
Apply a layer of mulch around the base of the poa sphondylodes plant, but avoid placing it directly against the stem, to help retain moisture and regulate soil temperature.
How Do You Care For Poa Sphondylodes After Transplanting?
Watering
Keep the soil around the poa sphondylodes consistently moist, but not waterlogged, for the initial weeks after transplanting to aid in establishing strong roots.
Pruning
Remove any damaged or dead leaves to lessen stress on the poa sphondylodes plant and encourage healthy growth.
Monitoring
Watch for indications of transplant shock, such as wilting or yellowing leaves, and adjust care routines as necessary. Gradually decrease watering frequency as the plant establishes itself.
Fertilizing
Wait at least six weeks after transplanting before applying any fertilizer to prevent root burn.
Troubleshooting Common Issues with Poa Sphondylodes Transplantation.
What is the best time to transplant poa sphondylodes?
Early to late spring is optimal for relocating poa sphondylodes, ensuring healthy development.
How should I space poa sphondylodes when transplanting?
Space the plants 12-18 inches (30-45 cm) apart for ideal growth and vitality.
How can I prepare the soil for poa sphondylodes?
Ensure the soil is well-draining and enriched with organic matter before transplanting.
Should I water poa sphondylodes immediately after transplanting?
Yes, water poa sphondylodes thoroughly right after transplanting to help establish roots.
What should I do if poa sphondylodes looks wilted after transplanting?
Water it sufficiently and consider providing temporary shade to reduce transplant shock.
How deep should I plant poa sphondylodes?
Plant poa sphondylodes at the same depth it was growing in its original location.
Can I fertilize poa sphondylodes immediately after transplanting?
Wait a few weeks before fertilizing to avoid stressing the newly transplanted poa sphondylodes.
How do I protect poa sphondylodes from pests after transplanting?
Use natural pest deterrents and monitor regularly to keep poa sphondylodes pest-free.
Why are the leaves of poa sphondylodes turning yellow after transplanting?
Yellow leaves might indicate overwatering or poor drainage; adjust watering habits accordingly.
What type of sunlight is best for poa sphondylodes?
Poa sphondylodes thrives in full sun to partial shade, so ensure adequate sunlight exposure.



