How to Transplant Greater purple fringed orchid?
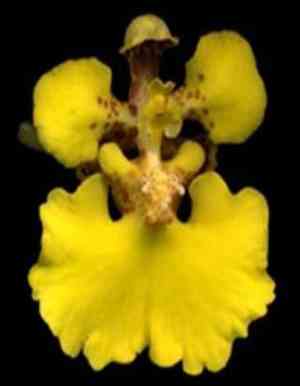
Relocate Platanthera grandiflora from early spring until the end of late spring to guarantee vigorous development. Position it in partial shade, keeping the soil hydrated; extreme care is essential for its fragile root system.
What Preparations are Needed Before Transplanting Greater Purple Fringed Orchid?
What is the Ideal Time for Transplanting Greater Purple Fringed Orchid?
Moving greater purple fringed orchid during the garden's awakening period â typically when daffodils begin to bloom â takes advantage of cooler, damp soil conditions, which promote root development. Relocating greater purple fringed orchid at this revitalizing time allows it ample opportunity to establish itself before the summer heat. This timely relocation fosters more vigorous growth, ensuring an abundance of blossoms for future years.
How Much Space Should You Leave Between Greater Purple Fringed Orchid Plants?
For your greater purple fringed orchid, you'll want to provide them with room to thrive. Aim for a spacing of approximately 12-18 inches (30-46 cm) between plants. This distance offers sufficient space for growth while still allowing them to form an attractive, grouped display.
What is the Best Soil Mix for Greater Purple Fringed Orchid Transplanting?
Your greater purple fringed orchid will flourish in soil that drains well, is consistently moist, and is rich in organic matter. Incorporate some compost or aged manure into the existing soil for a nutrient-rich start. A balanced, slow-release fertilizer will provide your greater purple fringed orchid with the necessary boost.
Where Should You Relocate Your Greater Purple Fringed Orchid?
When selecting the ideal location for your greater purple fringed orchid, seek out an area that receives filtered sunlight or partial shade. Avoid intense, direct afternoon sun, as greater purple fringed orchid prefers cooler, gentler lighting conditions to mimic their natural woodland environments.
What Equipments Should You Prepare Before Transplantation Greater Purple Fringed Orchid?
Gardening Gloves
To safeguard your hands while handling soil and the plant.
Shovel or Spade
For excavating the root ball and preparing the new planting site.
Watering Can or Hose
To hydrate the plant before and after the relocation process.
Pruning Shears
For trimming any damaged roots or leaves.
Wheelbarrow or Plant Sled
To move the greater purple fringed orchid plant to its new spot.
Organic Mulch
To help retain soil moisture and regulate temperature around the root area after transplanting.
How Do You Remove Greater Purple Fringed Orchid from the Soil?
How Do You Remove Greater Purple Fringed Orchid from the Soil?
From Ground: First, water the greater purple fringed orchid plant to moisten the soil, making it easier to manage. Use a shovel or spade to dig a wide circle around the plant, ensuring you encompass the entire root system. Gently pry beneath the root ball to lift the plant from the ground with minimal root disturbance.From Pot: Water the greater purple fringed orchid plant thoroughly, then turn the pot on its side, tap the bottom, and carefully ease the plant out, preserving as much of the root ball as possible. Be careful not to pull the plant by the stem to prevent injury.From Seedling Tray: Water the seedlings to dampen the soil. Use a tool such as a dibber or a small trowel to carefully lift the greater purple fringed orchid seedling from its tray cell by pushing up from the bottom, ensuring you extract the complete rootball.
Step-by-Step Guide for Transplanting Greater Purple Fringed Orchid
Preparation
Gather all necessary tools and water the greater purple fringed orchid plant until the soil is damp to facilitate the removal process.
Removal
Depending on the greater purple fringed orchid's original location, follow the appropriate instructions to remove the plant, ensuring a sufficient root ball is maintained without harming the roots.
New Hole
Dig a hole in the ground that is twice as wide and as deep as the root ball to allow the roots ample room to spread. Place the greater purple fringed orchid plant in the center of the hole.
Positioning
Adjust the greater purple fringed orchid plant in the hole so it stands upright and is at the same depth it was growing previously. Fill in around the root ball with soil, gently firming it down without excessive compaction.
Initial Watering
Water the greater purple fringed orchid plant thoroughly to help settle the soil around the roots and eliminate air pockets.
How Do You Care For Greater Purple Fringed Orchid After Transplanting?
Watering
Keep the soil around the greater purple fringed orchid consistently moist for the initial weeks following transplanting to ensure root establishment. However, avoid waterlogging.
Mulching
Apply a layer of organic mulch around the base of the greater purple fringed orchid to help maintain soil moisture levels and protect the roots.
Monitoring
Regularly inspect the plant for indications of stress, such as wilting or discolored leaves, and take appropriate action as needed.
Pruning
Trim any dead or damaged foliage to encourage healthy growth and reduce the likelihood of disease.
Troubleshooting Common Issues with Greater Purple Fringed Orchid Transplantation.
Why is my greater purple fringed orchid not thriving after transplanting?
Ensure you're transplanting during the optimal window of early to late spring and maintaining a suitable spacing of 12-18 inches (30-45 cm) for your plants to flourish.
What's the best soil type for transplanting greater purple fringed orchid?
Chalky, loamy, or sandy soil with good drainage works wonders for greater purple fringed orchid. Keep the soil moist but not waterlogged.
How much sunlight does greater purple fringed orchid need after transplantation?
After transplanting, situate greater purple fringed orchid in a spot with bright but indirect sunlight to encourage successful growth.
How do I know if my greater purple fringed orchid is overwatered after transplanting?
Wilting, yellowing leaves or a soggy base can be your cue for easing up on the watering for your greater purple fringed orchid.
What's causing the leaves of my greater purple fringed orchid to turn brown after transplanting?
Brown leaves may signify shock or under-watering. Gently nurture greater purple fringed orchid and adjust watering habits to combat post-transplant stress.
Can I fertilize my greater purple fringed orchid after transplanting?
Wait a few weeks post-transplant before fertilizing greater purple fringed orchid to allow it to acclimatize to its new environment.
How deep should I plant greater purple fringed orchid during transplant?
Plant greater purple fringed orchid at the same depth it grew previously, typically not deeper than the root ball to encourage proper establishment.
Should I prune greater purple fringed orchid when transplanting?
Minimal pruning is recommended. Just remove any damaged or dead tissue to help greater purple fringed orchid focus on taking root in its new spot.
My greater purple fringed orchid looks wilted post-transplant, what should I do?
Wilt can be normal due to transplant shock. Keep the soil evenly moist and provide some shade until greater purple fringed orchid recovers.
How do I protect my newly transplanted greater purple fringed orchid from pests?
Monitor your greater purple fringed orchid closely for pest activity and apply appropriate organic pest control methods if necessary, while avoiding chemical stress.



