How to Prune Greater purple fringed orchid?
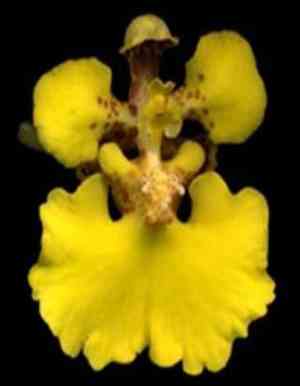
This enduring, ground-dwelling orchid is recognized for its vivid, aromatic flowers. The most effective trimming for greater purple fringed orchid takes place after blooming, generally in late summer or early autumn. Detach faded flower stalks at their origin to stimulate subsequent development. Lifeless or injured foliage can also be clipped at the base. As a wild plant, greater purple fringed orchid needs very little trimming, which contributes to the plant's well-being and robustness. Make certain to use sterile, keen cuts to avert illness and refrain from excessive cutting to safeguard the tuberous root system.
What Are the Benefits of Pruning Greater Purple Fringed Orchid?
What Are the Benefits of Pruning Greater Purple Fringed Orchid?
Trimming greater purple fringed orchid promotes robust development and helps maintain its structural integrity. Strategic removal of specific parts can stimulate stronger, healthier growth and preserve its aesthetic appeal.
What Is the Best Time for Pruning Greater Purple Fringed Orchid?
What Is the Best Time for Pruning Greater Purple Fringed Orchid?
The ideal time for pruning greater purple fringed orchid is from late spring to early summer, once the danger of frost has passed and before new growth emerges. Pruning during this period helps prevent harm to the delicate new shoots and buds crucial for the plant's blooming cycle. Additionally, trimming before the growth season allows greater purple fringed orchid to channel its energy into producing vigorous new growth and flowers. This timing also permits the removal of any winter-damaged foliage without affecting the plant's natural bloom cycle. By pruning at this time, gardeners can ensure greater purple fringed orchid maintains a healthy structure, promoting better air circulation and reducing disease potential.
What Tools Do I Need to Prune Greater Purple Fringed Orchid?
Sharp, sterilized scissors or snips
Perfect for precise cuts needed to remove spent blooms or dead leaves from greater purple fringed orchid, minimizing damage to the delicate orchid structure.
Fine-tipped tweezers
Useful for extracting small dead or yellowed leaves that might be near the base of greater purple fringed orchid, ensuring minimal disturbance during maintenance.
Soft-bristle brush
Helps gently clean any debris from the leaves and base of greater purple fringed orchid after pruning, maintaining plant cleanliness without causing harm.
Rubbing alcohol or bleach solution
For sanitizing pruning tools before and after use to prevent the spread of diseases among greater purple fringed orchid specimens.
How to Prune Greater Purple Fringed Orchid
Disinfect tools
Before starting to prune greater purple fringed orchid, sanitize your pruning equipment with a bleach or alcohol solution to prevent disease transmission during the process.
Remove diseased leaves
Carefully inspect greater purple fringed orchid for any diseased leaves. Use your sterilized pruning shears to cut away the infected foliage, ensuring the entire leaf, including its base, is removed to prevent further infection.
Trim withered leaves
Identify any withered or dead leaves on greater purple fringed orchid that are no longer green and vibrant. Using the same sterilized shears, snip these leaves at their base, close to the plant's central axis, avoiding damage to healthy tissue.
Eliminate diseased stems
Examine the stems of greater purple fringed orchid for disease signs, such as discoloration or unusual marks. Isolate any affected stems and cut them off at the base just above the intersection with healthy tissue or the soil line to stop disease spread.
Clean up
After pruning greater purple fringed orchid, remove all trimmed material from the surrounding area to lessen the risk of disease recurrence. Dispose of the material properly, ideally sealed in a bag and removed from the site.
Common Pruning Mistakes with Greater Purple Fringed Orchid
Over-pruning
Removing too many leaves or flower spikes can stress greater purple fringed orchid, hindering its ability to photosynthesize and store energy for the next blooming season.
Improper tool use
Using dull or unclean pruning tools can cause unnecessary damage to the plant tissues of greater purple fringed orchid, leading to potential infections or diseases.
Pruning healthy growth
Cutting away healthy leaves or stems can weaken greater purple fringed orchid. It is important to identify and only remove parts of the plant that are dead, diseased, or damaged.
Neglecting plant structure
Failing to consider the natural growth pattern of greater purple fringed orchid can result in an unbalanced appearance and may affect future growth.
Incorrect cut placement
Making cuts too close to the base or too far from dead tissue can cause harm. It is crucial to cut at the right spot to foster proper healing.
Common Pruning Tips for Greater Purple Fringed Orchid
Sterilize tools
Before pruning greater purple fringed orchid, always sterilize your tools to minimize the risk of transferring pathogens to the plant.
Sharp instruments
Use sharp pruning instruments to make clean cuts that will heal more rapidly and reduce stress on greater purple fringed orchid.
Post-bloom trimming
After greater purple fringed orchid has finished flowering, trim off the spent flower spikes to redirect energy to the leaves and roots, which supports the health of the plant.
Damage control
Regularly inspect greater purple fringed orchid and carefully remove any diseased or dead tissue to maintain its vigor and aesthetic appeal.
Conservative approach
Take a conservative approach when pruning greater purple fringed orchid, as it typically requires minimal intervention. Preserve as much of the healthy plant as possible.



