How to Transplant Pale green orchid?
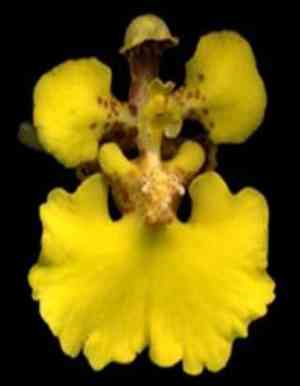
Relocate the pale green orchid during its inactive period, specifically from the beginning to the end of winter, for optimal outcomes. Confirm its placement in a partially shaded, humid environment to flourish. Exercise delicate care to avoid harming its root system.
Necessary Preparations Before Relocating Pale Green Orchid?
Optimal Period for Relocating Pale Green Orchid?
Pale green orchid, a Perennial plant, is best moved from early to late winter. This timing ensures the plant is inactive, reducing stress and allowing root systems to establish before the active growth phase. Relocating during this period benefits from cooler temperatures and decreased water needs, promoting ideal adaptation and development.
Required Spacing Between Pale Green Orchid Plants?
For pale green orchid, ensure each plant is positioned 12-18 inches (30-45 cm) apart. This provides ample space for development and air circulation.
Ideal Soil Blend for Pale Green Orchid Relocation?
Prepare the soil for pale green orchid using a well-draining mixture, ideally sandy loam. Incorporate an all-purpose base fertilizer to aid the plant in establishing its root system.
Recommended New Location for Your Pale Green Orchid?
Select a spot that receives partial sunlight to light shade for pale green orchid. Excessive direct sun can harm the plant, so aim for balanced light exposure.
Equipment Needed Before Relocating Pale Green Orchid?
Gardening Gloves
To safeguard your hands while handling soil and the plant.
Shovel or Spade
For digging around and lifting the plant from its initial spot.
Trowel
For precise digging and support during transfer.
Wheelbarrow or Bucket
To move the plant to its new position.
Watering Can or Hose
For hydrating the plant before and after relocation.
Pruners or Scissors
To trim any damaged roots or foliage during the process.
Mulch
To help maintain soil moisture after relocation.
How to Extract Pale Green Orchid from the Soil?
How to Extract Pale Green Orchid from the Soil?
From Ground: First, water the pale green orchid plant to moisten the soil. Then, dig a wide trench around the plant using a shovel or spade, ensuring the plant's root ball remains intact. Carefully work the spade under the root ball to lift the plant from its original location.From Pot: Begin by watering the pale green orchid plant to moisten the soil. Gently turn the pot on its side, holding the plant carefully at the base, and tap the sides to loosen the soil. Once loosened, slide the plant and its root ball out of the pot.From Seedling Tray: Water the seedlings lightly to make the soil pliable. Use a trowel or a small spoon to gently lift each pale green orchid seedling, ensuring you keep as much of the root ball intact as possible.
Step-by-Step Guide for Relocating Pale Green Orchid
Prepare New Site
Dig a hole in the new location that is twice as wide and the same depth as the root ball of the pale green orchid plant.
Add Compost
Mix compost into the soil at the bottom of the hole to provide nutrients that will help the pale green orchid establish itself.
Transfer Plant
Carefully place the pale green orchid plant into the hole, ensuring that the top of the root ball is level with the surrounding soil.
Backfill Soil
Fill the hole with the excavated soil, pressing down gently to eliminate air pockets around the root ball.
Water Thoroughly
Water the pale green orchid plant thoroughly immediately after transplanting to help settle the soil and establish the roots in their new location.
Apply Mulch
Apply a layer of mulch around the base of the plant to retain moisture and regulate soil temperature.
Post-Relocation Care for Pale Green Orchid?
Watering
Keep the soil around the pale green orchid consistently moist, but not waterlogged, for the initial weeks after relocation to aid in developing strong roots.
Monitoring
Regularly check the plant for any signs of relocation shock, such as wilting or yellowing leaves, and provide additional water if necessary.
Mulching
Replenish the mulch layer as needed to maintain soil moisture and temperature.
Weeding
Keep the area around the pale green orchid free of weeds to reduce competition for resources.
Resolving Common Issues with Pale Green Orchid Relocation.
When is the best time to relocate pale green orchid?
Relocate pale green orchid from early winter to late winter for optimal growth and acclimation.
How far apart should I space pale green orchid plants?
Space pale green orchid plants 12-18 inches (30-46 cm) apart to ensure healthy growth.
What soil type is best for pale green orchid?
Use well-draining, slightly acidic to neutral soil for successful relocation of pale green orchid.
How much water does pale green orchid need after relocating?
Keep the soil evenly moist but not waterlogged during the first few weeks after relocating.
How can I prevent relocation shock in pale green orchid?
Water thoroughly before and after relocating, and avoid disturbing the roots too much.
How deep should I plant pale green orchid during relocating?
Plant pale green orchid at the same depth it was growing at previously to avoid stress.
When should I start acclimating pale green orchid to outdoor conditions?
Begin acclimating pale green orchid to outdoor conditions a couple of weeks before relocating.
What should I do if pale green orchid shows signs of stress?
Provide shade, maintain soil moisture, and avoid fertilizing immediately after relocating.
Should I fertilize pale green orchid after relocating?
Wait a few weeks for pale green orchid to establish roots before applying any fertilizer.
What are common pests that affect pale green orchid after relocating?
Watch out for aphids and slugs; use organic methods to control these pests.



