How to Transplant Productive carnation?
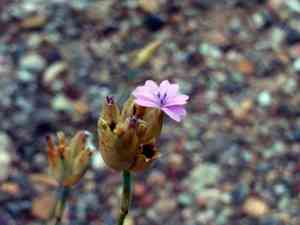
To ensure optimal establishment, transfer your thriving carnation plants during the delightful period from early to late spring, as the ground becomes active again. Select a brightly lit location featuring soil that drains effectively, replicating its natural environment to guarantee robust growth and abundant flowering.
What Preparations are Needed Before Transplanting Productive Carnation?
What is the Ideal Time for Transplanting Productive Carnation?
The best period for relocating productive carnation extends from early spring to the onset of warm summer. This timeframe allows roots to establish in moderate soil, promoting optimal development and blooming.
How Much Space Should You Leave Between Productive Carnation Plants?
Hello, gardener! Before moving your productive carnation to its new spot, measure a comfortable distance between each planting location. Aim for 10-12 inches (25-30 cm) apart so every plant has sufficient room to thrive without overcrowding.
What is the Best Soil Mix for Productive Carnation Transplanting?
For your productive carnation, a strong base is crucial! Prepare a light, well-draining soil blend with some organic compost or a slow-release fertilizer. This will provide your productive carnation with a nourishing start, and healthy roots lead to abundant flowers!
Where Should You Relocate Your Productive Carnation?
Sunlight is your productive carnation's closest companion! Choose a garden area that receives full sun to partial shade. This sunny exposure will help your productive carnation absorb the light it needs to grow robustly and flower beautifully.
What Equipments Should You Prepare Before Transplantation Productive Carnation?
Gardening Gloves
To safeguard your hands while handling soil and plants.
Hand Trowel
For excavating small holes or channels to accommodate the root ball of productive carnation.
Shovel or Spade
For digging larger planting holes and lifting plants from the ground.
Watering Can or Hose
To hydrate the plant before and after relocation.
Pruning Shears
For trimming any damaged roots or stems if necessary.
Garden Fork
To loosen the soil around the plant's original position, facilitating easier removal.
Measuring Tape
To ensure appropriate spacing between the newly transplanted productive carnation plants.
Wheelbarrow
For transporting the productive carnation plant and any required soil or compost.
Plant Labels or Markers
To identify your productive carnation plants if moving multiple specimens.
How Do You Remove Productive Carnation from the Soil?
How Do You Remove Productive Carnation from the Soil?
From Ground: First, water the productive carnation plant to moisten the soil. Then, dig a wide trench around the plant using a shovel or spade, ensuring the root ball remains intact. Carefully work the spade under the root ball to lift the plant from its original location.From Pot: Thoroughly water the productive carnation plant, then gently tap around the pot's edges to loosen the soil. Turn the pot sideways and hold the base of the plant, carefully pulling it out. Make sure you support the soil to prevent the root ball from breaking apart.From Seedling Tray: Water the seedling tray cells with productive carnation to make it easier to remove the plants. Use a hand trowel or your fingers to lift the plant out gently from its cell by supporting the root ball and not pulling from the stems or leaves.
Step-by-Step Guide for Transplanting Productive Carnation
Preparation
Don gardening gloves to protect your hands and gather all necessary tools and supports mentioned above.
Removal
Follow the suitable removal procedure outlined above, depending on whether productive carnation is being moved from the ground, a pot, or a seedling tray.
Transplant Hole
Excavate a hole with the shovel or hand trowel where you intend to relocate productive carnation. Make the hole slightly larger than the root ball.
Placement
Gently place the productive carnation plant into the hole, maintaining the same depth it was previously growing at. Adjust its position so the plant stands upright.
Filling
Carefully backfill the hole with soil around the root ball of productive carnation. Gently firm the soil as you fill to eliminate air pockets.
Watering
Immediately after planting, thoroughly water the productive carnation to settle the soil around the roots and help reduce transplant shock.
Support
If needed, add supports like stakes at this stage to help productive carnation grow upright and withstand winds.
Labeling
Use plant labels or markers to identify your productive carnation plants if transplanting more than one.
How Do You Care For Productive Carnation After Transplanting?
Maintenance
Regularly inspect your productive carnation plants for signs of stress such as wilting or yellowing leaves and address any issues promptly.
Monitoring Growth
Observe the growth of productive carnation and provide necessary supports if the plants begin to lean or cannot bear their own weight.
Pruning
Trim any damaged or diseased growth from productive carnation to encourage healthy development and prevent the spread of potential problems.
Weed Control
Keep the area around your productive carnation plants clear of weeds, which can compete for nutrients and water.
Troubleshooting Common Issues with Productive Carnation Transplantation.
Why isn't my productive carnation thriving after transplanting?
Ensure your productive carnation isn't experiencing shock. Gently water and shield from extreme temperatures. Evaluate soil drainage and sunlight.
When's the perfect timing to transplant productive carnation?
The best transplant time is during early to late spring - once the frost has passed and growth can begin.
What's the ideal way to space productive carnation during transplanting?
Allow each productive carnation ample room to flourish by spacing them 10-12 inches (25-30 cm) apart.
Can I transplant productive carnation in the summer?
Relocating productive carnation in summer is not ideal due to heat stress. Aim for cooler, springtime conditions.
How deep should I plant productive carnation when transplanting?
Plant productive carnation at the same depth it was in its previous container, allowing roots to spread effectively.
Why are the leaves of productive carnation wilting post-transplant?
Wilting may occur from root damage during transplanting. Keep the soil moist and avoid direct sunlight initially.
Should I prune productive carnation before transplanting?
Pruning is not necessary; focus on minimizing root disturbance for a successful transplant.
How do I prepare the soil for productive carnation transplanting?
Enrich the soil with compost, ensure it's well-draining, and loosen it to encourage root growth.
What's the best way to water productive carnation after transplanting?
Water thoroughly after transplanting to settle the soil around the roots and eliminate air pockets.
My productive carnation isn't showing new growth, what should I do?
Patience is key. Ensure consistent watering, adequate sunlight, and time for productive carnation to establish in its new location.



