How to Transplant Pergularia?
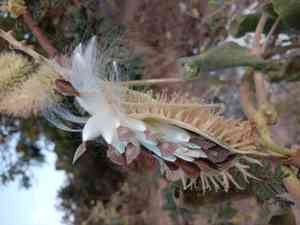
The ideal period for relocating pergularia spans from mid-summer through late autumn, enabling the specimen to develop its root system prior to its dormant phase. Select a bright, adequately drained spot for peak development. Should it be required, gradually introduce the plant to its new environment to lessen the impact of transplantation.
What Preparations are Necessary Before Relocating Pergularia?
What is the Optimal Period for Moving Pergularia?
Pergularia should ideally be moved from mid-summer through late autumn. During this timeframe, ground temperatures are warm yet not excessively hot, creating prime conditions for root establishment. Furthermore, cooler weather minimizes plant stress, boosting its chances of a successful move and vigorous development.
What Distance Should You Maintain Between Pergularia Plants?
Ensure you position pergularia with a separation of approximately 12 inches (30 cm). This provides sufficient room for proper development and air circulation.
What is the Best Soil Mixture for Pergularia Relocation?
Prepare well-draining, sandy or loamy soil for pergularia. Enhance it with compost or a balanced base fertilizer to provide a nutritional boost.
Where Should You Replant Your Pergularia?
Select a sunny spot for relocating pergularia. It flourishes best with 6-8 hours of direct sunlight daily.
What Tools Should You Prepare Before Relocating Pergularia?
Gardening Gloves
To safeguard your hands while handling soil and the plant.
Shovel or Spade
To excavate the plant from its original spot and create a new cavity for replanting.
Garden Trowel
For more precise digging tasks and root management.
Watering Can or Hose
To hydrate the plant before and after its relocation.
Pruning Shears
To trim any damaged or excessively long roots.
Compost or Organic Matter
To enrich the soil in the new planting site.
Stakes and Ties
To support the plant, if required, following its relocation.
How Do You Extract Pergularia from the Ground?
How Do You Extract Pergularia from the Ground?
From Ground: First, water the pergularia plant to moisten the soil. Then, dig a wide trench around the plant using a shovel or spade, ensuring the plant's root ball remains intact. Carefully work the spade beneath the root ball to lift the plant from its initial position.From Pot: Water the pergularia plant a few hours prior to relocating. Gently tap and squeeze the container to loosen the soil. Hold the plant at its base and carefully invert the pot, allowing the plant to slide out while supporting the root ball.From Seedling Tray: Water the seedlings thoroughly before moving them. Gently loosen the soil around each seedling using a trowel or your fingers. Carefully lift each seedling, supporting its root system to keep it whole.
Detailed Guide for Relocating Pergularia
Preparation
Water the pergularia plant in its original location thoroughly a day before relocation to minimize transplant shock.
New Hole
Dig a hole in the new spot that is twice as wide and the same depth as the plant's root ball.
Adding Compost
Mix compost or organic material with the excavated soil to enrich it and enhance drainage.
Placing the Plant
Position the pergularia plant in the center of the hole, ensuring the top of the root ball is level with the surrounding ground.
Backfilling
Fill the hole with the enriched soil, gently firming it around the root ball to remove air pockets.
Watering In
Water the plant thoroughly after relocation to help settle the soil and initiate the establishment process.
How Do You Care For Pergularia After Relocation?
Watering
Keep the soil around the pergularia consistently moist, but not waterlogged, for the initial weeks after relocation to aid in developing strong roots.
Mulching
Apply a layer of mulch around the base of the plant to retain moisture and regulate soil temperature.
Support
Provide stakes or ties if the plant is tall or has a weak stem to ensure it remains upright in its new location.
Monitoring
Observe the plant closely for the first few weeks, looking for signs of transplant shock such as wilting or yellowing leaves, and provide additional care as needed.
Troubleshooting Common Issues with Pergularia Relocation.
When is the best time to relocate pergularia?
The ideal times are mid-summer to late summer, and early fall to late fall.
How much space should I leave between each pergularia?
Maintain a spacing of about 12 inches (30 cm) between each plant for best growth.
How deep should I plant pergularia after relocating?
Plant at the same depth it was growing originally to avoid root stress.
What type of soil is ideal for relocating pergularia?
Well-draining soil with ample organic matter is ideal for relocating pergularia.
How often should pergularia be watered after relocating?
Water thoroughly immediately after relocating and keep the soil consistently moist, not waterlogged.
What should I do if pergularia's leaves turn yellow after relocating?
Ensure adequate water and check for root damage to address any transplant shock.
Should I fertilize pergularia immediately after relocating?
It's best to wait a few weeks before fertilizing to allow roots to establish.
Can I relocate pergularia on a hot day?
Avoid relocating on excessively hot days; early morning or late evening is preferable.
Do I need to prune pergularia during relocating?
Pruning damaged or excessively long roots can help, but extensive pruning should be avoided.
How can I reduce transplant shock for pergularia?
Ensure gentle handling, ample watering, and provide temporary shade if exposed to intense sun.



