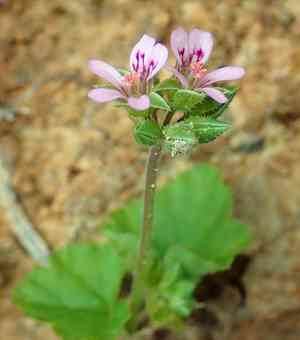
How to Transplant Scentless geranium?
To ensure the best rooting, relocate scentless geranium during its vigorous development phase, from late spring to mid-summer. Select a bright area featuring soil that drains effectively. Verify the chosen site replicates scentless geranium's inherent requirements for a smooth adaptation.
What Preparations are Needed Before Transplanting Scentless Geranium?
What is the Ideal Time for Transplanting Scentless Geranium?
Choose to move scentless geranium when spring begins or during early summer for best root development. Relocating scentless geranium during this period of mild warmth and steady growth conditions allows the plant's roots to adapt and spread in their new spot, ensuring a strong and thriving future. Planting in the correct season, much like carefully establishing roots in fertile ground, is crucial for a flourishing scentless geranium garden. This season offers perfect temperatures and increasing daylight, which helps scentless geranium recover from transplant shock more effectively and take advantage of the abundant growing season ahead.
How Much Space Should You Leave Between Scentless Geranium Plants?
Hello, gardening enthusiast! When preparing to give your scentless geranium a new home, ensure they are spaced approximately 12-24 inches (30-61 cm) apart. This provides ample room for them to thrive and enhance your garden's beauty.
What is the Best Soil Mix for Scentless Geranium Transplanting?
Your scentless geranium will thrive in a comfortable location with well-draining soil enriched with compost. Before planting, incorporate a balanced, slow-release fertilizer to give your scentless geranium a great start!
Where Should You Relocate Your Scentless Geranium?
Select a location for your scentless geranium that receives full sun to partial sun. They adore sunlight but appreciate some afternoon shade, especially when the sun is very intense. This will ensure they continue to bloom beautifully!
What Equipments Should You Prepare Before Transplantation Scentless Geranium?
Gardening Gloves
To safeguard your hands while handling soil and plants.
Trowel
For digging and moving the scentless geranium during the transplanting process.
Watering Can
To hydrate the scentless geranium once it has been transplanted.
Spade or Shovel
To excavate the scentless geranium from its original spot if it's in the ground and to prepare the new planting hole.
Gardening Fork
To loosen the soil around the plant's root system and ensure a successful transplant.
Pruning Shears
To trim any damaged or excessive growth prior to transplanting.
Wheelbarrow or Garden Cart
For transporting the plant and soil if needed.
How Do You Remove Scentless Geranium from the Soil?
How Do You Remove Scentless Geranium from the Soil?
From Ground: Water the scentless geranium to moisten the soil, facilitating easier removal. Use a spade or shovel to dig a wide circle around the plant, being careful not to harm the root system. Pry the tool underneath to gently lift the root ball out of the ground.From Pot: Water the scentless geranium before beginning. Turn the pot on its side and gently tap or squeeze it to loosen the plant. Hold the base of the plant and carefully slide it out of the pot, supporting the root ball.From Seedling Tray: Water the seedlings to dampen the soil. Use a trowel or your fingers to carefully lift each individual scentless geranium from its compartment, taking care not to damage the delicate roots.
Step-by-Step Guide for Transplanting Scentless Geranium
Preparation
Gather all necessary tools and thoroughly water the scentless geranium before starting the transplanting procedure.
Root Ball Care
Handle the root ball of the scentless geranium with care to avoid disturbing the plant's roots. Remove any dead or excessive root material using pruning shears.
Hole Digging
Dig a hole that is twice the width of the scentless geranium's root ball and of the same depth to ensure the roots have ample room to spread.
Plant Placement
Gently place the scentless geranium into the hole, making sure the top of the root ball is level with the surrounding soil.
Filling the Hole
Backfill the hole with native soil, ensuring there are no air pockets by gently firming the soil around the plant.
Watering
Thoroughly water the scentless geranium after planting to settle the soil and hydrate the roots.
How Do You Care For Scentless Geranium After Transplanting?
Stabilizing
Provide support for the scentless geranium with stakes if necessary, especially if it is top-heavy or exposed to strong winds.
Monitoring
Observe the scentless geranium daily for indications of transplant shock, which may appear as wilting or yellowing leaves.
Adjustment
Be patient as the scentless geranium adapts to its new location; it may take some time for it to flourish.
Pruning
Trim any damaged or diseased leaves to encourage new growth and maintain the plant's health.
Troubleshooting Common Issues with Scentless Geranium Transplantation.
When is the best time to transplant scentless geranium?
Aim to transplant scentless geranium when temperatures are moderate, specifically from late spring through mid-summer, to allow the plant to establish itself.
How far apart should scentless geranium be spaced when transplanting?
Ideally, space scentless geranium 12 – 24 inches (30 – 60 cm) apart. This provides them with sufficient room to grow without competing for resources.
What soil conditions favor scentless geranium after transplanting?
Well-draining soil with abundant organic matter is optimal for scentless geranium post-transplant. Avoid excessively wet or dense soils.
How deep should I plant scentless geranium during transplantation?
Transplant scentless geranium at the same depth it was growing in its previous container to prevent root suffocation or exposure.
Why are my transplanted scentless geranium wilting?
Wilting after transplanting can indicate shock or insufficient water. Ensure adequate watering and consider providing shade if temperatures are high.
How do I water scentless geranium after transplanting?
Water scentless geranium deeply immediately after transplanting to settle the soil around the roots, then maintain consistent moisture without overwatering.
What should I do if scentless geranium shows leaf yellowing after transplant?
Leaf yellowing might signal a nutrient deficiency or overwatering. Adjust your watering schedule and consider a balanced fertilizer.
How can I minimize transplant shock in scentless geranium?
Reduce transplant shock by keeping the roots moist during the process, transplanting on a cloudy day or at dusk, and watering thoroughly afterward.
Can I use mulch after transplanting scentless geranium?
Yes, mulching helps retain soil moisture, regulate temperature, and suppress weeds, which is beneficial for scentless geranium after transplanting.
Should I fertilize scentless geranium right after transplanting?
Wait a few weeks after transplanting scentless geranium before fertilizing to allow the roots to establish in their new location.


