How to Transplant Sleeping combseed?
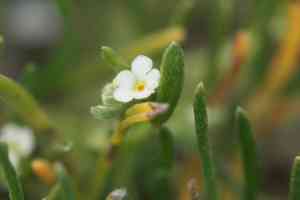
Relocate dormant combseed optimally from early to late spring since it flourishes in moderate warmth. Provide a bright spot with soil that drains effectively to encourage robust development. Gentle handling and limited disruption will contribute to successful re-establishment.
What Preparations are Needed Before Transplanting Sleeping Combseed?
What is the Ideal Time for Transplanting Sleeping Combseed?
Move sleeping combseed during the lively period from early to late spring for peak development. This timing ensures the ground is unfrozen and rich in nutrients, offering an ideal setting for root establishment. Early spring provides extended daylight and mild temperatures, promoting strong growth and minimizing transplant stress.
How Much Space Should You Leave Between Sleeping Combseed Plants?
For optimal growth, position your sleeping combseed plants approximately 6-12 inches (15-30 cm) apart. This spacing allows them ample room to expand and flourish without becoming overcrowded.
What is the Best Soil Mix for Sleeping Combseed Transplanting?
Utilize well-draining soil blended with organic compost for thriving sleeping combseed plants. A balanced base fertilizer, such as a 10-10-10 NPK, yields excellent results. This supplies them with the vital nutrients they require.
Where Should You Relocate Your Sleeping Combseed?
Select a sunny location for your sleeping combseed plants. They flourish in full sunlight, requiring at least 6 hours of direct sun daily. Bright spots ensure they develop vigorously.
What Equipments Should You Prepare Before Transplantation Sleeping Combseed?
Gardening Gloves
To safeguard your hands while handling soil and plants.
Trowel
To assist in digging around the plant and lifting it from its initial spot.
Shovel or Spade
For excavating a trench around the plant when it's in the ground and for digging the new planting hole.
Watering Can or Hose
For hydrating the plant before and after relocation.
Tarpaulin or Bucket
To move the plant if necessary.
Pruners or Scissors
To trim any damaged roots or foliage.
How Do You Remove Sleeping Combseed from the Soil?
How Do You Remove Sleeping Combseed from the Soil?
From Ground: First, hydrate the sleeping combseed plant to moisten the soil. Then, excavate a wide trench around the plant using a shovel or spade, ensuring the plant's root ball stays intact. Carefully work the spade beneath the root ball to lift the plant from its original position.From Pot: Water the sleeping combseed plant in its container before removal. Gently tilt the pot sideways and tap the bottom, loosening the root ball from the pot. If needed, use a trowel to help ease the plant out. Hold the plant at its base and carefully lift it from the pot.From Seedling Tray: Water the seedlings and use a small trowel or your fingers to gently loosen the soil around the roots. Carefully lift each seedling from the tray, supporting the stem to prevent damage.
Step-by-Step Guide for Transplanting Sleeping Combseed
Prepare the New Site
Choose a spot with adequate sunlight and room for your sleeping combseed plant to reach its mature size. Prepare the soil by loosening it and clearing any debris.
Dig a Planting Hole
Excavate a hole that is twice as wide and as deep as the root ball of your sleeping combseed plant. This provides space for the roots to spread comfortably.
Place the Plant
Carefully position your sleeping combseed plant in the new hole, ensuring it sits at the same depth as it was in its initial location. Fill the hole halfway with soil and gently press down to remove air pockets.
Water Thoroughly
After placing the plant, thoroughly water the hole to help settle the soil around the roots. Then, fill the remainder of the hole with soil and water again.
Add Mulch
Apply a layer of mulch around the base of the transplanted plant, being careful not to crowd the stem, to help retain moisture and regulate soil temperature.
How Do You Care For Sleeping Combseed After Transplanting?
Watering
Keep the soil around the sleeping combseed consistently damp, but not waterlogged, for the initial weeks post-transplant to aid in establishing strong roots.
Monitoring
Regularly inspect the sleeping combseed for indications of transplant shock, such as wilting or yellowing leaves, and promptly address any issues by adjusting watering or checking for pests.
Pruning
If necessary, trim any damaged or excessively long roots during the transplant to encourage new growth and easier establishment.
Mulching
Maintain a good layer of mulch around the plant to help conserve soil moisture and shield the roots from temperature fluctuations.
Troubleshooting Common Issues with Sleeping Combseed Transplantation.
When is the best time to transplant sleeping combseed?
Relocate sleeping combseed from early spring to late spring for optimal growth and establishment.
What spacing should I follow when transplanting sleeping combseed?
Space sleeping combseed plants 6-12 inches (15-30 cm) apart to ensure proper growth and airflow.
How deep should I plant sleeping combseed seedlings?
Plant sleeping combseed seedlings at the same depth as they were in their original containers.
Why are my transplanted sleeping combseed wilting?
Wilting could be due to transplant shock; ensure adequate water and shade until acclimated.
How can I prevent root damage when transplanting sleeping combseed?
Handle sleeping combseed seedlings gently, avoiding tugging on roots; use tools if necessary to lift them out.
How do I improve soil quality before transplanting sleeping combseed?
Amend the soil with compost to enhance drainage and nutrient content before transplanting sleeping combseed.
Should I water sleeping combseed immediately after transplanting?
Yes, water sleeping combseed thoroughly right after transplanting to help the roots establish in the new location.
What should I do if my transplanted sleeping combseed show yellow leaves?
Yellow leaves may indicate overwatering or nutrient deficiency; adjust water and check soil nutrients.
Can I transplant sleeping combseed on a hot day?
Avoid transplanting sleeping combseed during the hottest part of the day; early morning or late afternoon is best.
How can I protect transplanted sleeping combseed from pests?
Use mulch and natural pest deterrents to protect sleeping combseed after transplanting to prevent pest infestations.



